If you are not redirected, click here.
Examples
All examples included in our library can be found here: Examples for Inkplate After you download inkplate Arduino library you will have all examples inside Arduino IDE. There are comments in all examples that describe how it works and what hardware you need.
Note: There is not every example for every Inkplate, but most of them exist on each Inkplate board. For example, for Inkplate2 there are no examples that use an SD card because Inkplate 2 does not have an SD card slot. Examples that are for specific Inkplate boards, in the text below it contain a version of Inkplate for which is intended. Examples that don’t have versions of Inkplate in the name are examples for each Inkplate board.
Basic
Inkplate2_Black_White_Red
This example shows basic Inkplate functionalities in black, white, and red colors (writing text, drawing shapes and images, …).
Inkplate2_Text_With_Shadow
This example will show you how you can draw some simple graphics using Adafruit GFX functions. It will draw red text with black shadow.
Inkplate_Black_And_White
This example shows basic Inkplate functionalities in black and white mode (writing text, drawing shapes and images, …).
Inkplate_Grayscale
This example shows basic Inkplate functionalities in gray mode (writing text, drawing shapes and images).
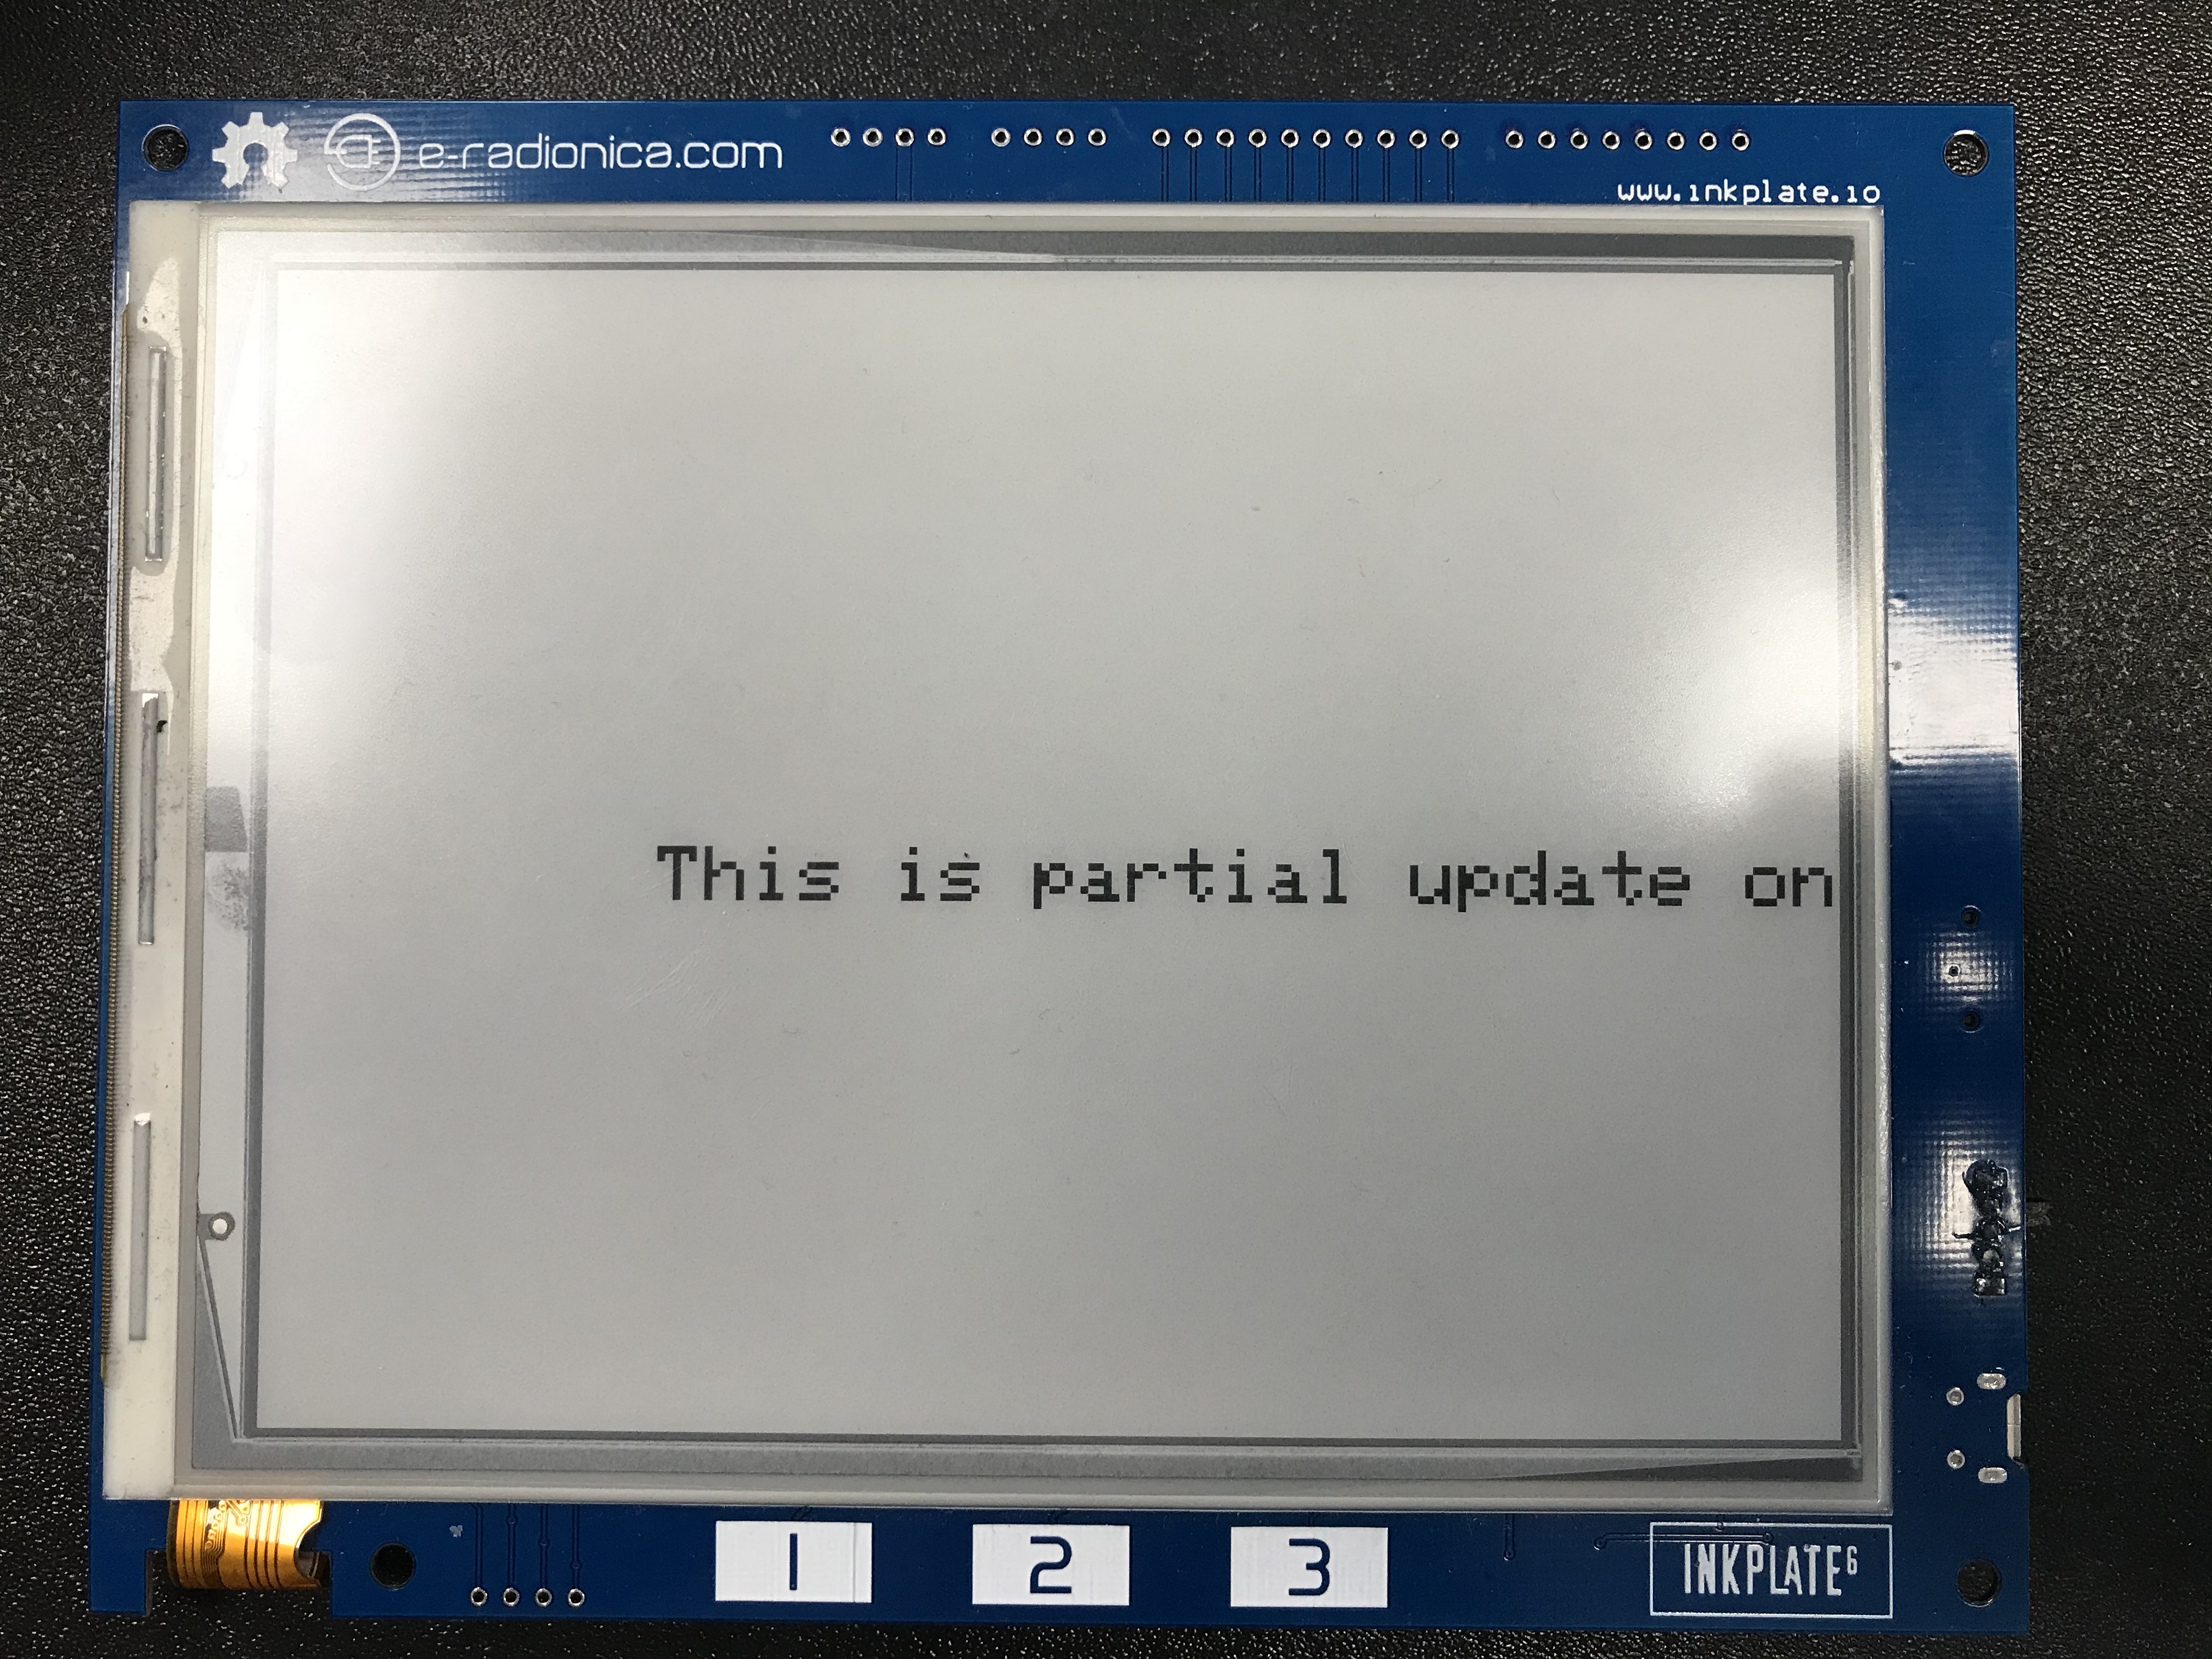
Inkplate_Partial_Update
This example shows how to properly use partial update on Inkplate.
Inkplate6PLUS_Simple_Frontlight
This example will show you how to use Inkplate 6Plus frontlight.
Inkplate6PLUS_Touch_In_Area
This example shows you how to use Inkplate 6Plus touchscreen. Once the code is uploaded, try to touch the rectangle on the screen :)
Inkplate6PLUS_Touch_Registers
This example shows you how to use Inkplate 6Plus touchscreen. Once the code is uploaded, open the serial monitor in Arduino IDE and you’ll see touchscreen events there.
Inkplate6PLUS_Touchscreen_Draw
This example shows you how to use Inkplate 6PLUS touchscreen. Once the code is uploaded, try drawing on the screen :)
Inkplate6PLUS_Touchscreen_Serial
This example shows you how to use Inkplate 6Plus touchscreen. Once the code is uploaded, open the serial monitor in Arduino IDE and you’ll see touchscreen events there.
Inkplate6COLOR_Full_Screen_Colors
Simple Inkplate 6COLOR example showing all colors of the Inkplate.
Inkplate6COLOR_Simple
Simple Inkplate example showing drawing functionalities of the Inkplate 6COLOR library.
Advanced
Communications
Inkplate_Bluetooth_Peripheral_Mode
This example shows how to use Inkplate as a peripheral device over Bluetooth.Note: for this to work you need to use ESP32 Wroover Board definition, as ours currently has a bug :(
Inkplate_Bluetooth_Serial
This example shows how to use Bluetooth on Inkplate devices. Upload this example to the Inkplate and connect your phone to it via Bluetooth. On the screen (or Serial monitor on Inkplates with slow refresh rate), you will see what the phone sends while in the app you will see what the Inkplate sends over the Serial Monitor.
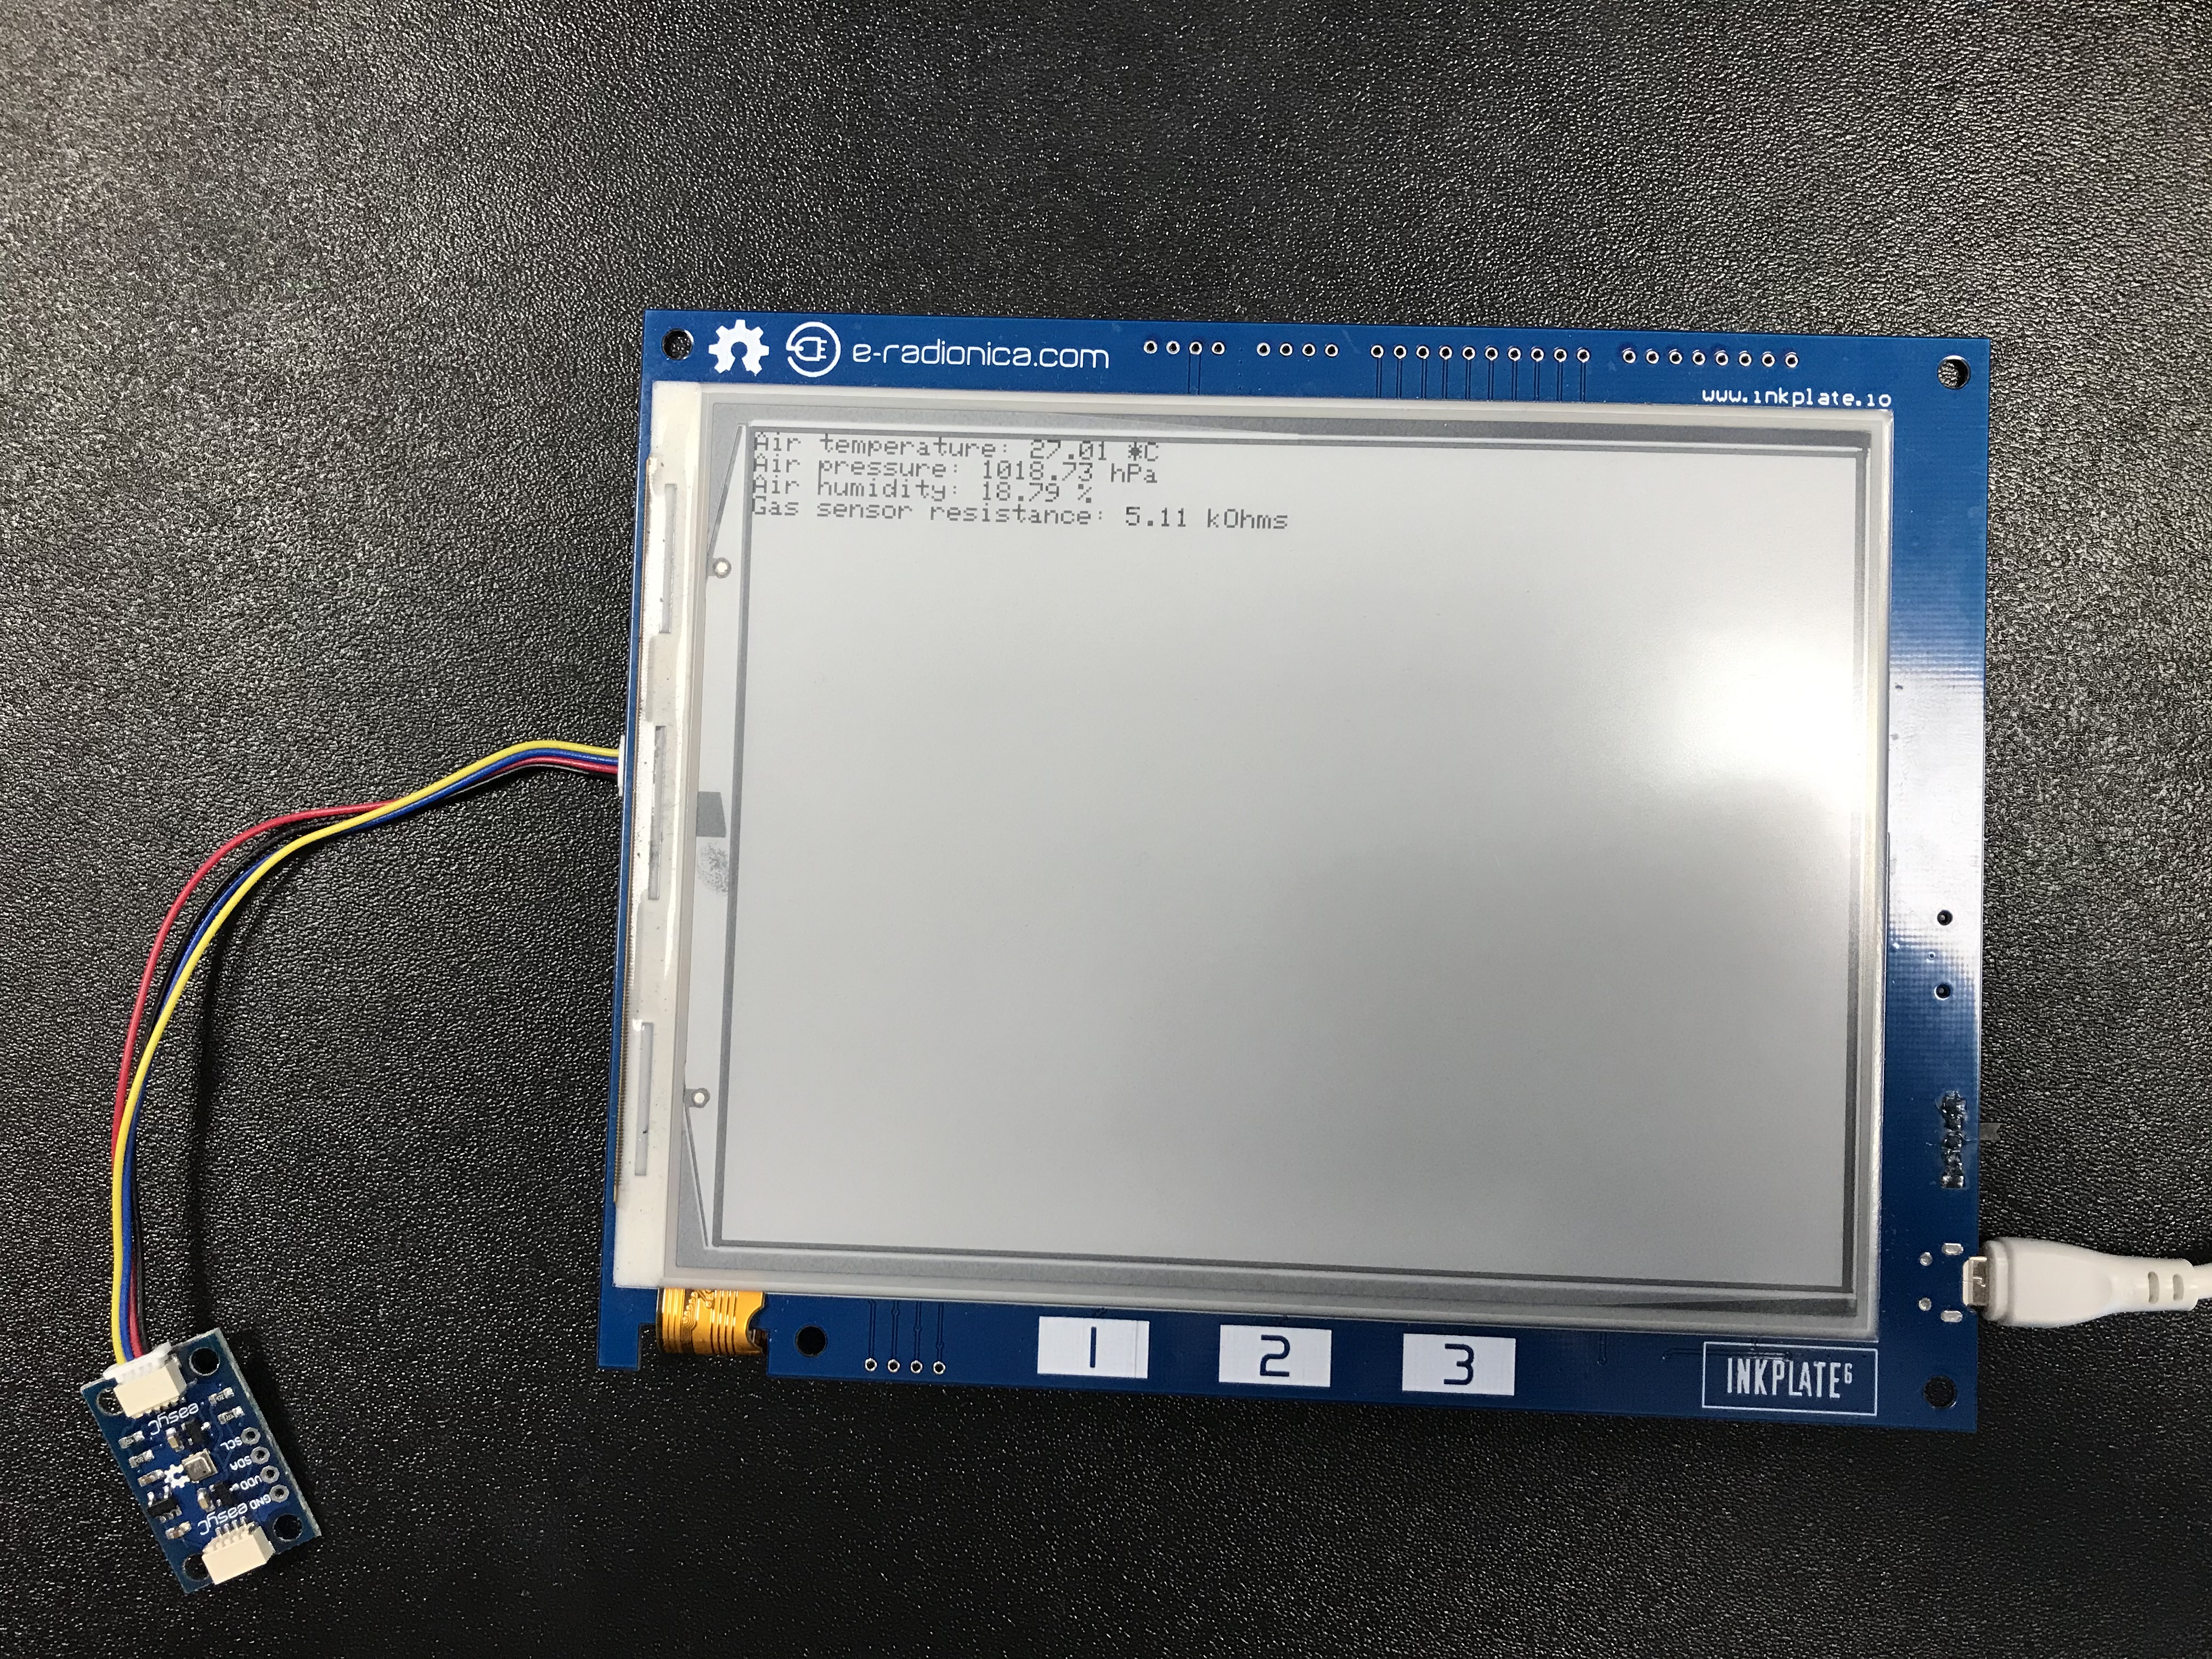
Inkplate_EasyC
For this example you will need a micro USB cable, Inkplate, BME680 sensor with easyC connector on it. This example will show you how you can read temperature, humidity, and air pressure data from BME680.
Inkplate_Second_SPI
This example will show you how you can read a tag ID and print it on the Inkplate screen.
DeepSleep
Inkplate_Partial_Update_With_Deep_Sleep
In this example we will show how to use partial update of epaper screen with deep sleep functionality of ESP32.Note: Inkplate 2 and Inkplate 6COLOR don’t support partial updates.
Inkplate_RTC_Alarm_With_Deep_Sleep
This example will show you how to use RTC alarm interrupt with deep sleep. All Inkplates except Inkplate2 features an RTC chip with an interrupt for alarm connected to GPIO39.
Inkplate_Simple_Deep_Sleep.ino
For this example you will need a USB-C cable and Inkplate. This example will show you how you can use low power functionality of Inkplate boards. In deep sleep, whole board will consume about 25uA from battery. Inkplate will wake every 20 seconds change content on screen.
Inkplate_Wake_Up_On_Touchpads
Here is shown how to use I/O Expander and ESP interrupts to wake up the MCU from deepsleep when the touchpad is pressed.Note: Only available on Inkplates that have touchpads.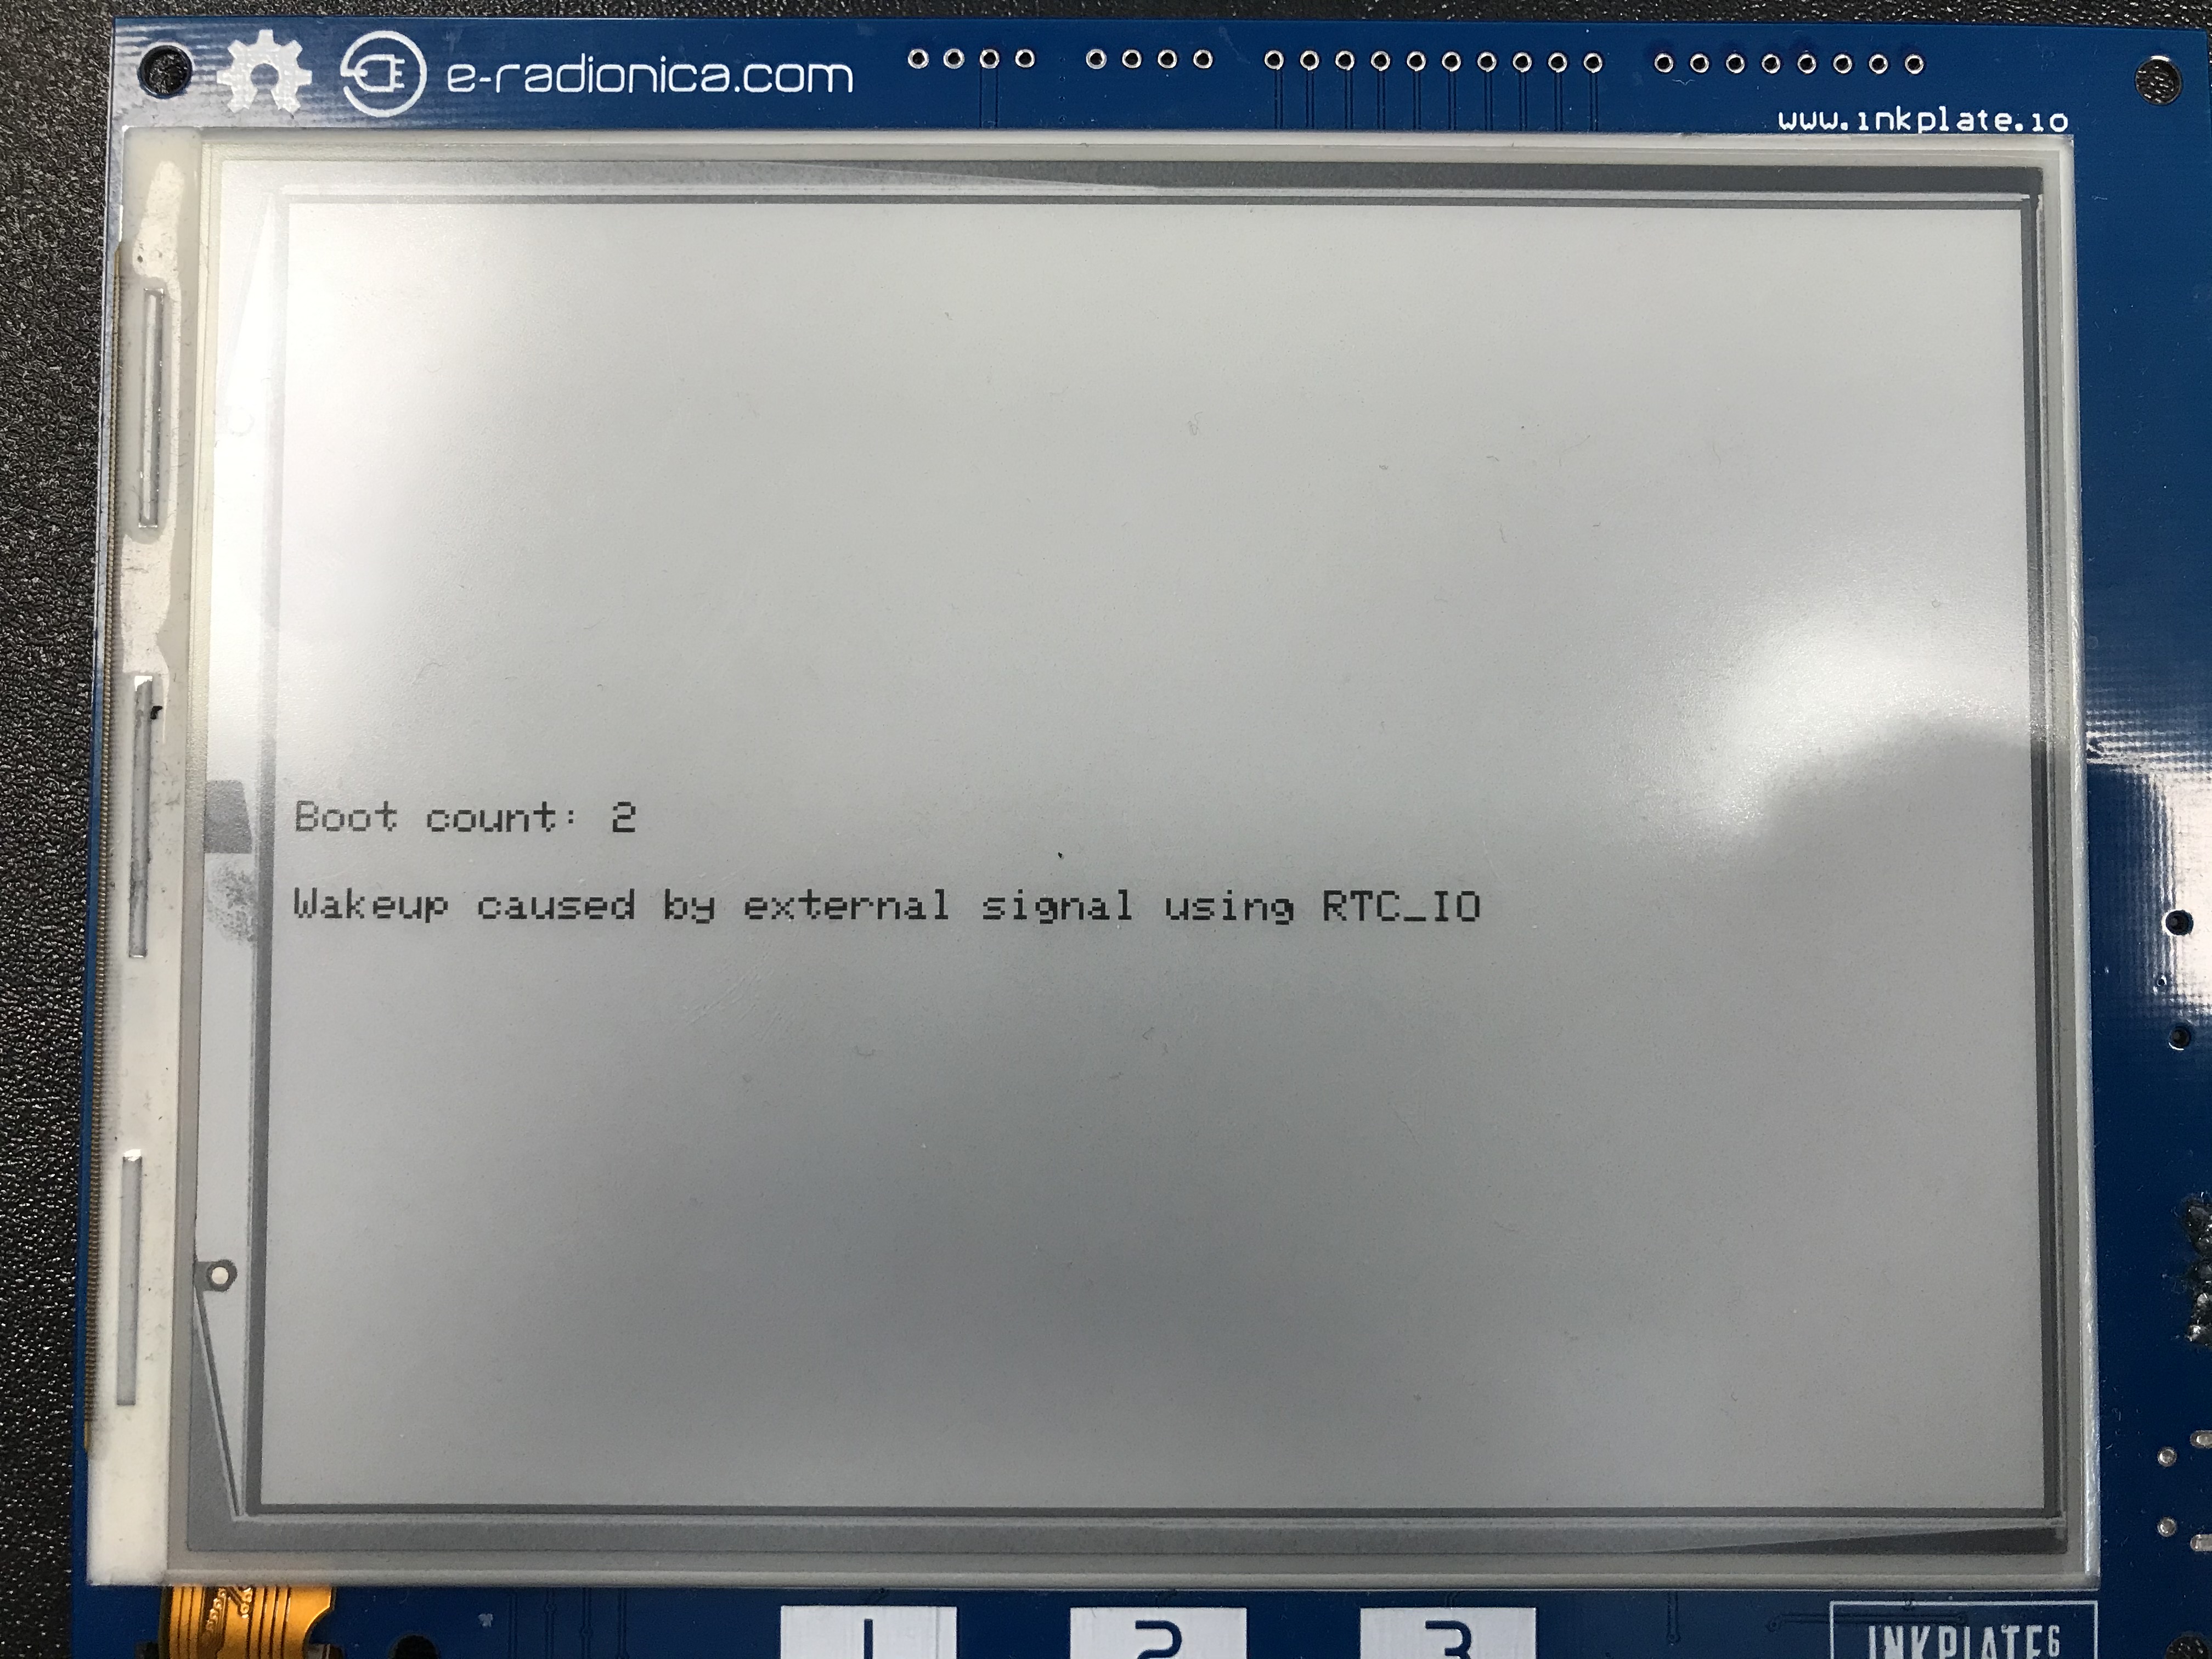
IO
Inkplate_External_IO_Expander
This example will show you how you can manipulate with I/Os of external IO Expander.Note: Only available on Inkplates that have external IO expander.
Inkplate_Internal_IO_Expander
This example will show you how you can manipulate with I/Os of internal IO Expander.Note: Only available on Inkplates that have internal IO expander.
Inkplate_Read_Touchpads
This example will show you how you can use built-in touchpads (on PCB marked with numbers 1, 2 and 3).Note: Only available on Inkplates that have touchpads.
Other
Inkplate_EEPROM_Usage
This example will show you how to use EEPROM with Inkplate board. EEPROM is a permanent memory that holds data even if the power supply is disconnected. You can use EEPROM to store any data you don’t want to lose during restarting or powering down the device. It shows how to use basic operations with EEPROM like clearing, writing, and reading.
Inkplate_Faster_Display_Refreshes
We can display and partial update our screens faster by leaving the panel power on. Just be sure to turn it off when going to deep sleep to save power.
Inkplate_Read_Battery_Voltage
This example will show you how to read voltage of the battery.Note: Not available on Inkplate2
Inkplate_Read_Temperature
This example will show you how to read temperature from on-board temperature sensor which is part of TPS65186 e-paper PMIC.Note: Only available for Inkplates that have TPS (5, 6, 6PLUS, 10).
RTC
Inkplate_RTC_Alarm
In this example we will show how to use basic alarm and clock functions of PCF85063 RTC on Inkplate board. This example will show how to set time and date, how to set alarm, how to read time and how to print time on Inkplate.
Inkplate_RTC_Interrupt_Alarm
In this example we will show how to use PCF85063A RTC Alarm functionality with interrupt. This example will show how to set time and date, how to set up a alarm, how to read time, how to print time on Inkplate.
Inkplate_RTC_Simple
Example shows how to use basic clock functions of PCF85063A RTC on Inkplate board. This example will show how to set time and date, how to read time and how to print time on Inkplate.
Inkplate_RTC_Timer
In this example we will show how to use PCF85063A RTC Timer functionality. This example will show how to set time and date, how to set up a timer, how to read time and how to print time on Inkplate.
SD
Inkplate_SD_Pictures
This example will show you how you can read .bmp and .jpeg files (pictures) from SD card and display that image on e-paper display.
Inkplate_SD_TXT_Read
This example will show you how to open .txt files and display the content of that file on Inkplate epaper display.
Inkplate_SD_TXT_Write
This example will show you how to write in .txt file.
WEB_WiFi
Inkplate_HTTPS_POST_Request
This example will show you how to connect to a WiFi network and send a POST request via HTTPS.
Inkplate_HTTP_POST_Request
This example will show you how to connect to a WiFi network and send a POST request via HTTP.
Inkplate_HTTP_Request
This example will show you how to connect to WiFi network, get data from Internet and display that data on epaper. This example is NOT on to how to parse HTML data from Internet - it will just print HTML on the screen.

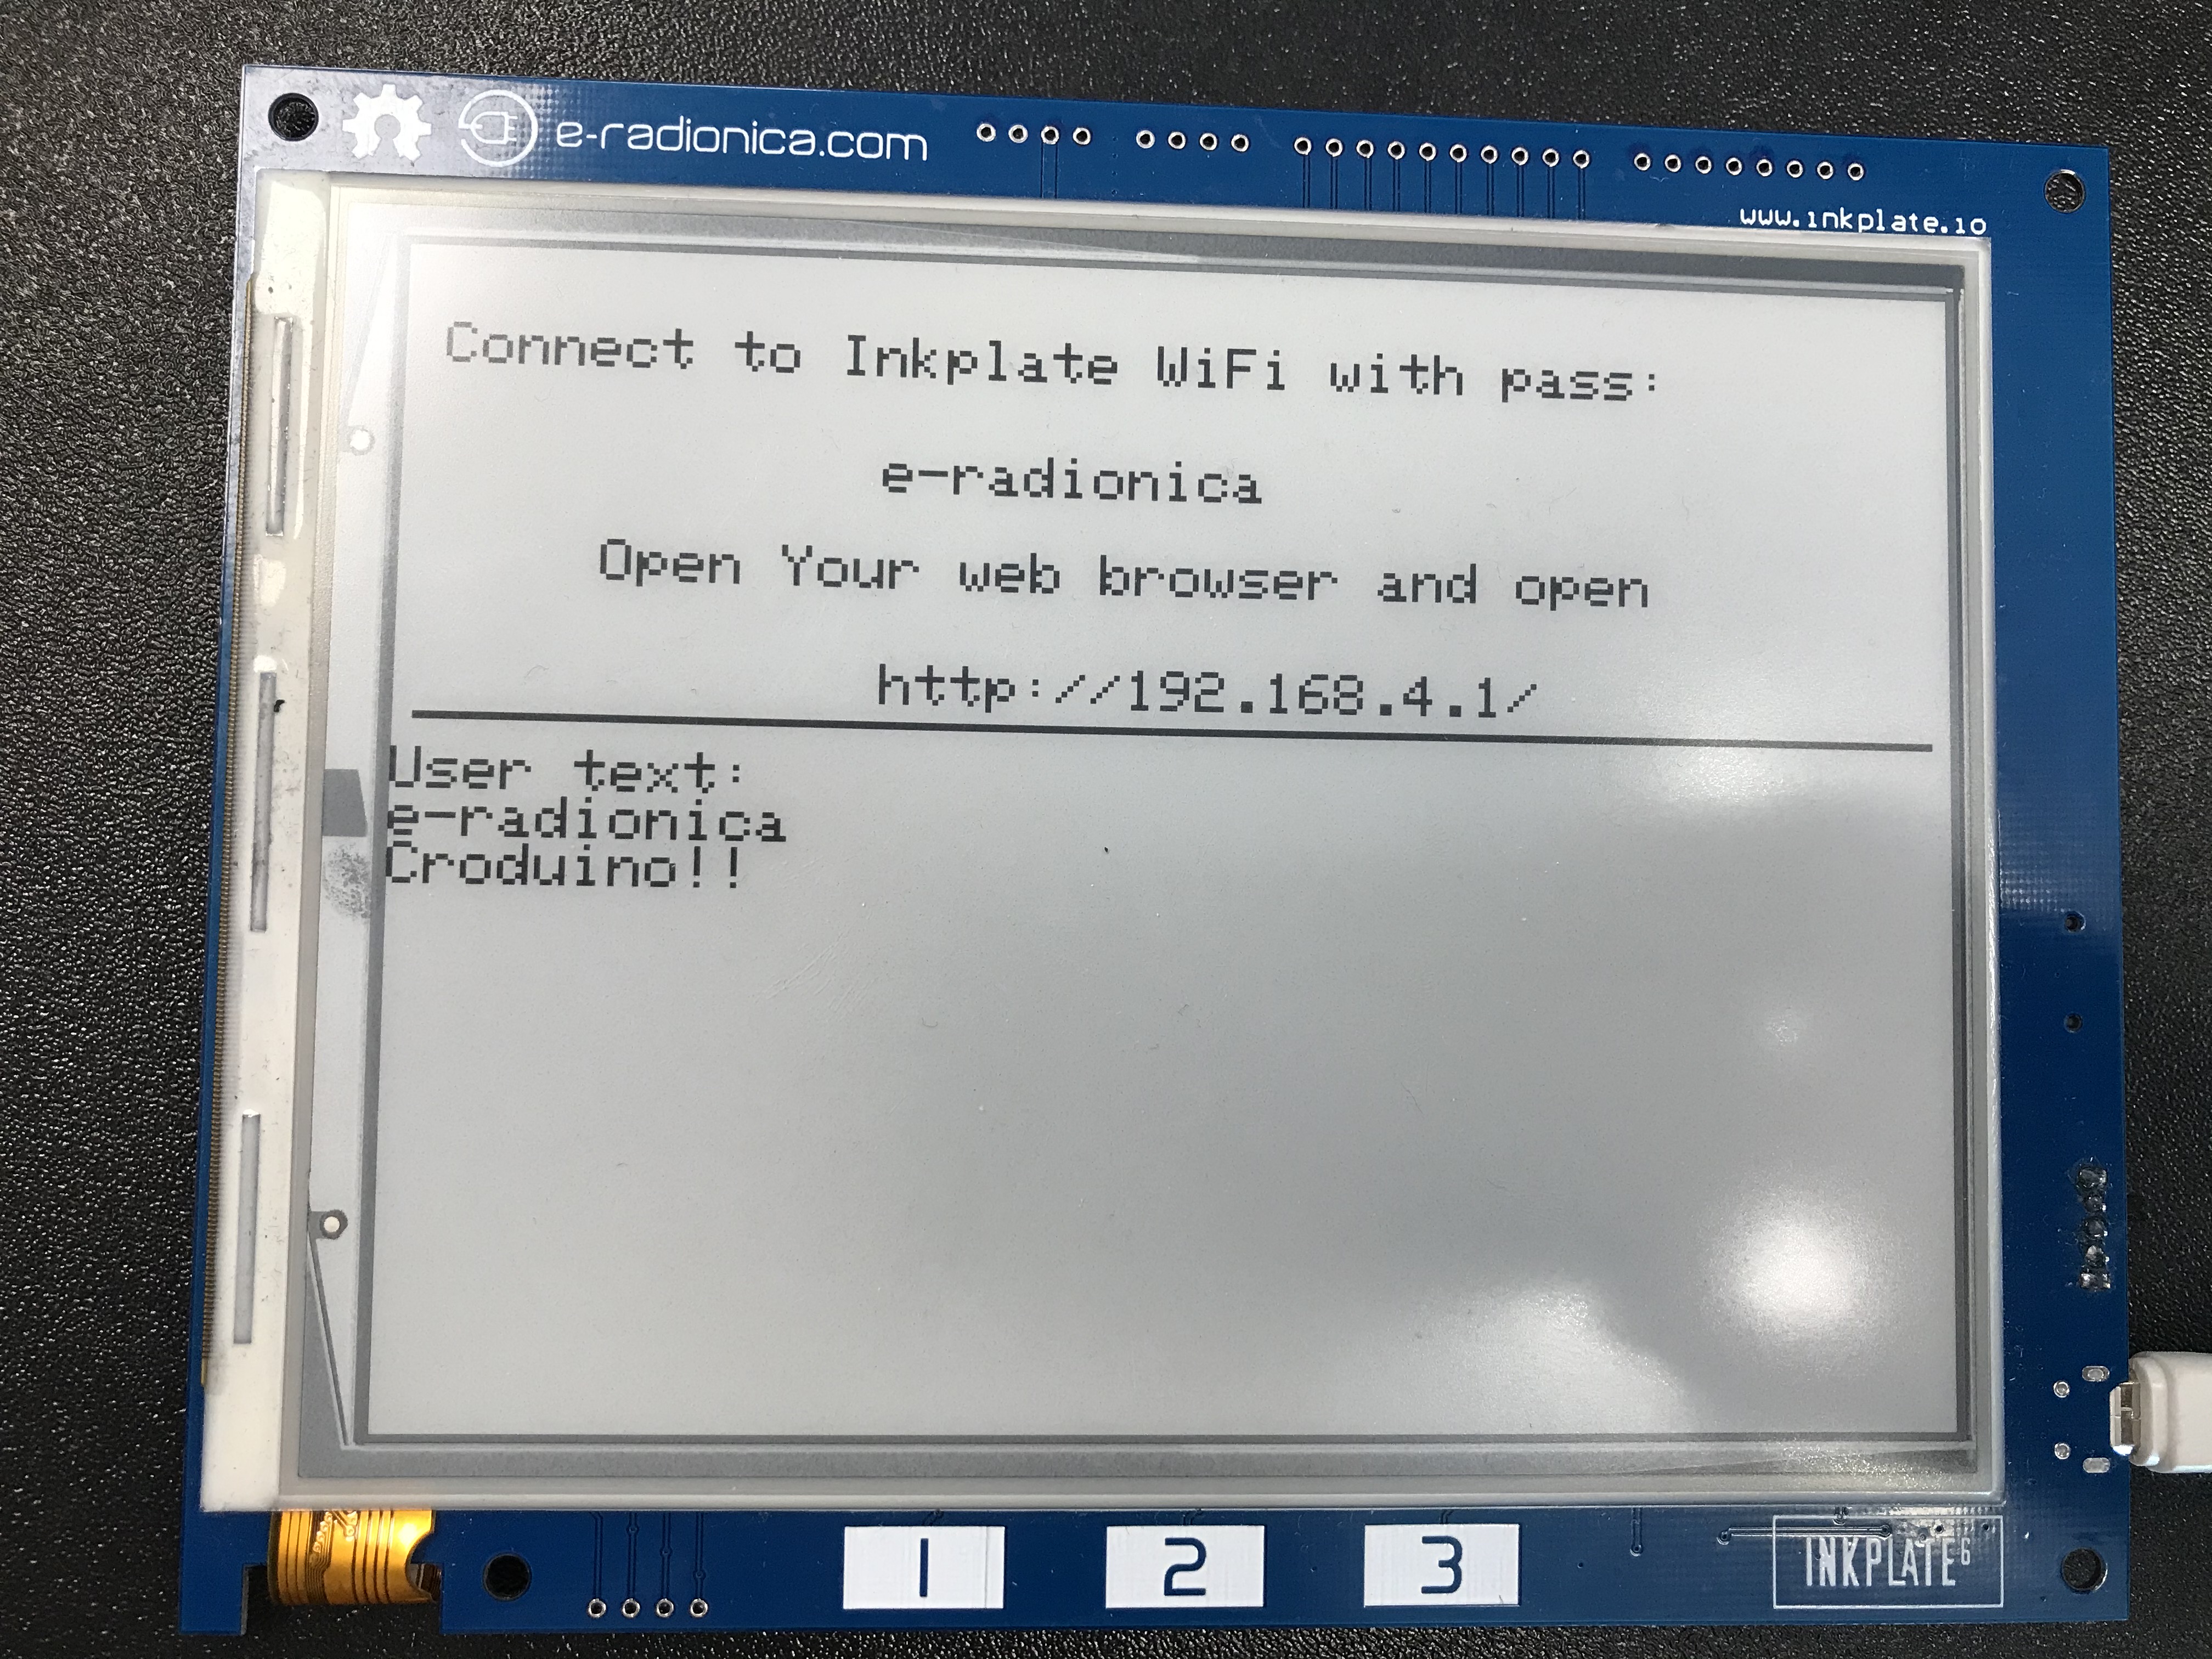
Inkplate_HTTP_Web_Server
This example will show you how you can use Inkplate as a small and simple standlone Web Server. You need to connect to Inkplate with WiFi and open IP address shown on Inkplate display. After opening IP address, you will se text box where you can type some text and after that you press “Send to display”. Text will apper on Inkplate display! This is just simple example what you can do with it and of course, you can create much more complex stuff.
Inkplate_Show_Pictures_From_Web
This example will show you how you can download a .bmp file (picture) from the web and display that image on e-paper display.

Diagnostics
Inkplate_Burn_In_Clean
This example will try to remove heavy burn-in visible on the panel.
Inkplate_Factory_Programming_VCOM
This example should not be used if you dont know what VCOM is and what exactly you are doing as it can damage panel. Some Inkplates does not support auto VCOM, it has to be set manually. The user will be prompted to enter VCOM via serial (baud 115200). VCOM ranges from 0.0 to -5.0.!WARNING! VCOM can only be set 100 times, so keep usage to a minimum.!WARNING! Use at your own risk.
Inkplate_Peripheral_Mode
Using this sketch, you don’t have to program and control e-paper using Arduino code. Instead, you can send UART command (explained in documentation that can be found inside folder of this sketch). This give you flexibility that you can use Inkplate on any platform! Because it uses UART, it’s little bit slower and it’s not recommended to send bunch of drawPixel command to draw some image. Instead, load bitmaps and pictures on SD card and load image from SD. If we missed some function, you can modify this and make yor own. Also, every Inkplate comes with this peripheral mode right from the factory.
Inkplate6COLOR_Gallery
This example will show you how you can use Inkplate 6COLOR to random images in the root sdcard folder.
Inkplate6COLOR_Mapbox_API
This example will show you how you can use Inkplate 6COLOR to display map data. This example gets html data from crowdsource campaing and displays them on Inkplate screen.
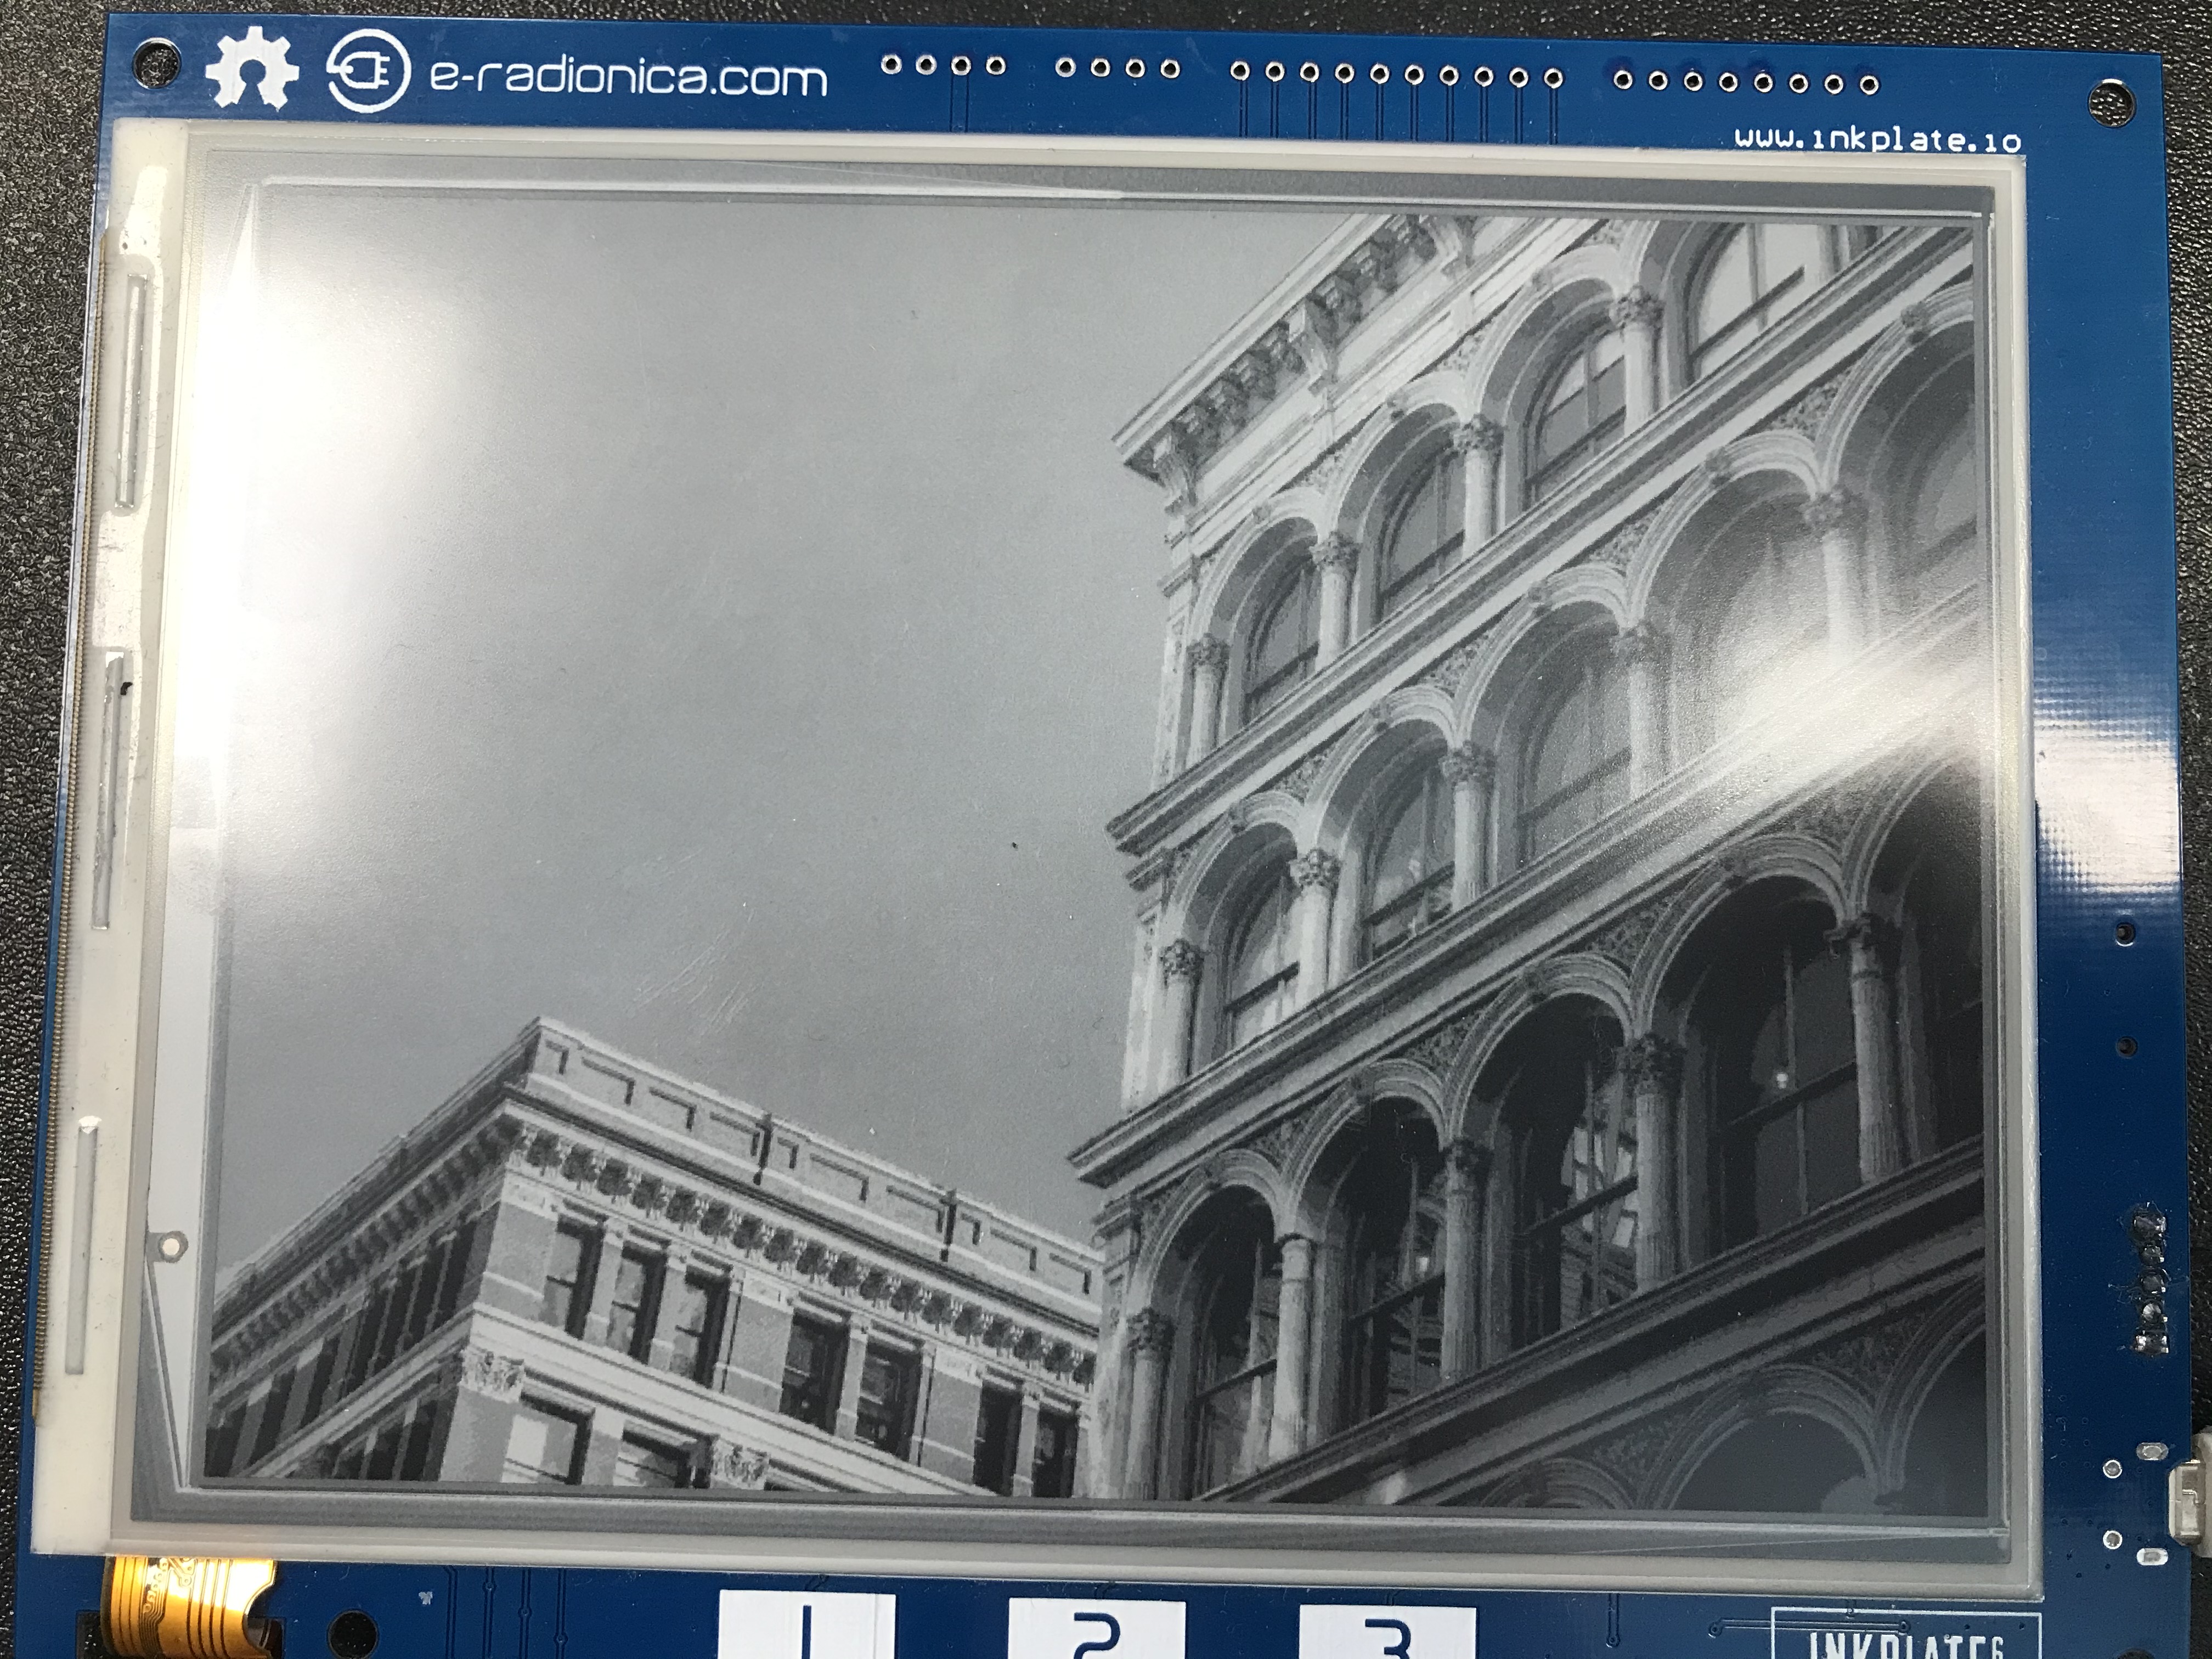
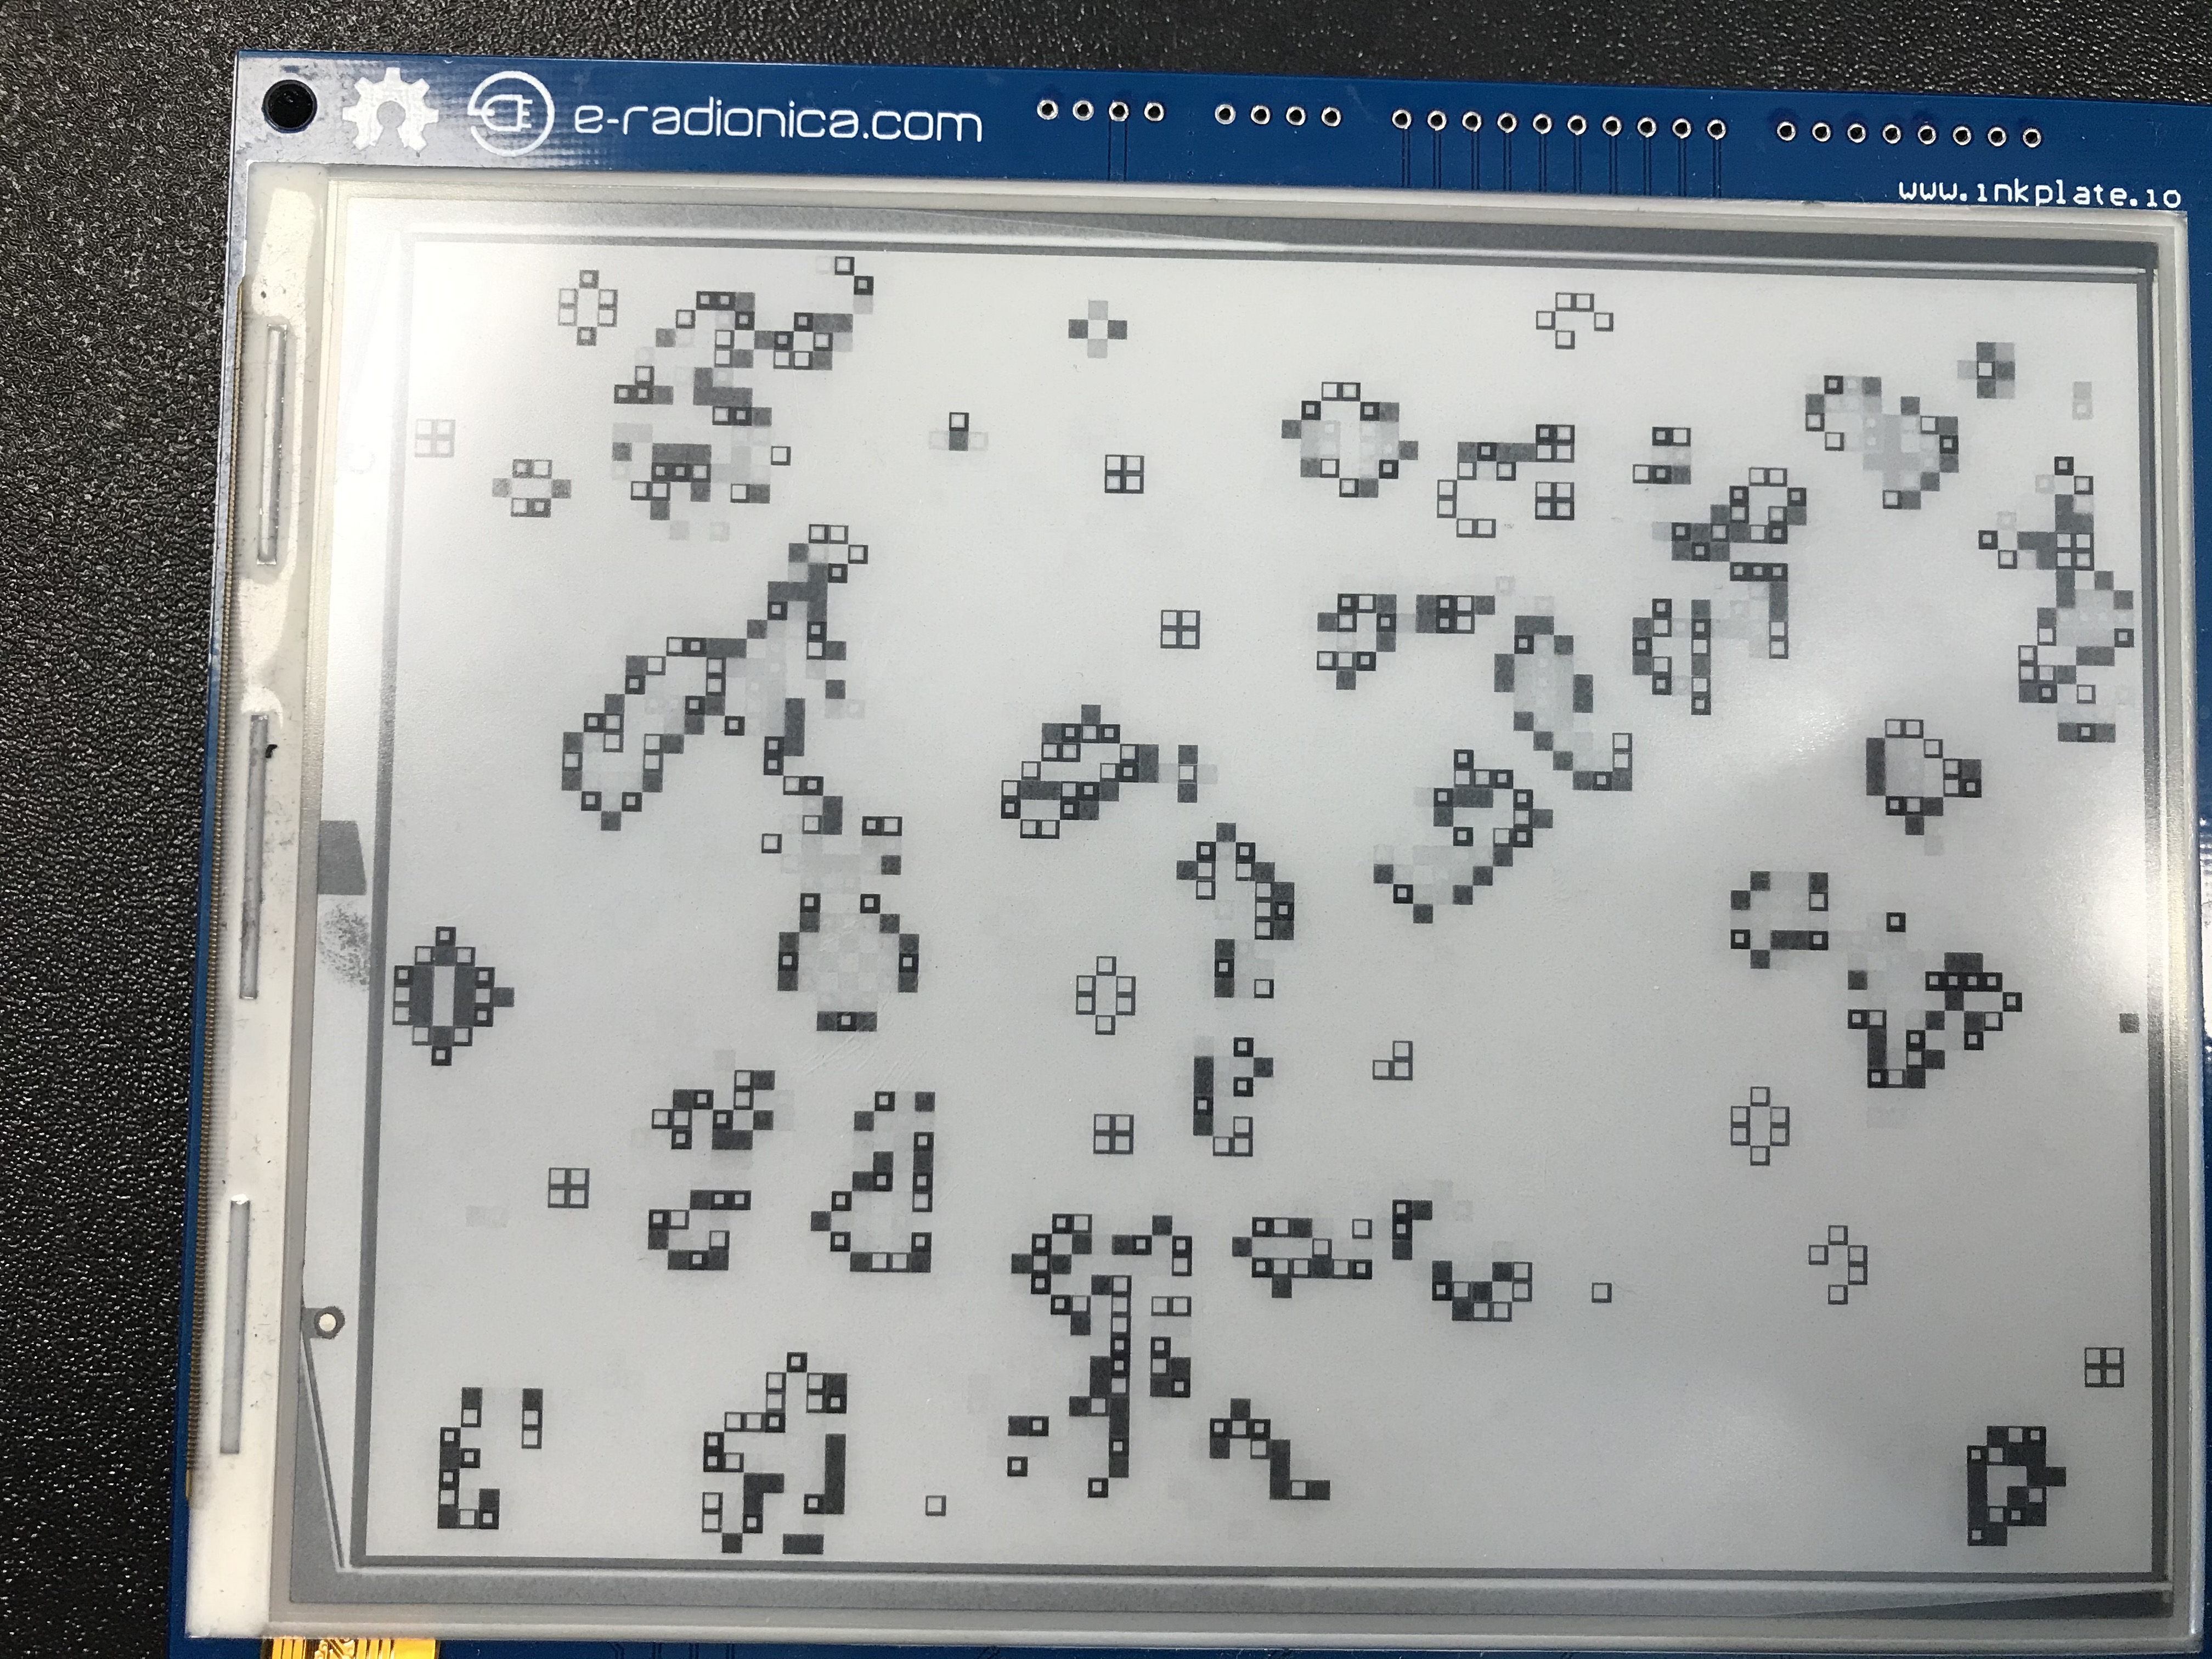
Inkplate10_Waveform_EEPROM_Programming
NOTE: This example is only available on Inkplate 10 board.
In order for the image to display correctly on Inkplate, Inkplate needs to have a proper waveform saved in the EEPROM memory. If there is no waveform data available, the message “Waveform load failed! Upload new waveform in EEPROM. Using default waveform.” on the Serial monitor will be displayed (if the Serial.begin() is called before display.begin()). If something like this happens, or you’re not satisfied with the grayscale, you can run this example and choose one of three available waveforms.
Waveforms are responsible for the grayscale image on the e-paper display. It’s just a series of frames that darken or whiten pixels in each frame in order to get desired pixel color. They depend on many parameters like temperature, previous pixel color, next pixel color, and even the type (batch) of the e-paper panel.
Upload this example code on your Inkplate 10. After upload, with touchpad 1 and touchpad 3 choose one of the available waveforms. In the next images, you can see what the correct waveform will look like on the Inkplate. After you find the waveform that best suits for your panel, press touchpad 2 to store it in the EEPROM memory of the ESP32. Calling display.begin() function, the waveform will be copied from EEPROM memory into the library. There is no need for waveform selection before every usage of the Inkplate. One waveform on one Inkplate may not be compatible with another Inkplate (as you can also see in the pictures, there are two different panels, each with its own waveform).
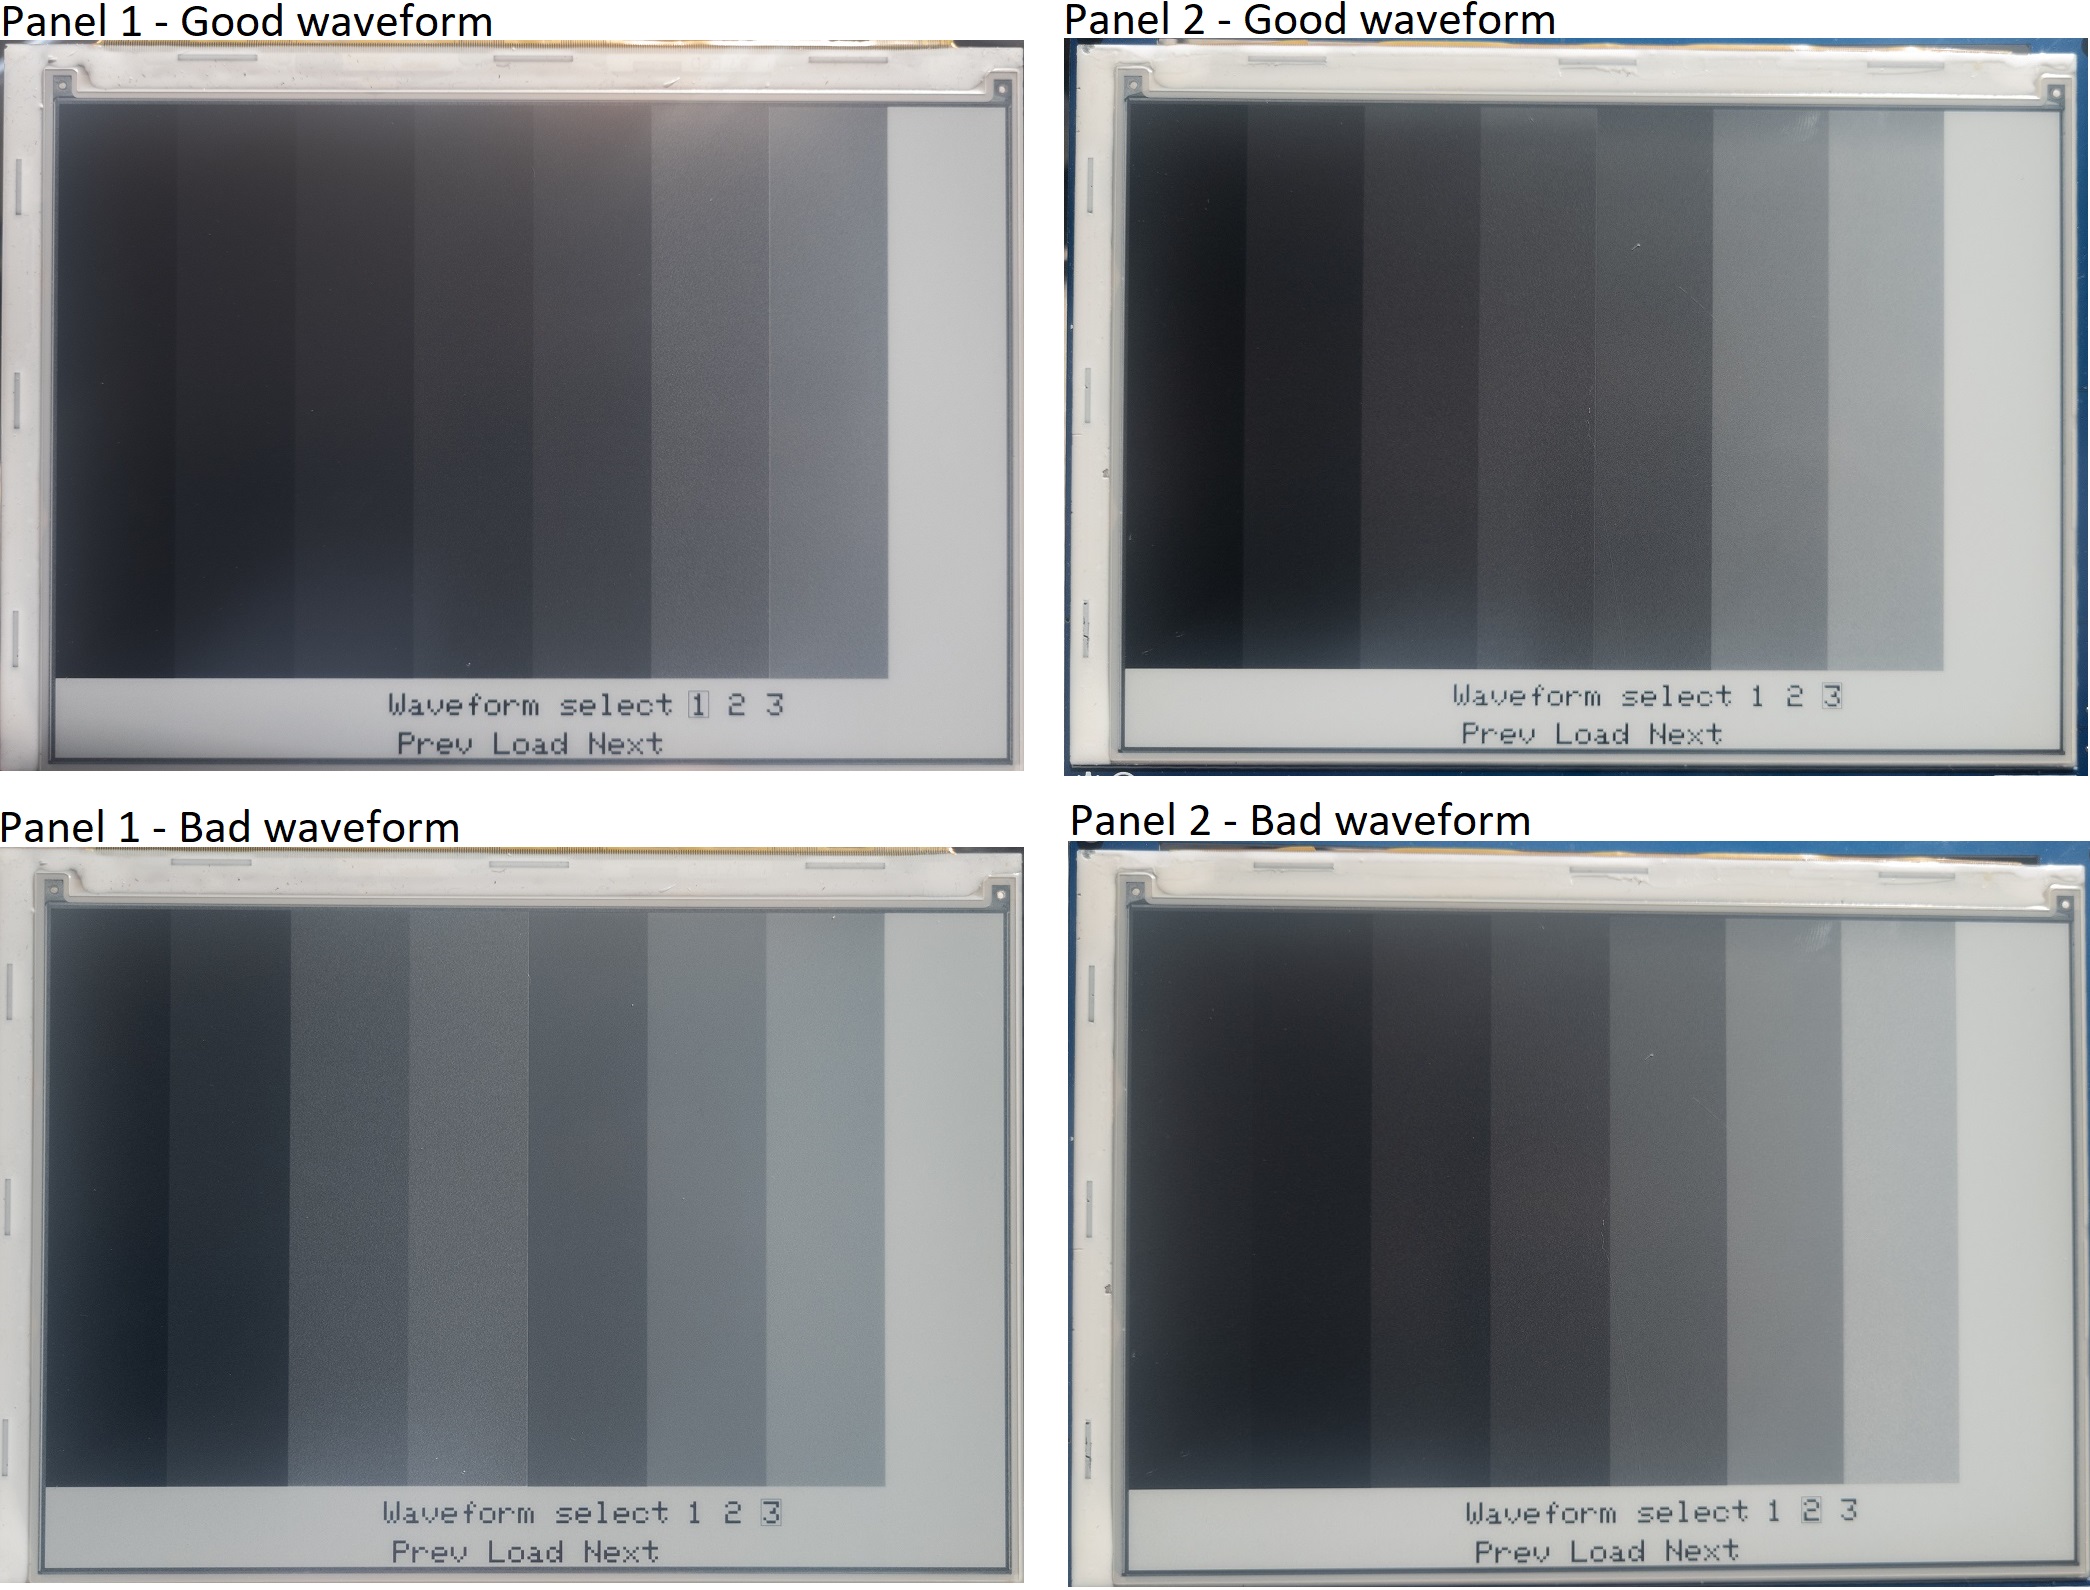
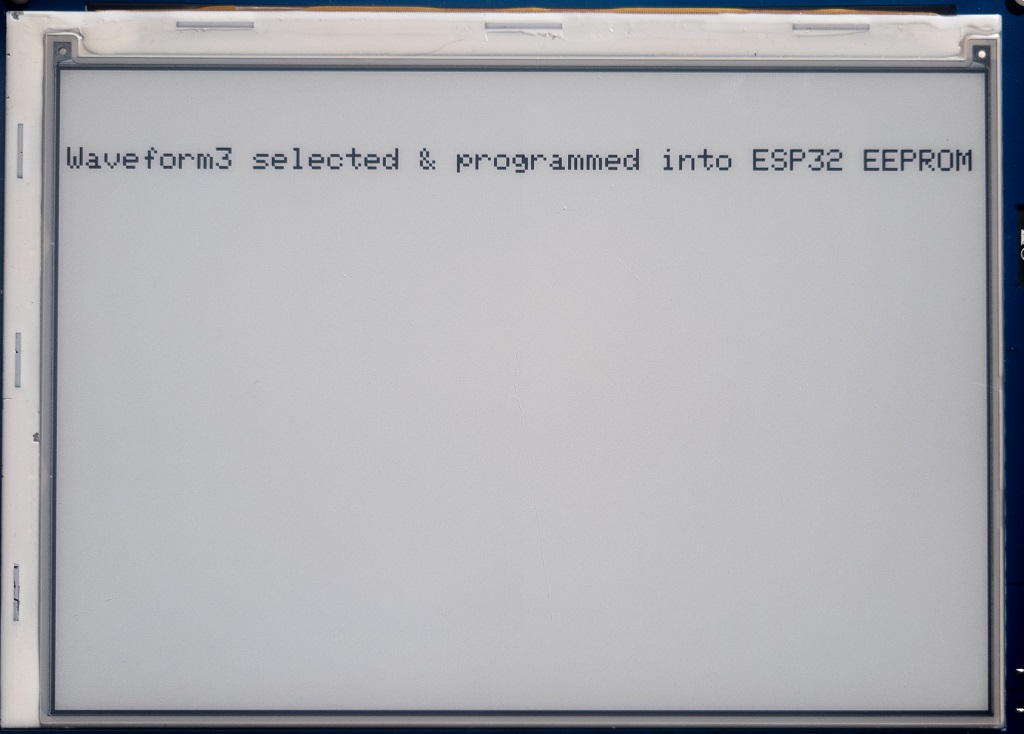
After successfully saving waveform data to EEPROM, it shows the next image.
Waveforms on the Inkplate are reverse engineered and made to best fit a large number of e-paper panels, but they are not perfect.
Projects
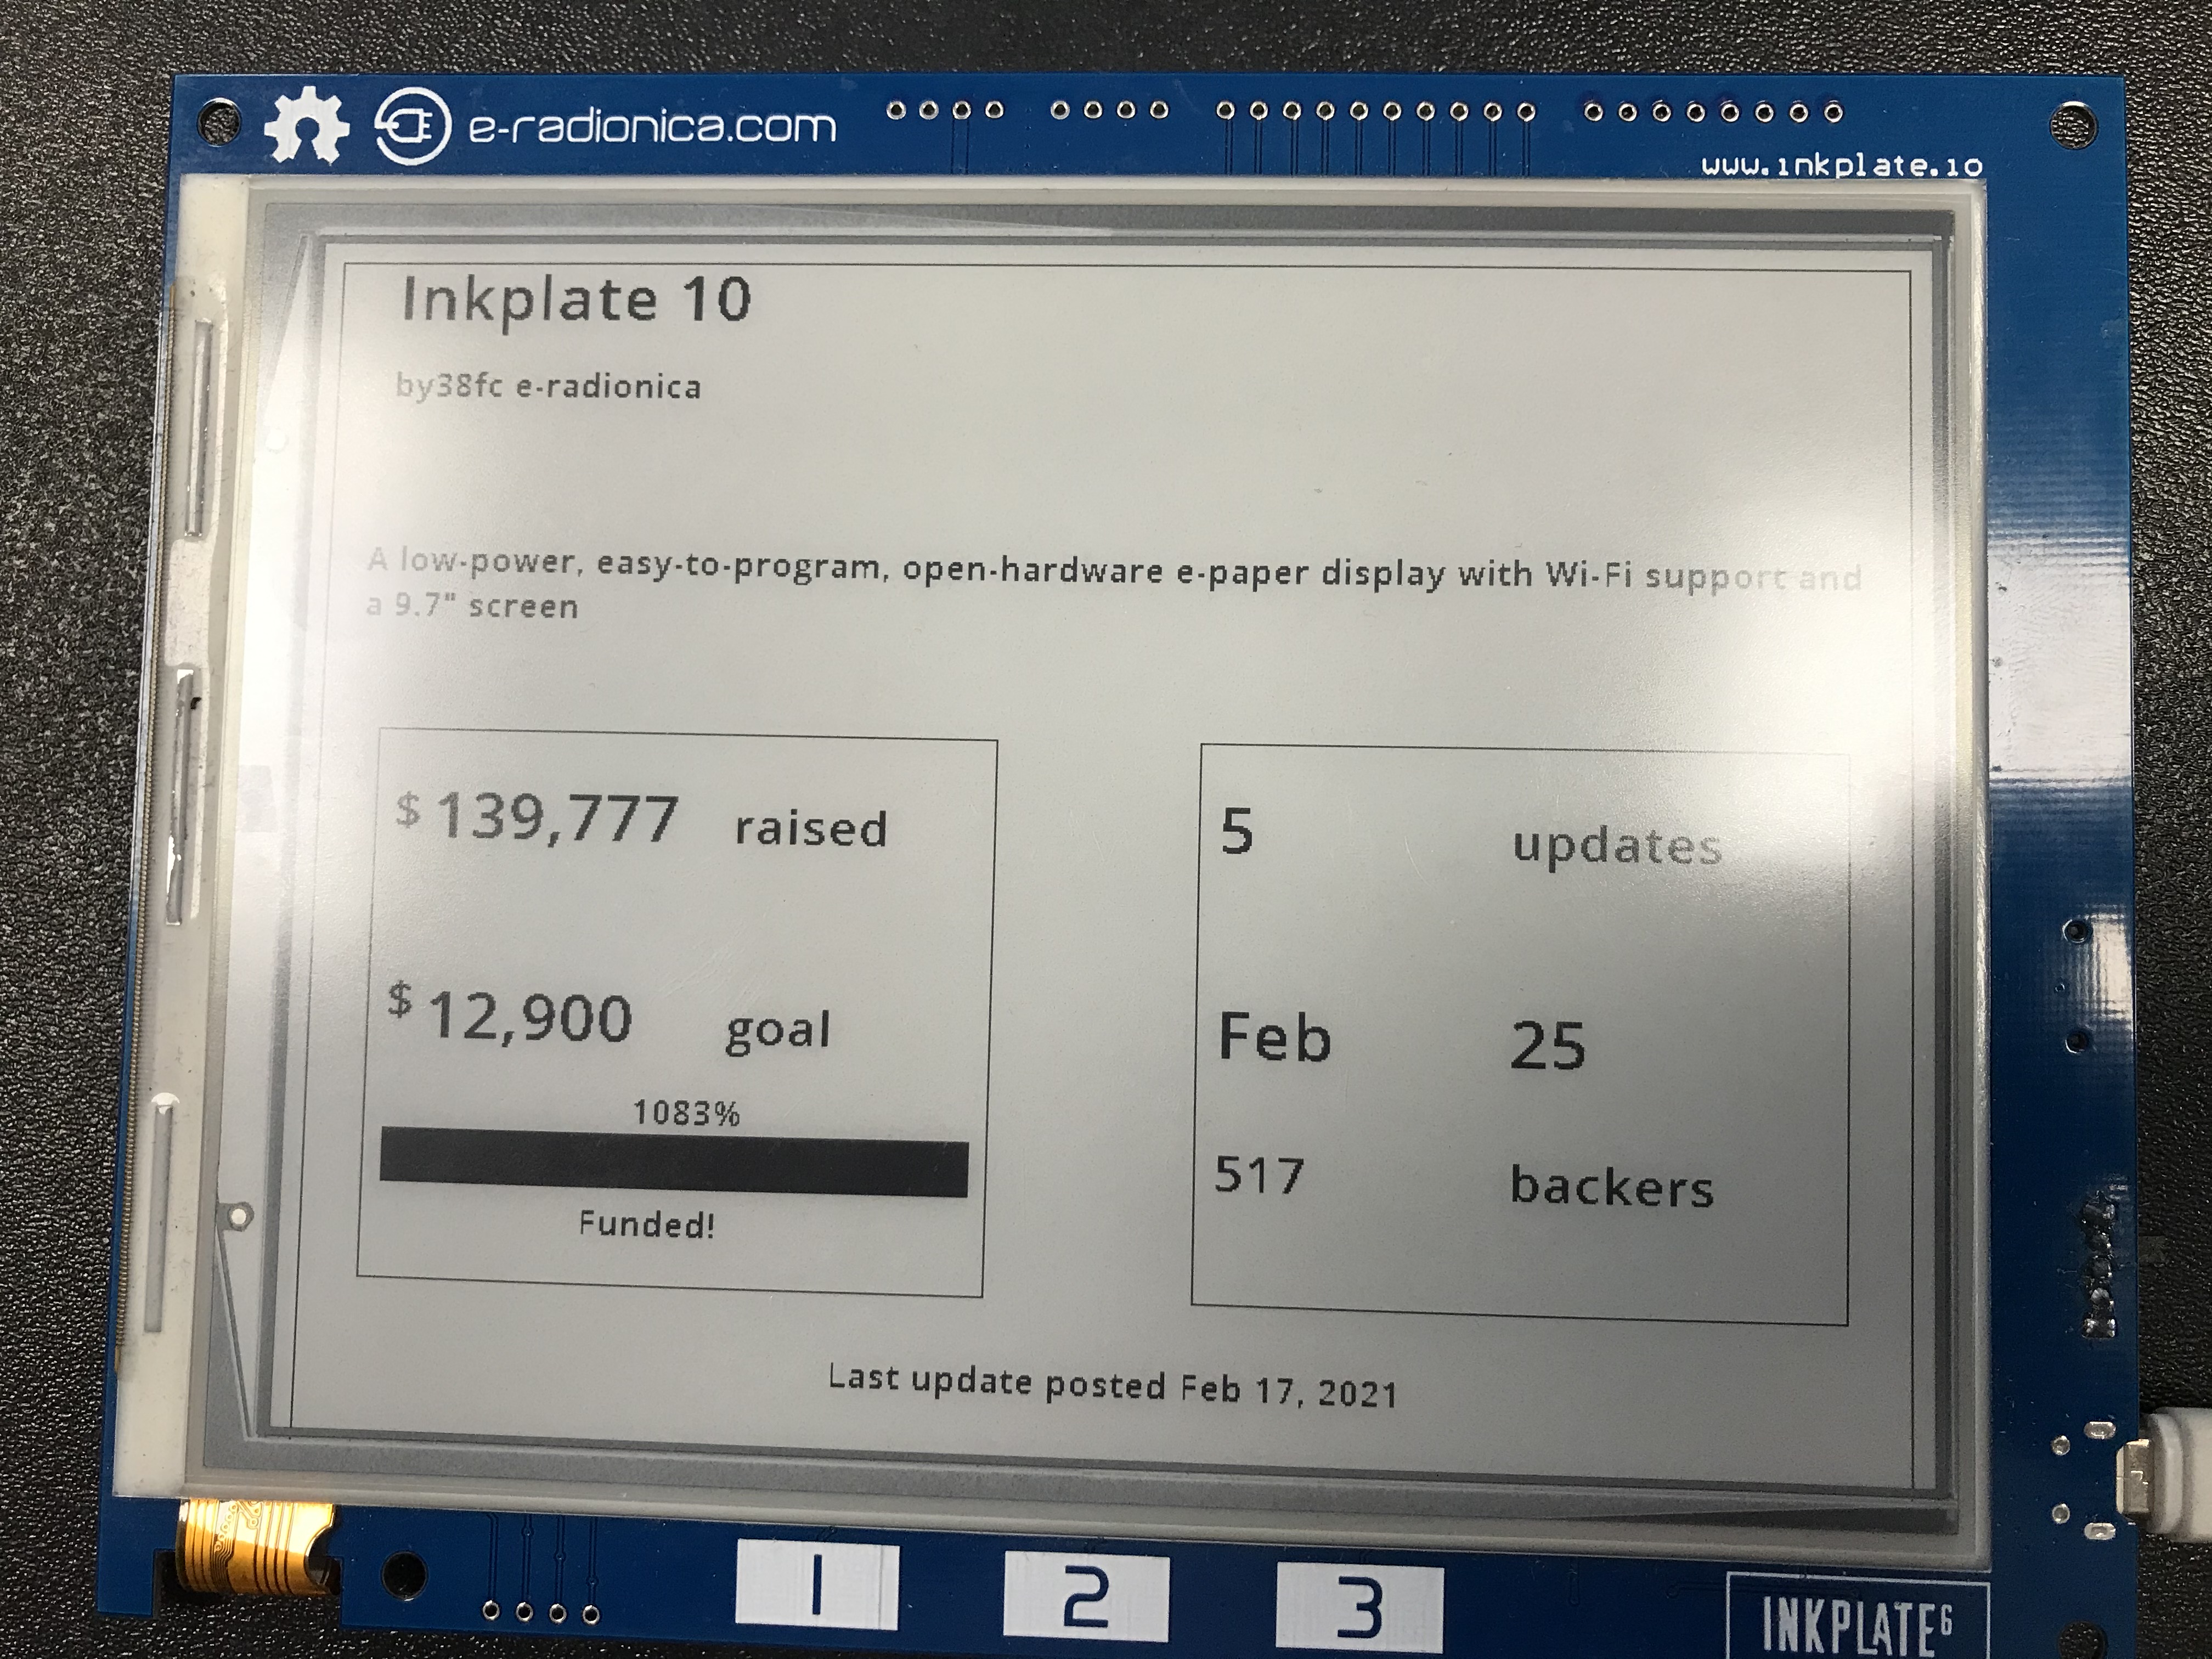
Inkplate_Crowdsupply_Campaing_Tracker
This example will show you how you can use Inkplate to display html data. This example gets html data from crowdsource campaing and displays them on Inkplate screen.
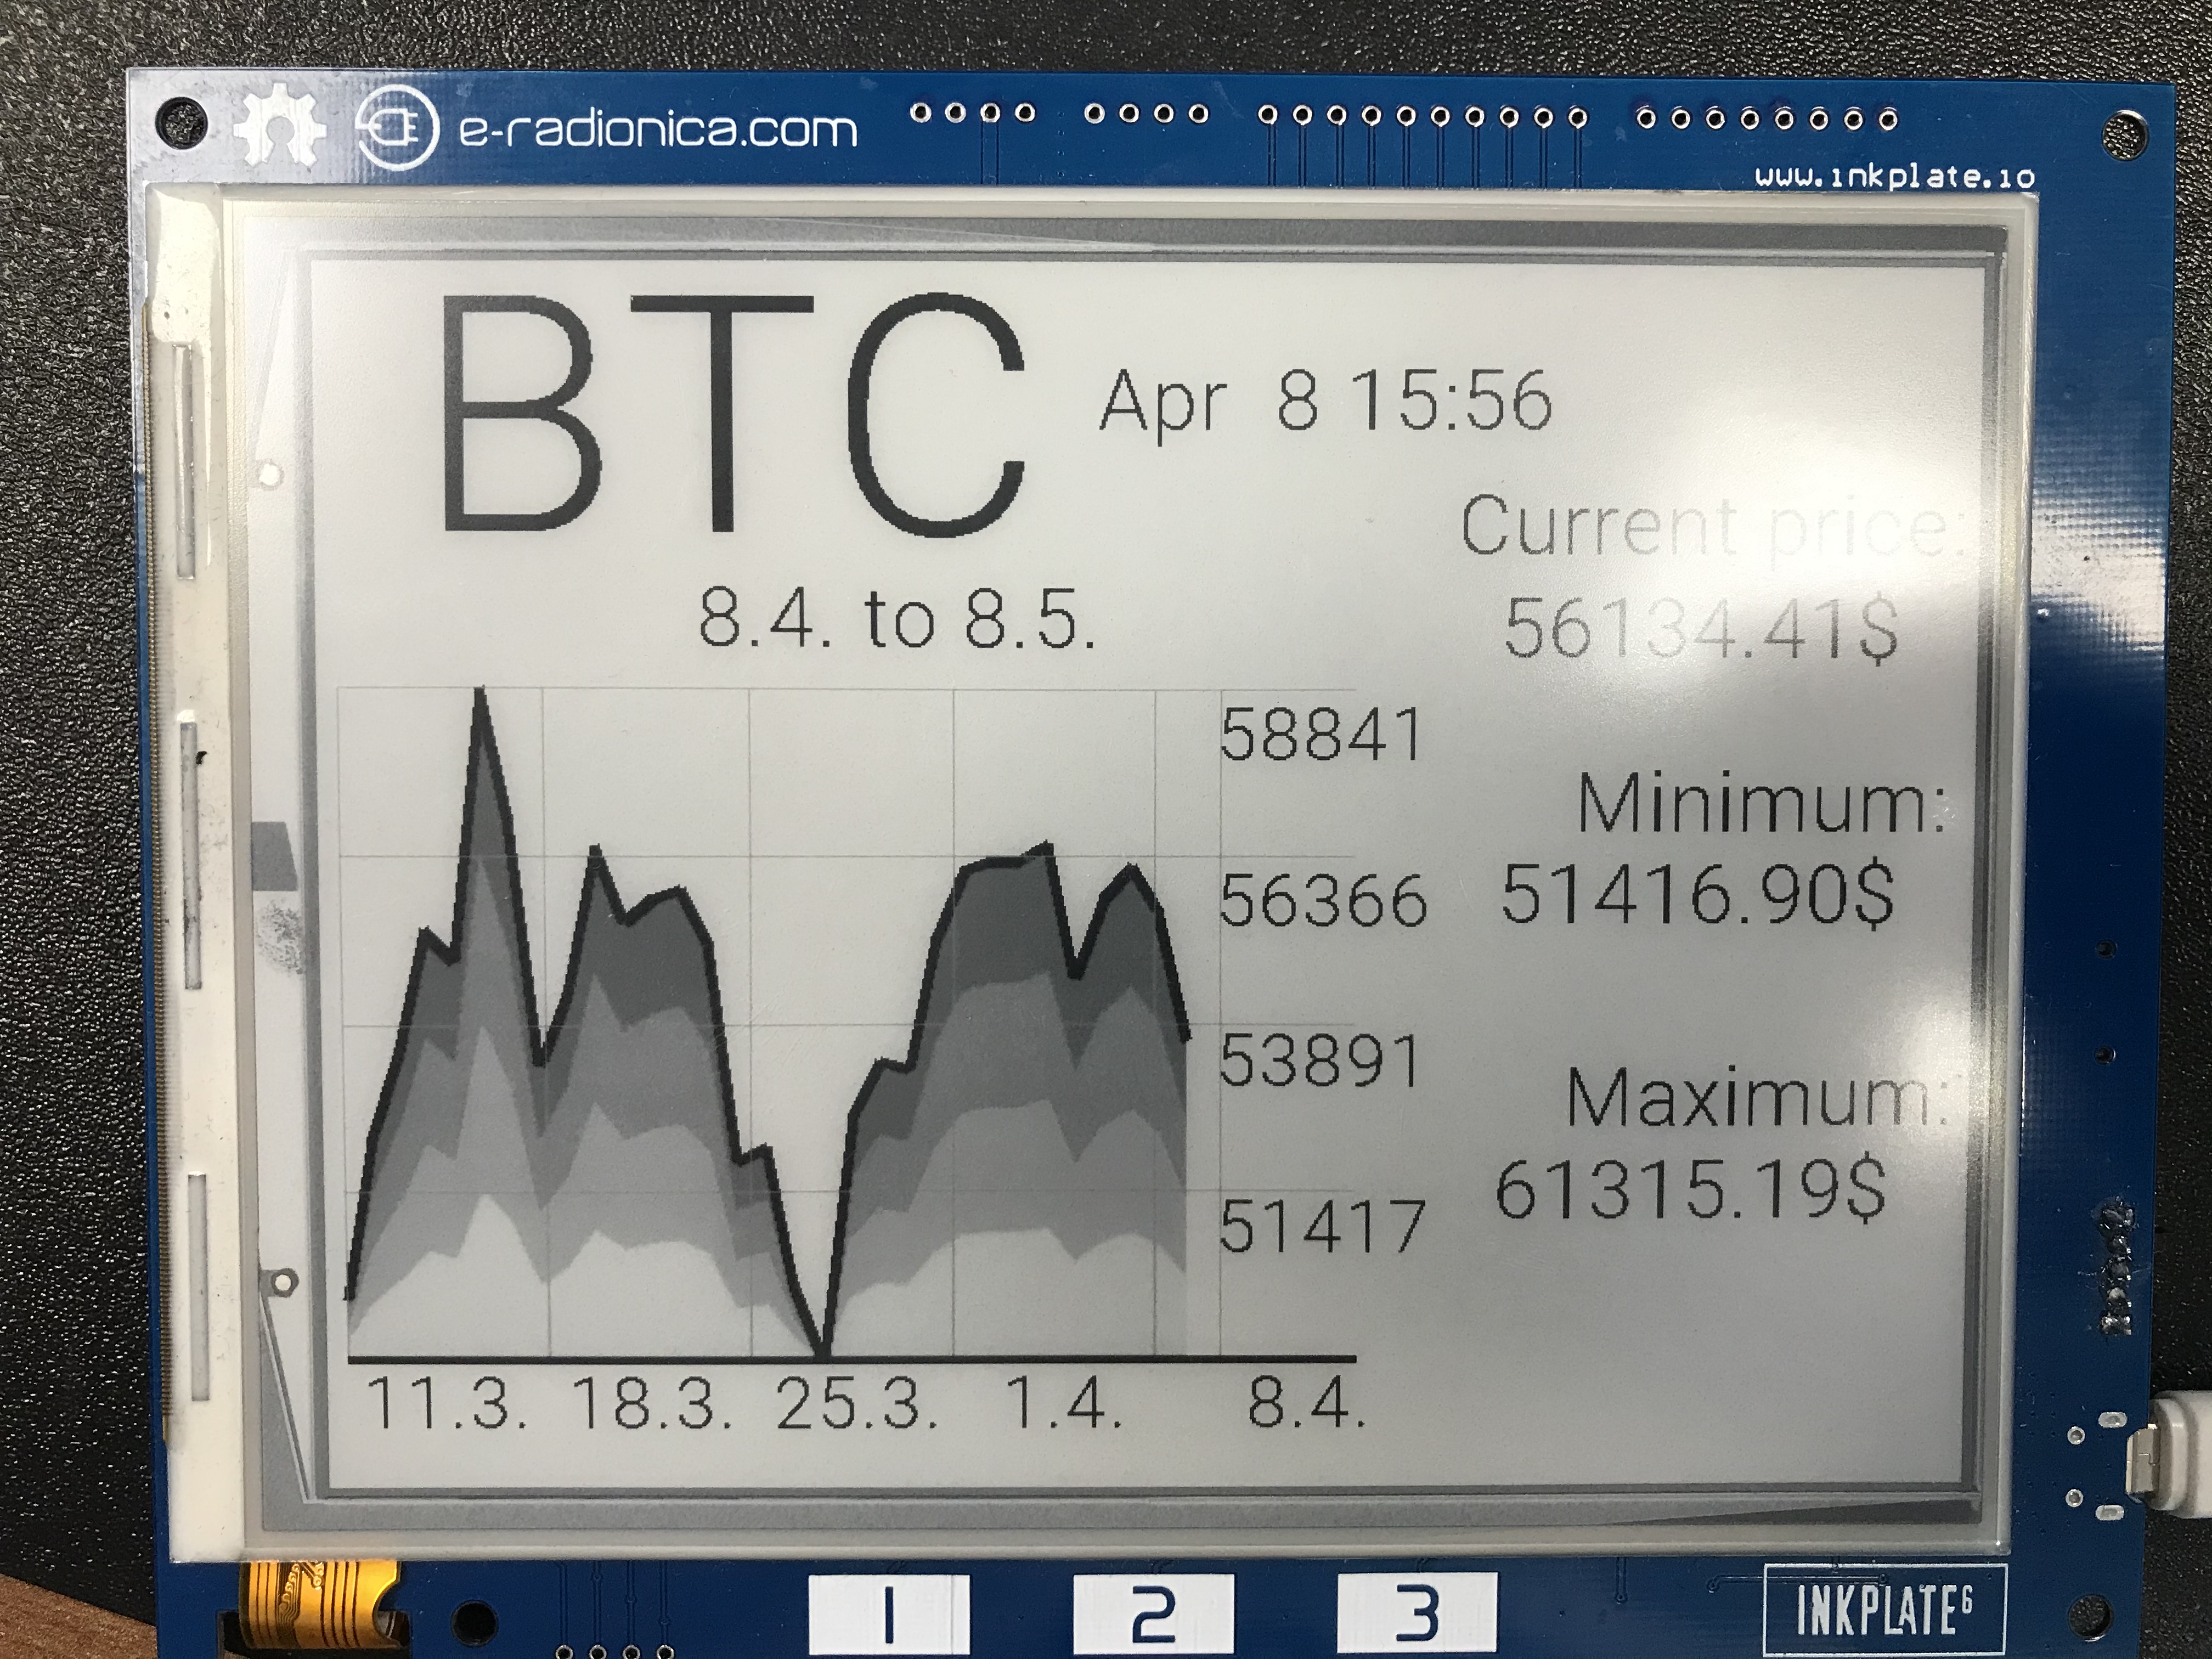
Inkplate_Crypto_Currency_Tracker
This example will show you how you can use Inkplate to display API data. Here we use Coingecko API to get last 90 days prices and display them on the Inkplate screen.
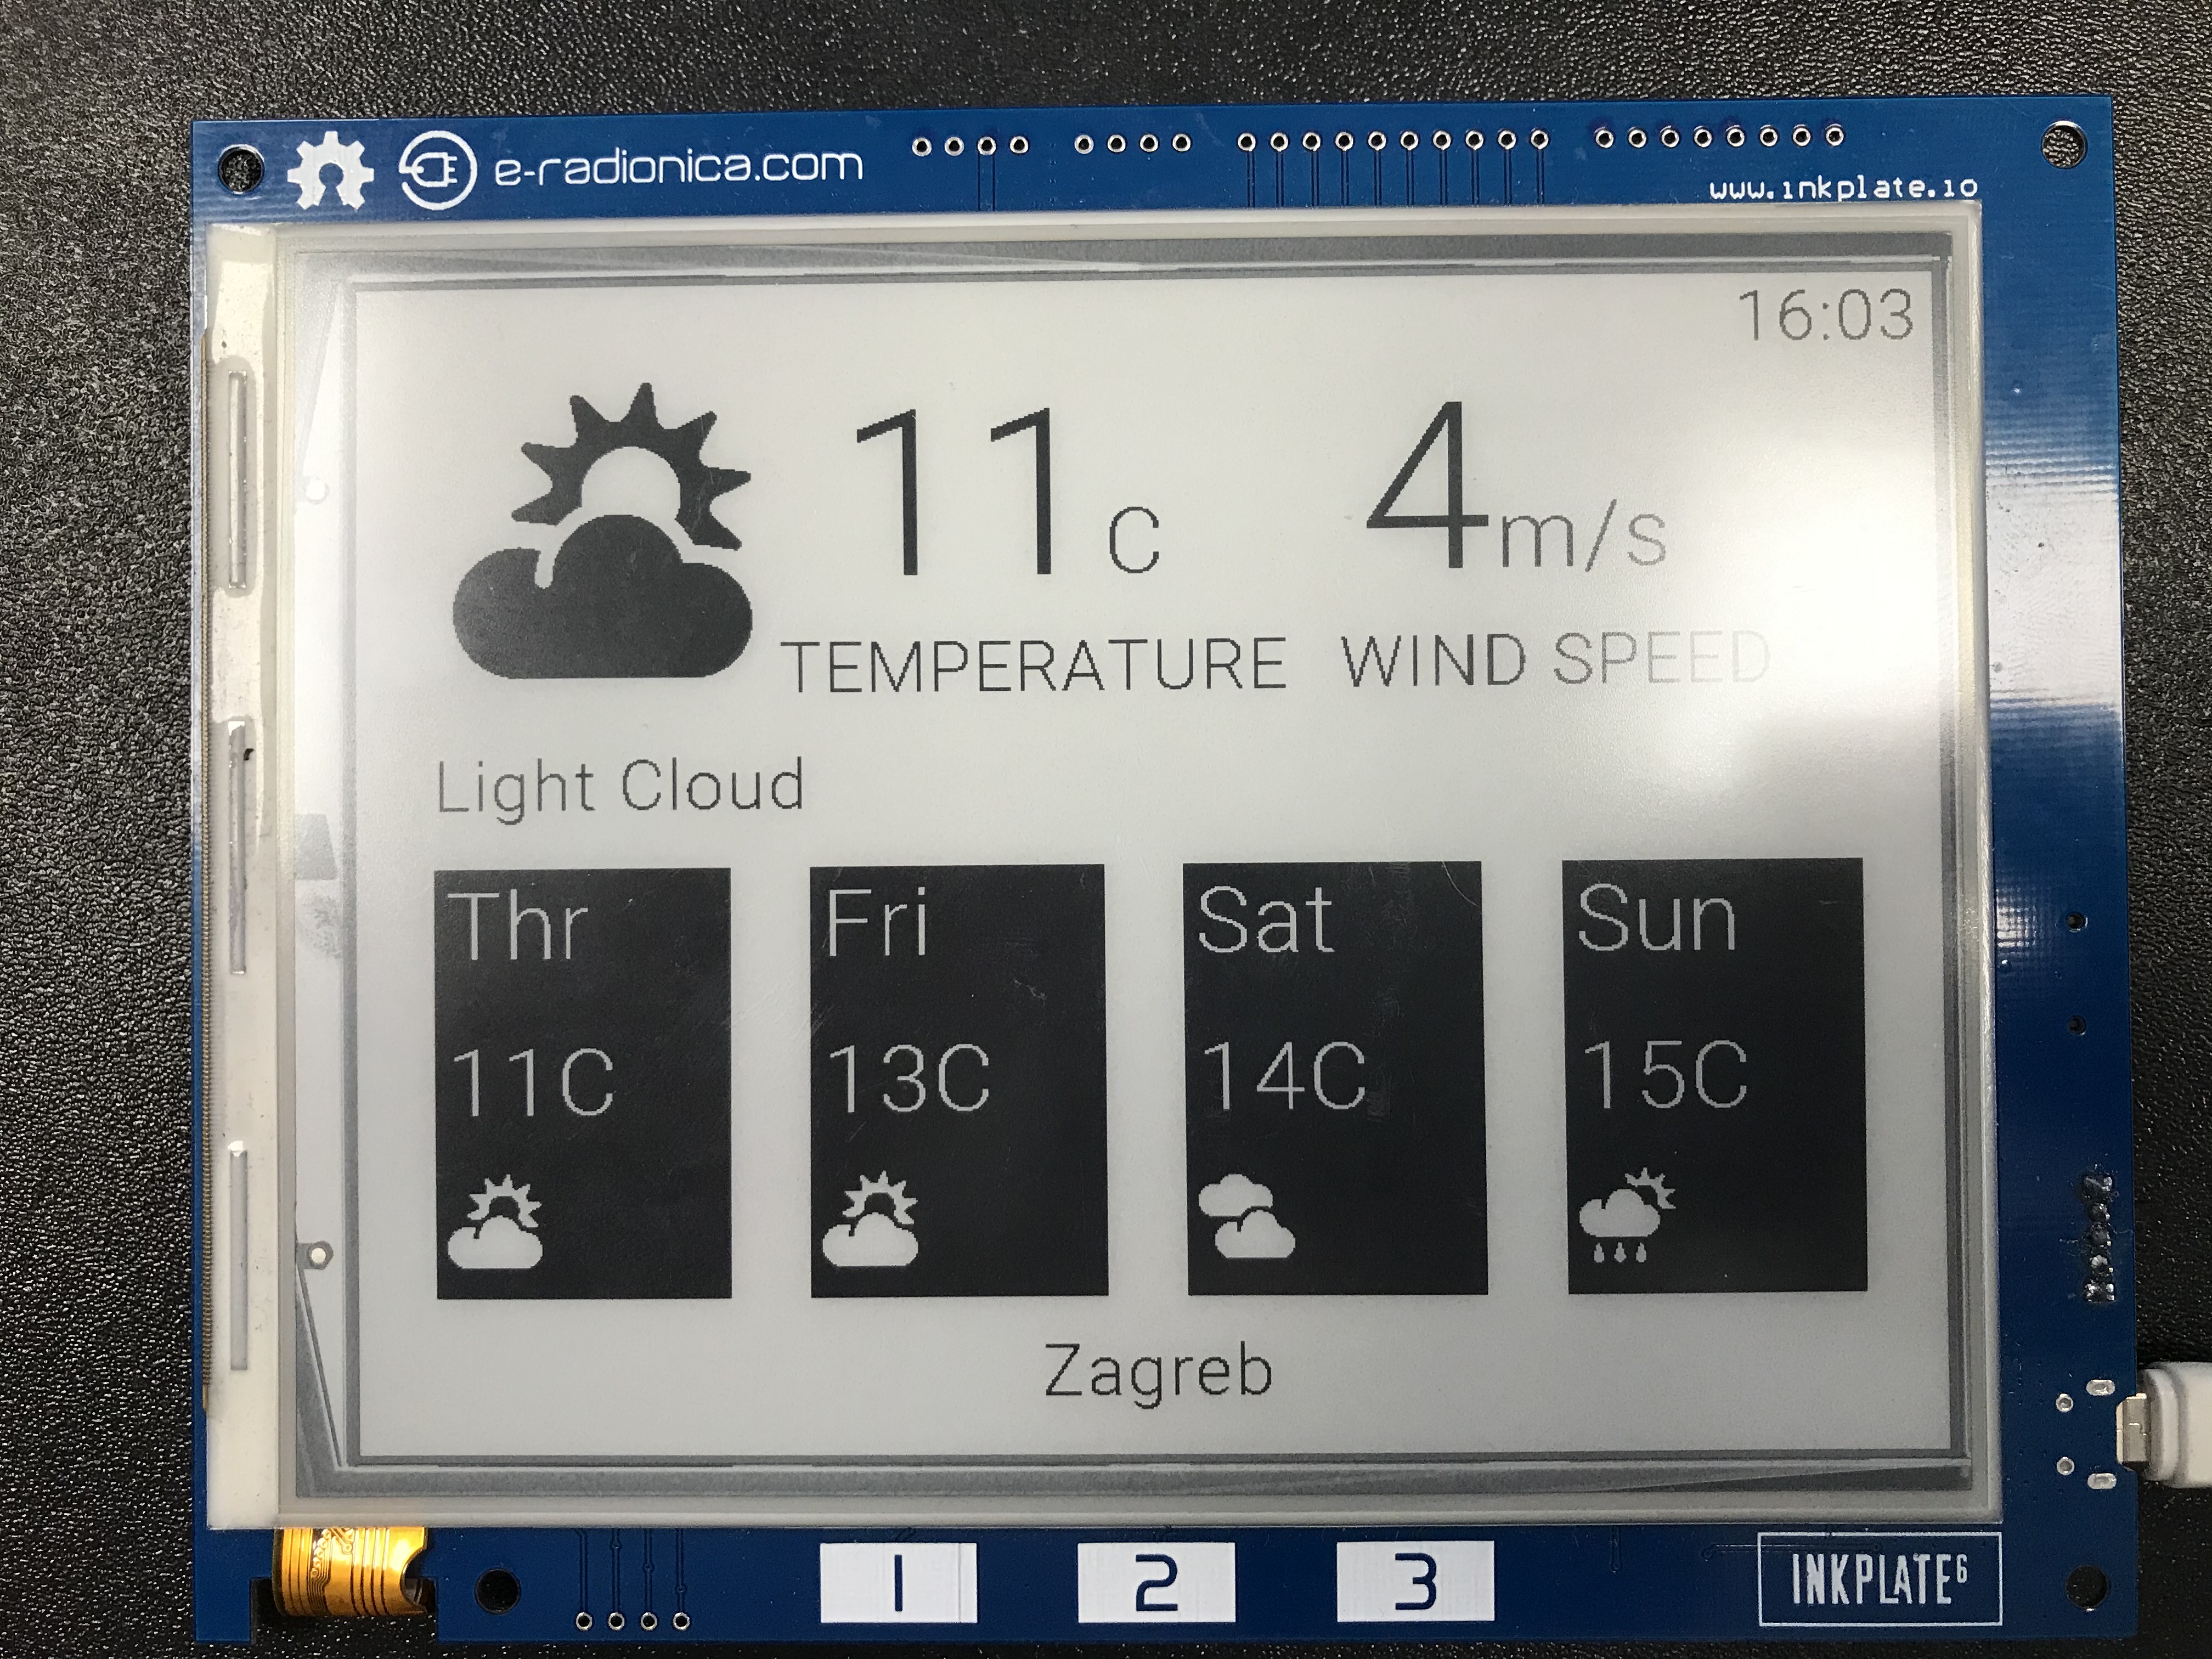
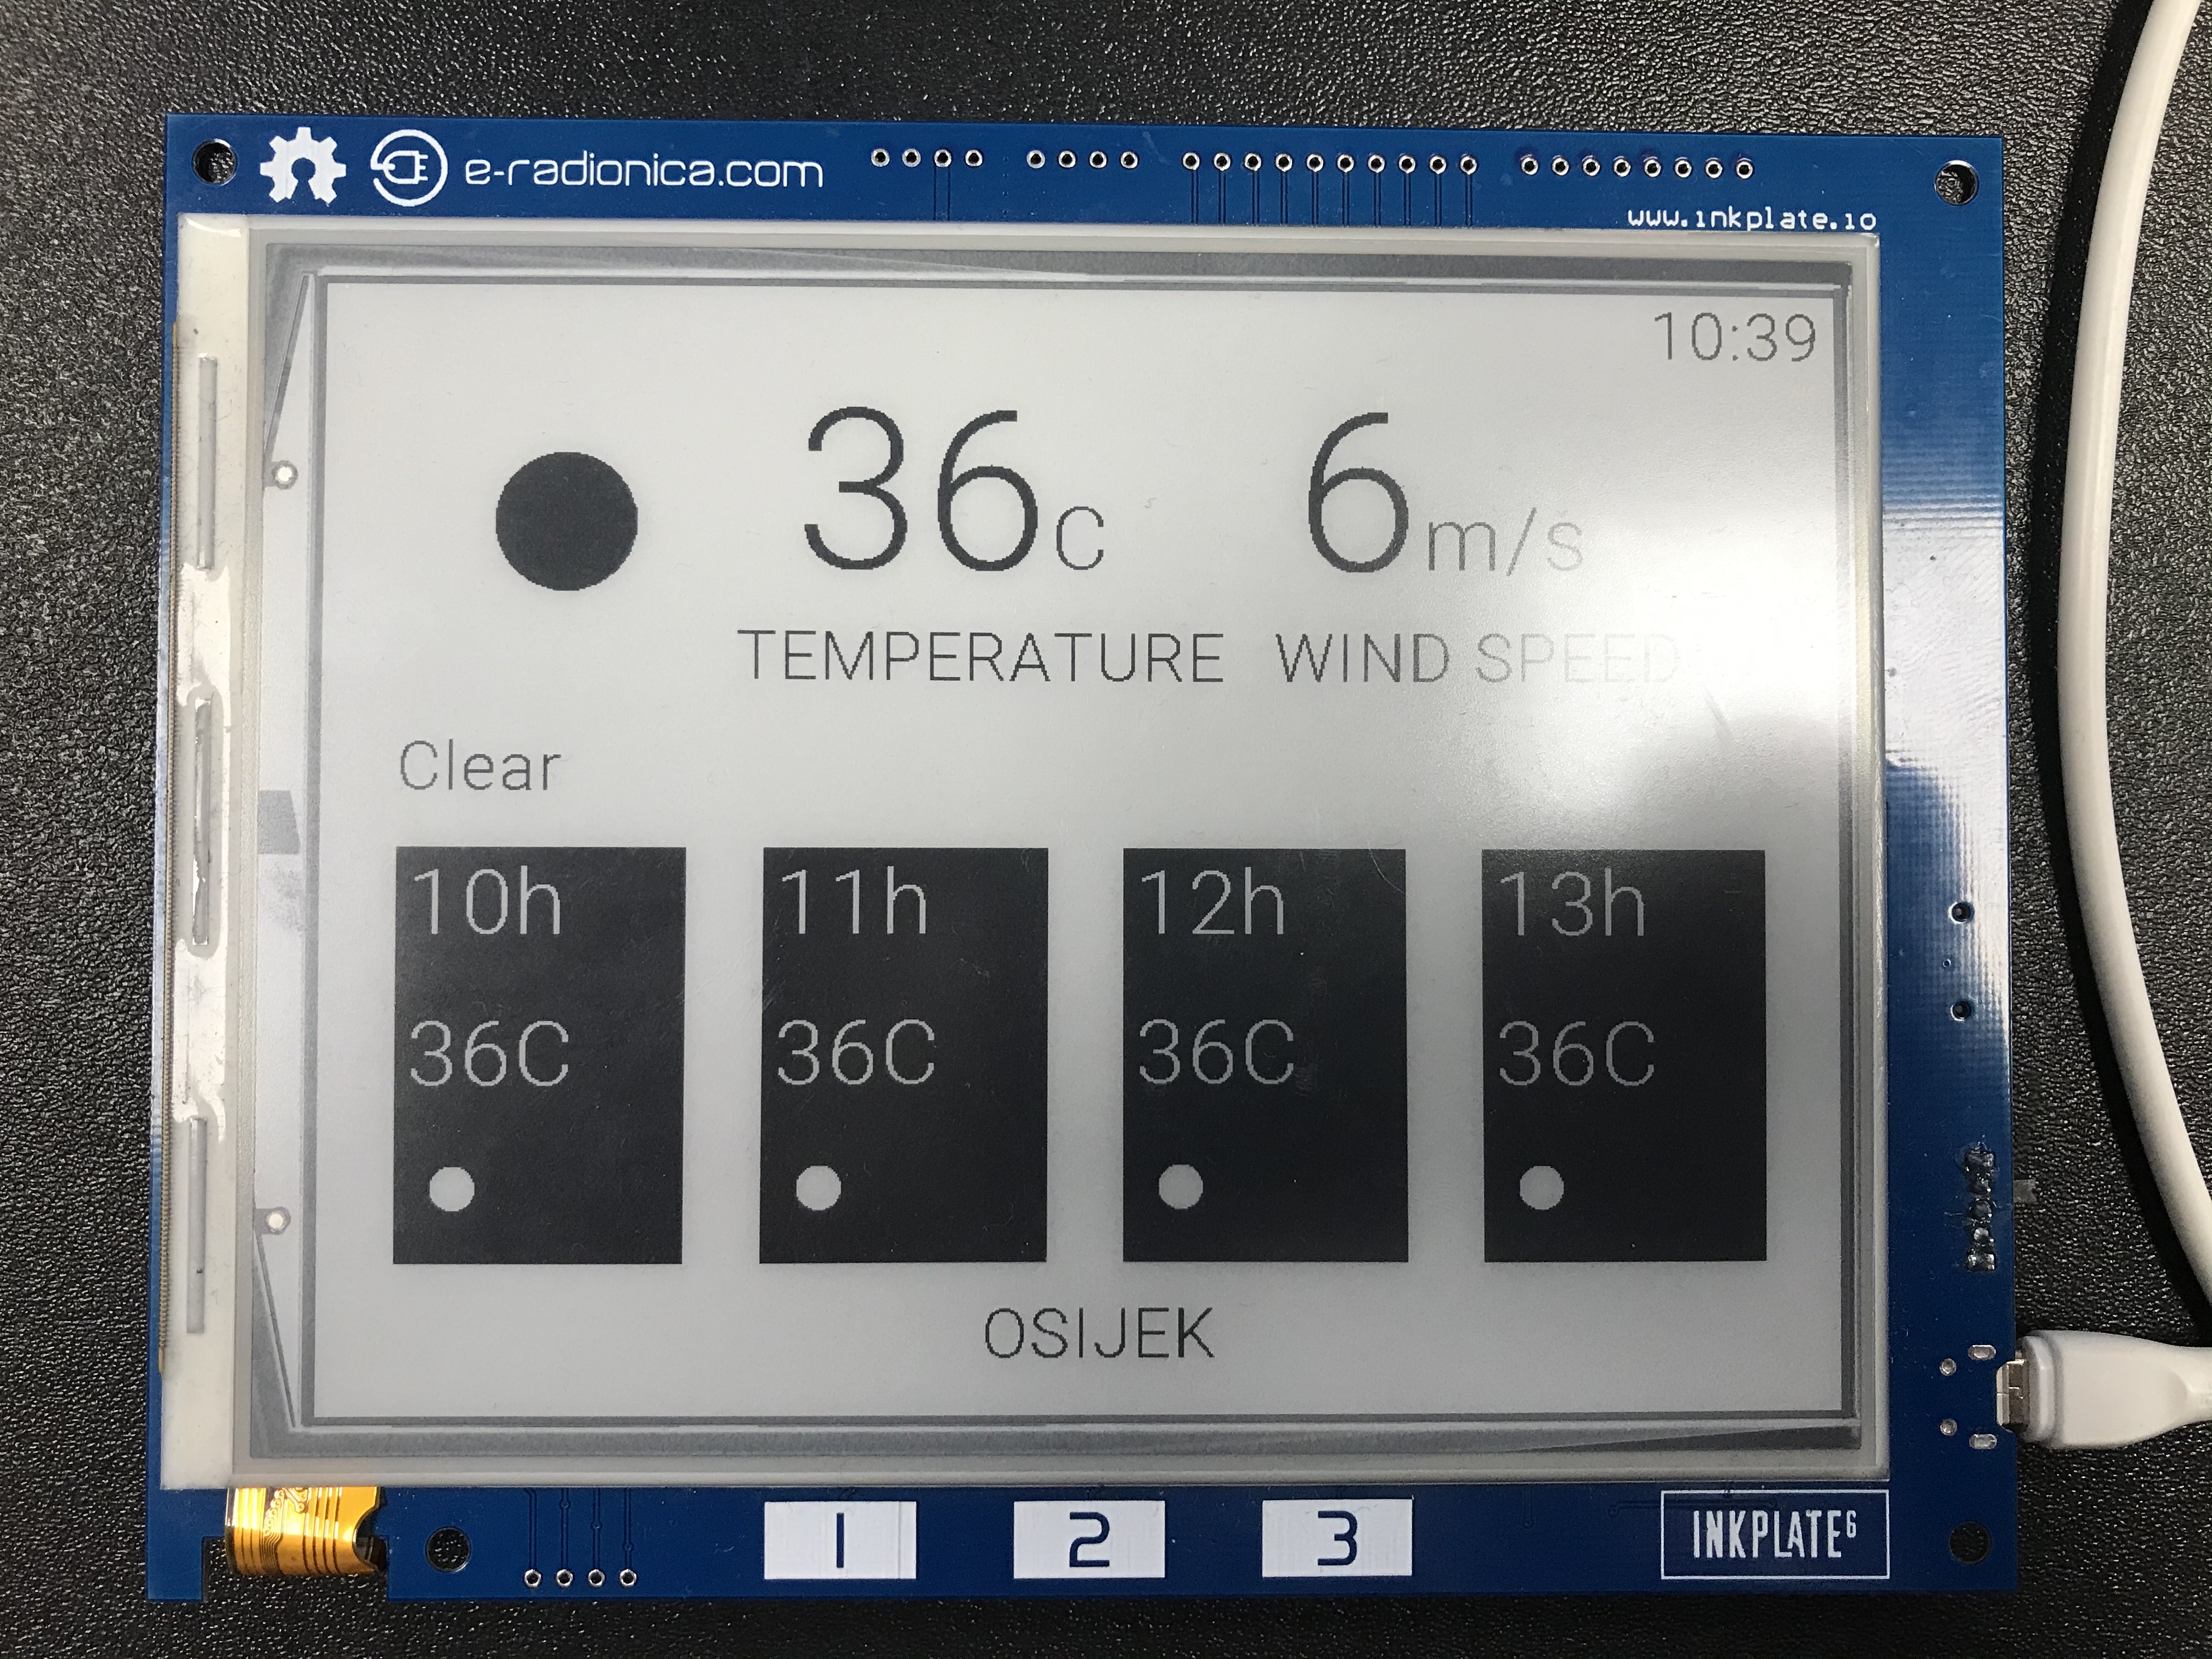
Inkplate_Daily_Weather_Station
This example will show you how you can use Inkplate to display API data, e.g. Openweather public weather API.
Inkplate_Game_Of_Life
Our first community created example, made by: https://github.com/claud9999 To run it, jut upload the code and watch Conways game of life animation!
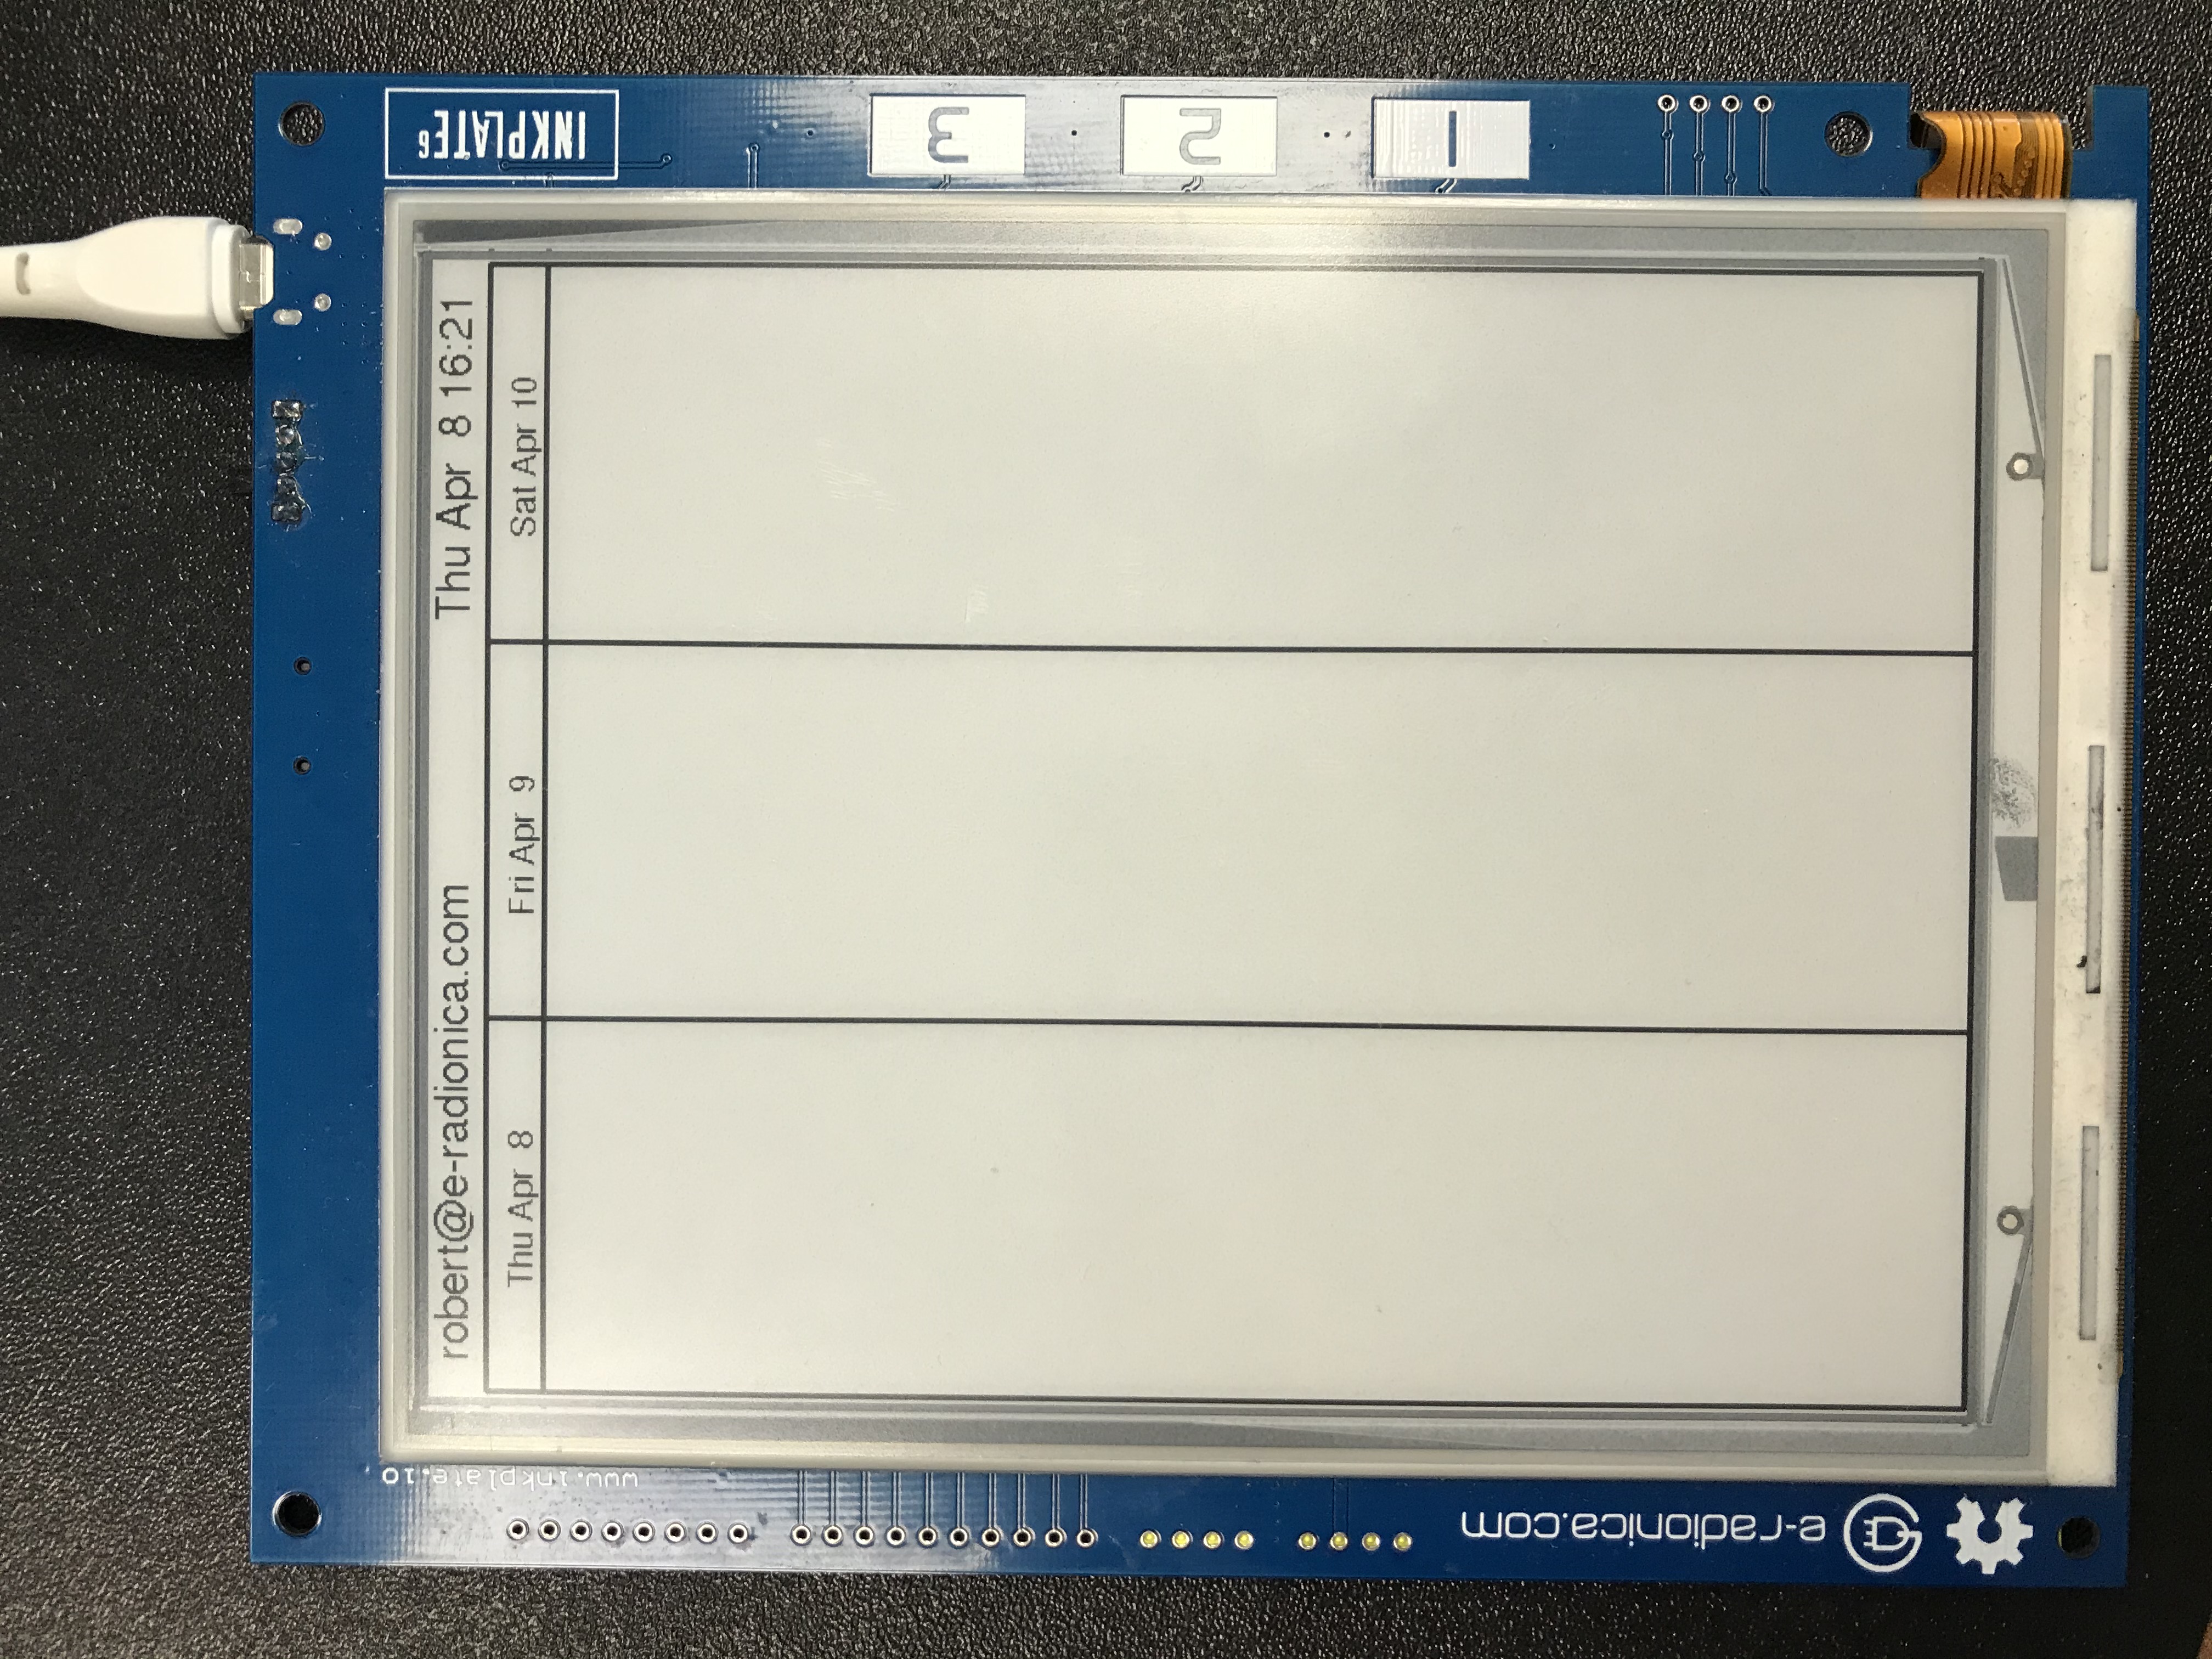
Inkplate_Google_Calendar
This project shows you how Inkplate can be used to display events in your Google Calendar using their provided API.
Inkplate_Hourly_Weather_Station
This example will show you how you can use Inkplate to display API data.
Inkplate_Image_Frame_From_SD
This example will show you how you can make slideshow images from an SD card. Put your images on the SD card in a file and specify the file path in the sketch.
Inkplate_Image_Frame_From_Web
This example shows how you can set inkplate to show random pictures from web.
Inkplate_Mandelbrot_Set
This example renders the mandelbrot set to coordiantes to Inkplate. Due to the nature of Mandelbrot set, it is quite slow on low powered MCUs, so please be patient :)

Inkplate_Maze_Generator
This example renders a random maze every time! You can write on it with a whiteboard marker or a graphite pen to solve it. Just be sure not to use pernament markers!

Inkplate_News_API
This example will show you how you can use Inkplate to display API data. Here we use News API to get headline news and short description and display them on the Inkplate screen.
Inkplate_OpenWeather_Station
This example will show you how you can use Inkplate to display API data.

Inkplate_Quotables
This example shows you how to use simple API call without API key. Response from server is in JSON format, so that will be shown too how it is used. What happens here is basically ESP32 connects to WiFi and sends API call and server returns HTML document containing one quote and some information about it, then using library ArduinoJSON we extract only quote from JSON data and show it on Inkplate. After displaying quote ESP32 goes to sleep and wakes up every 300 seconds to show new quote(you can change time interval).
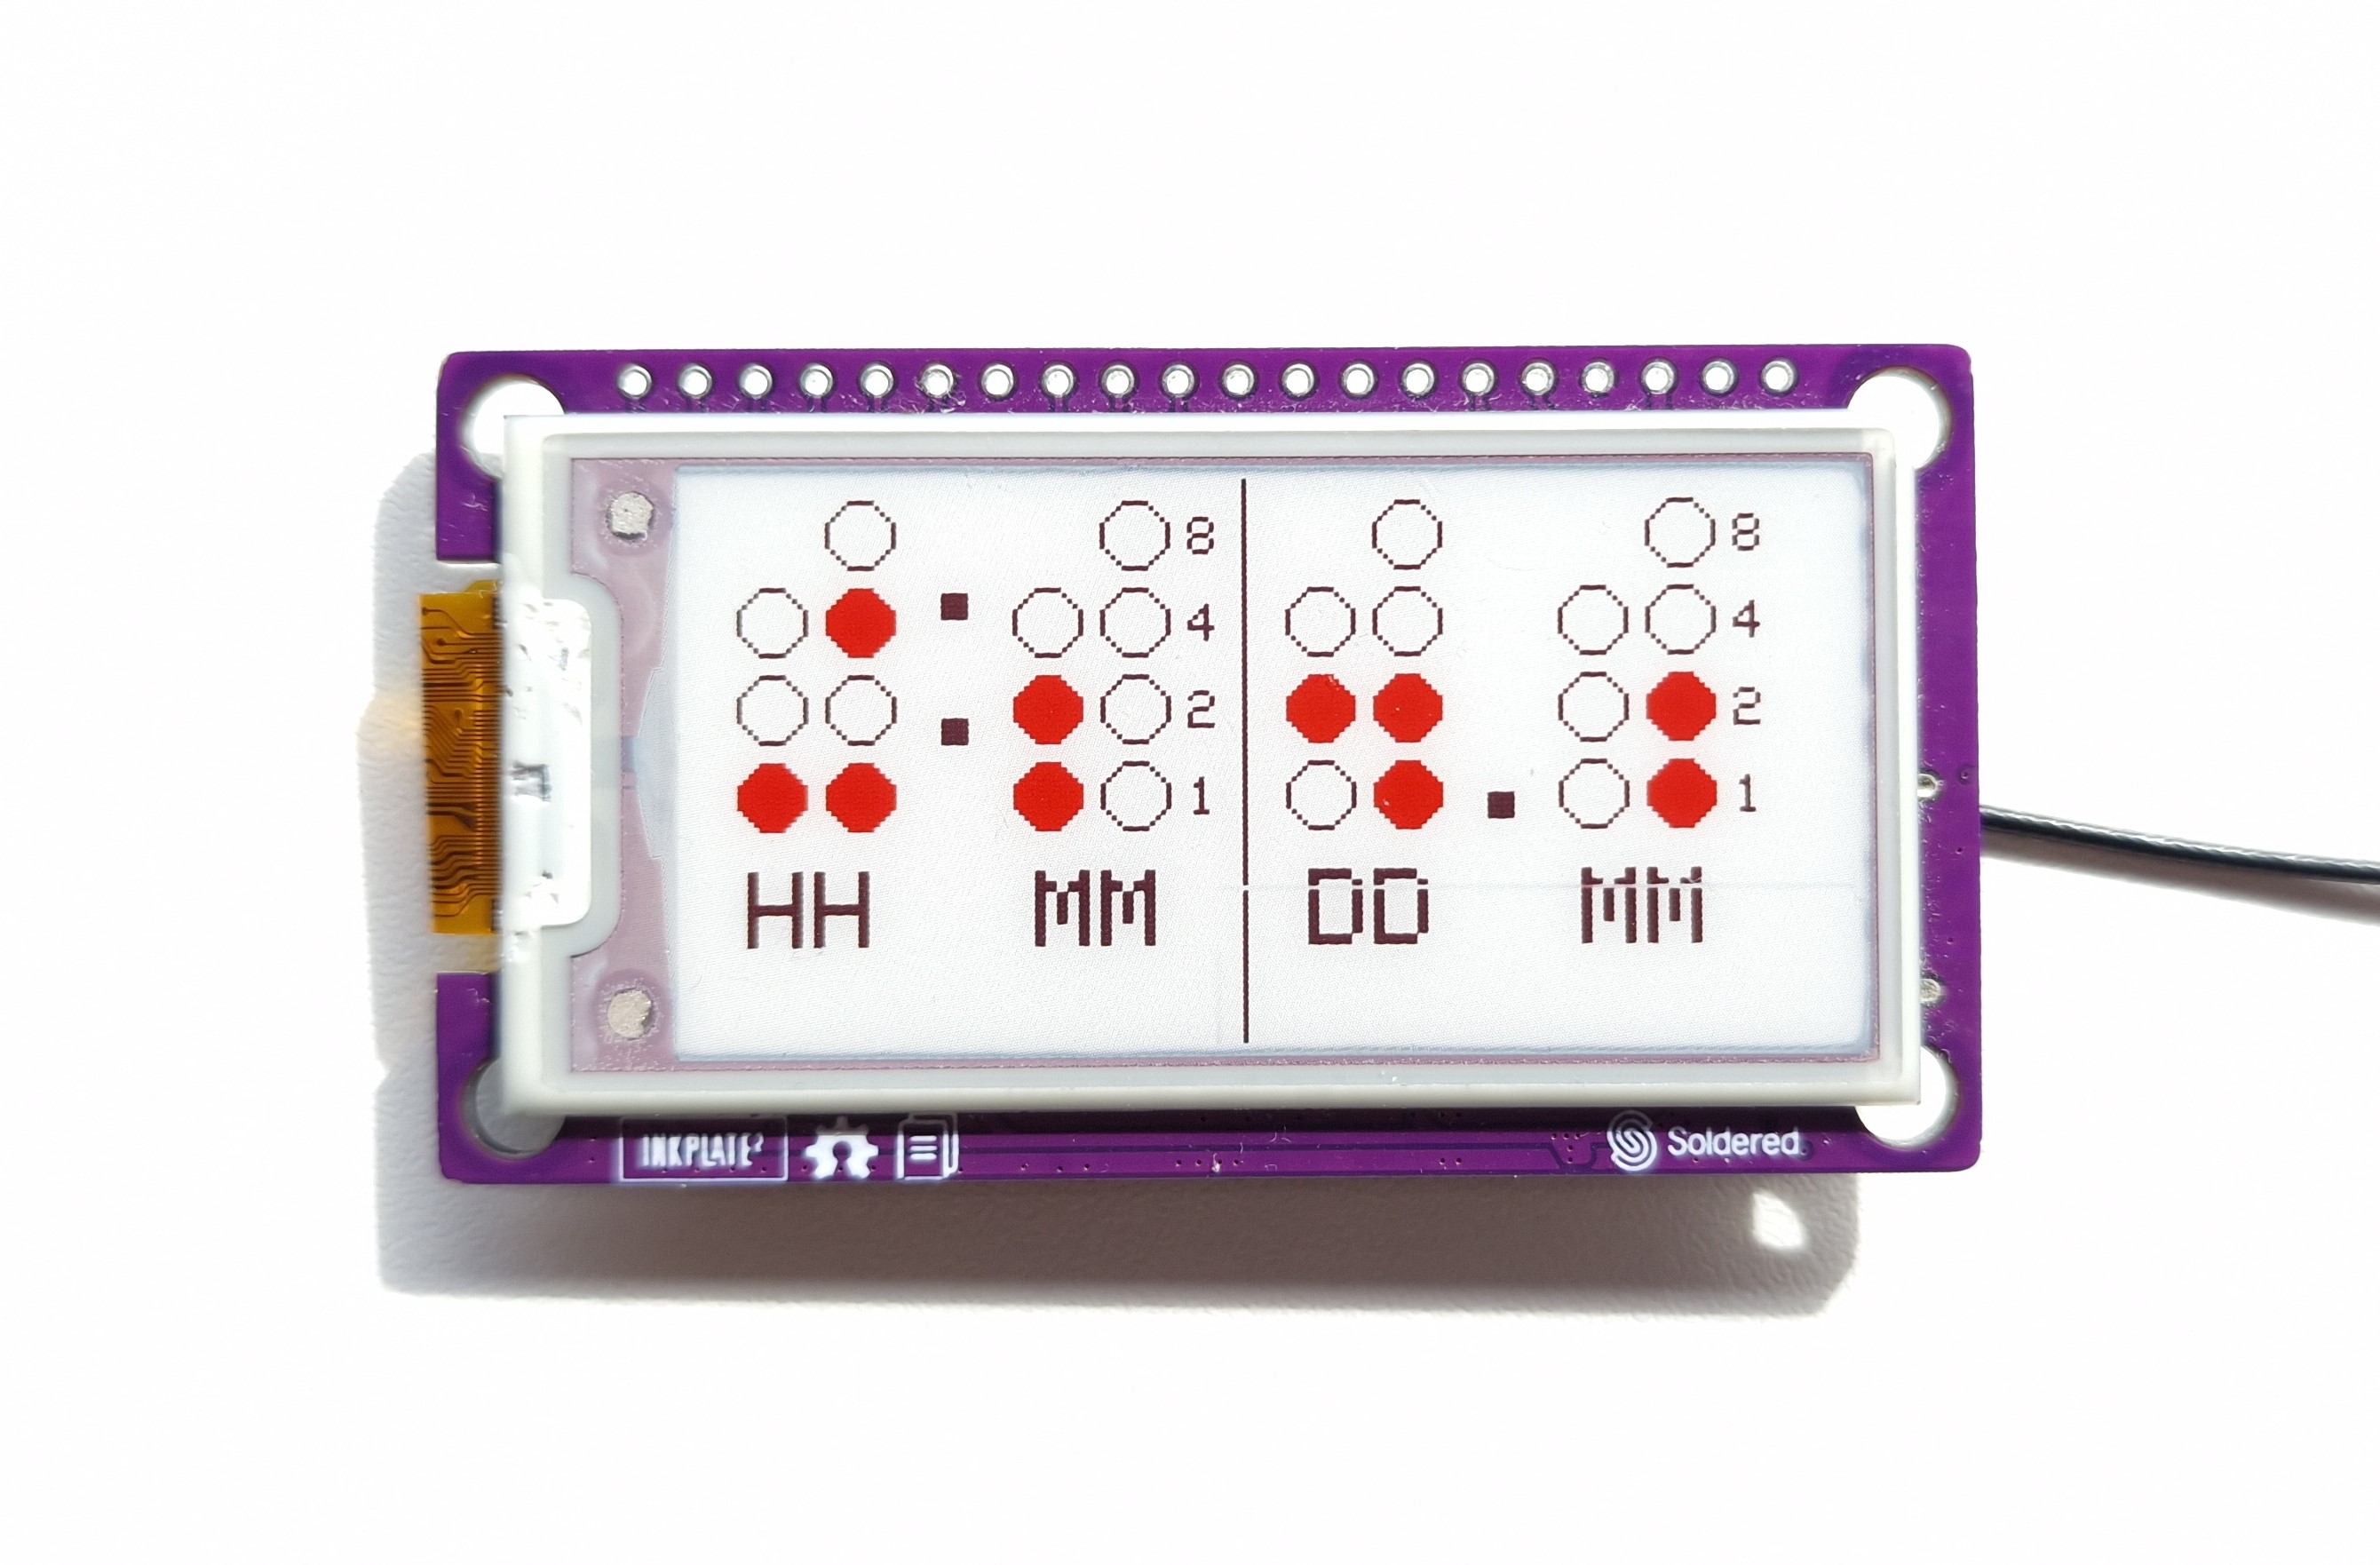
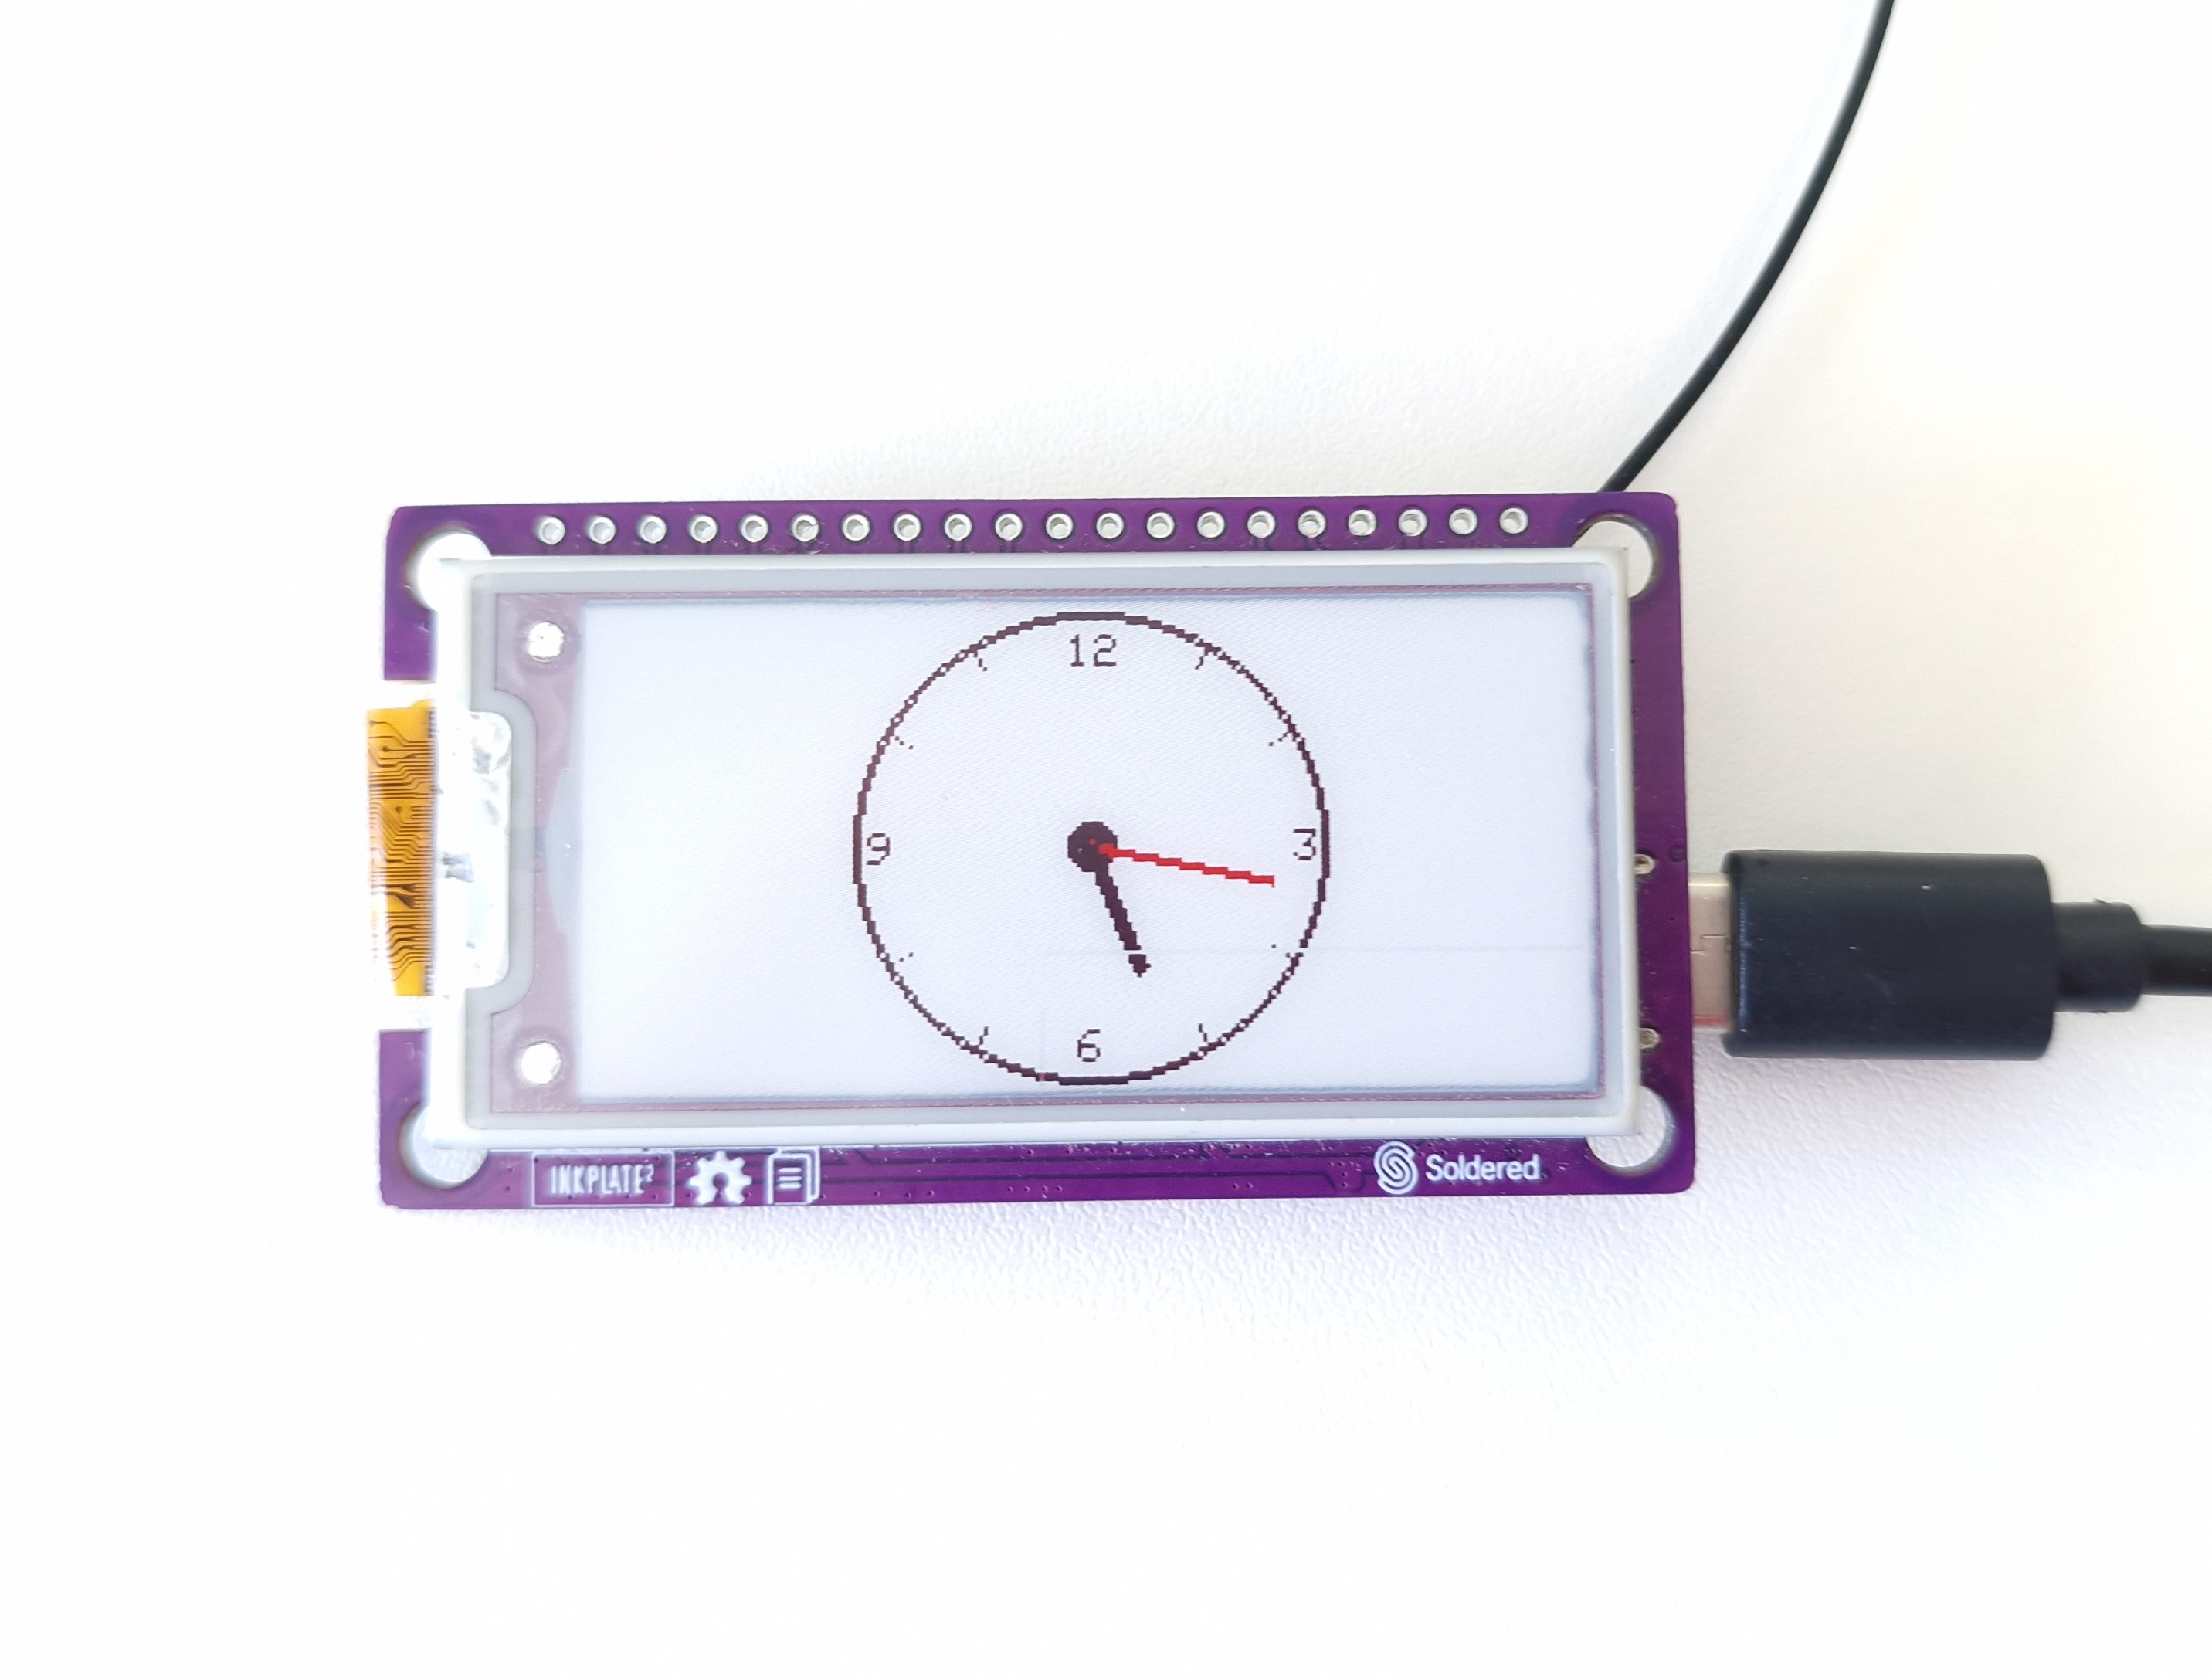
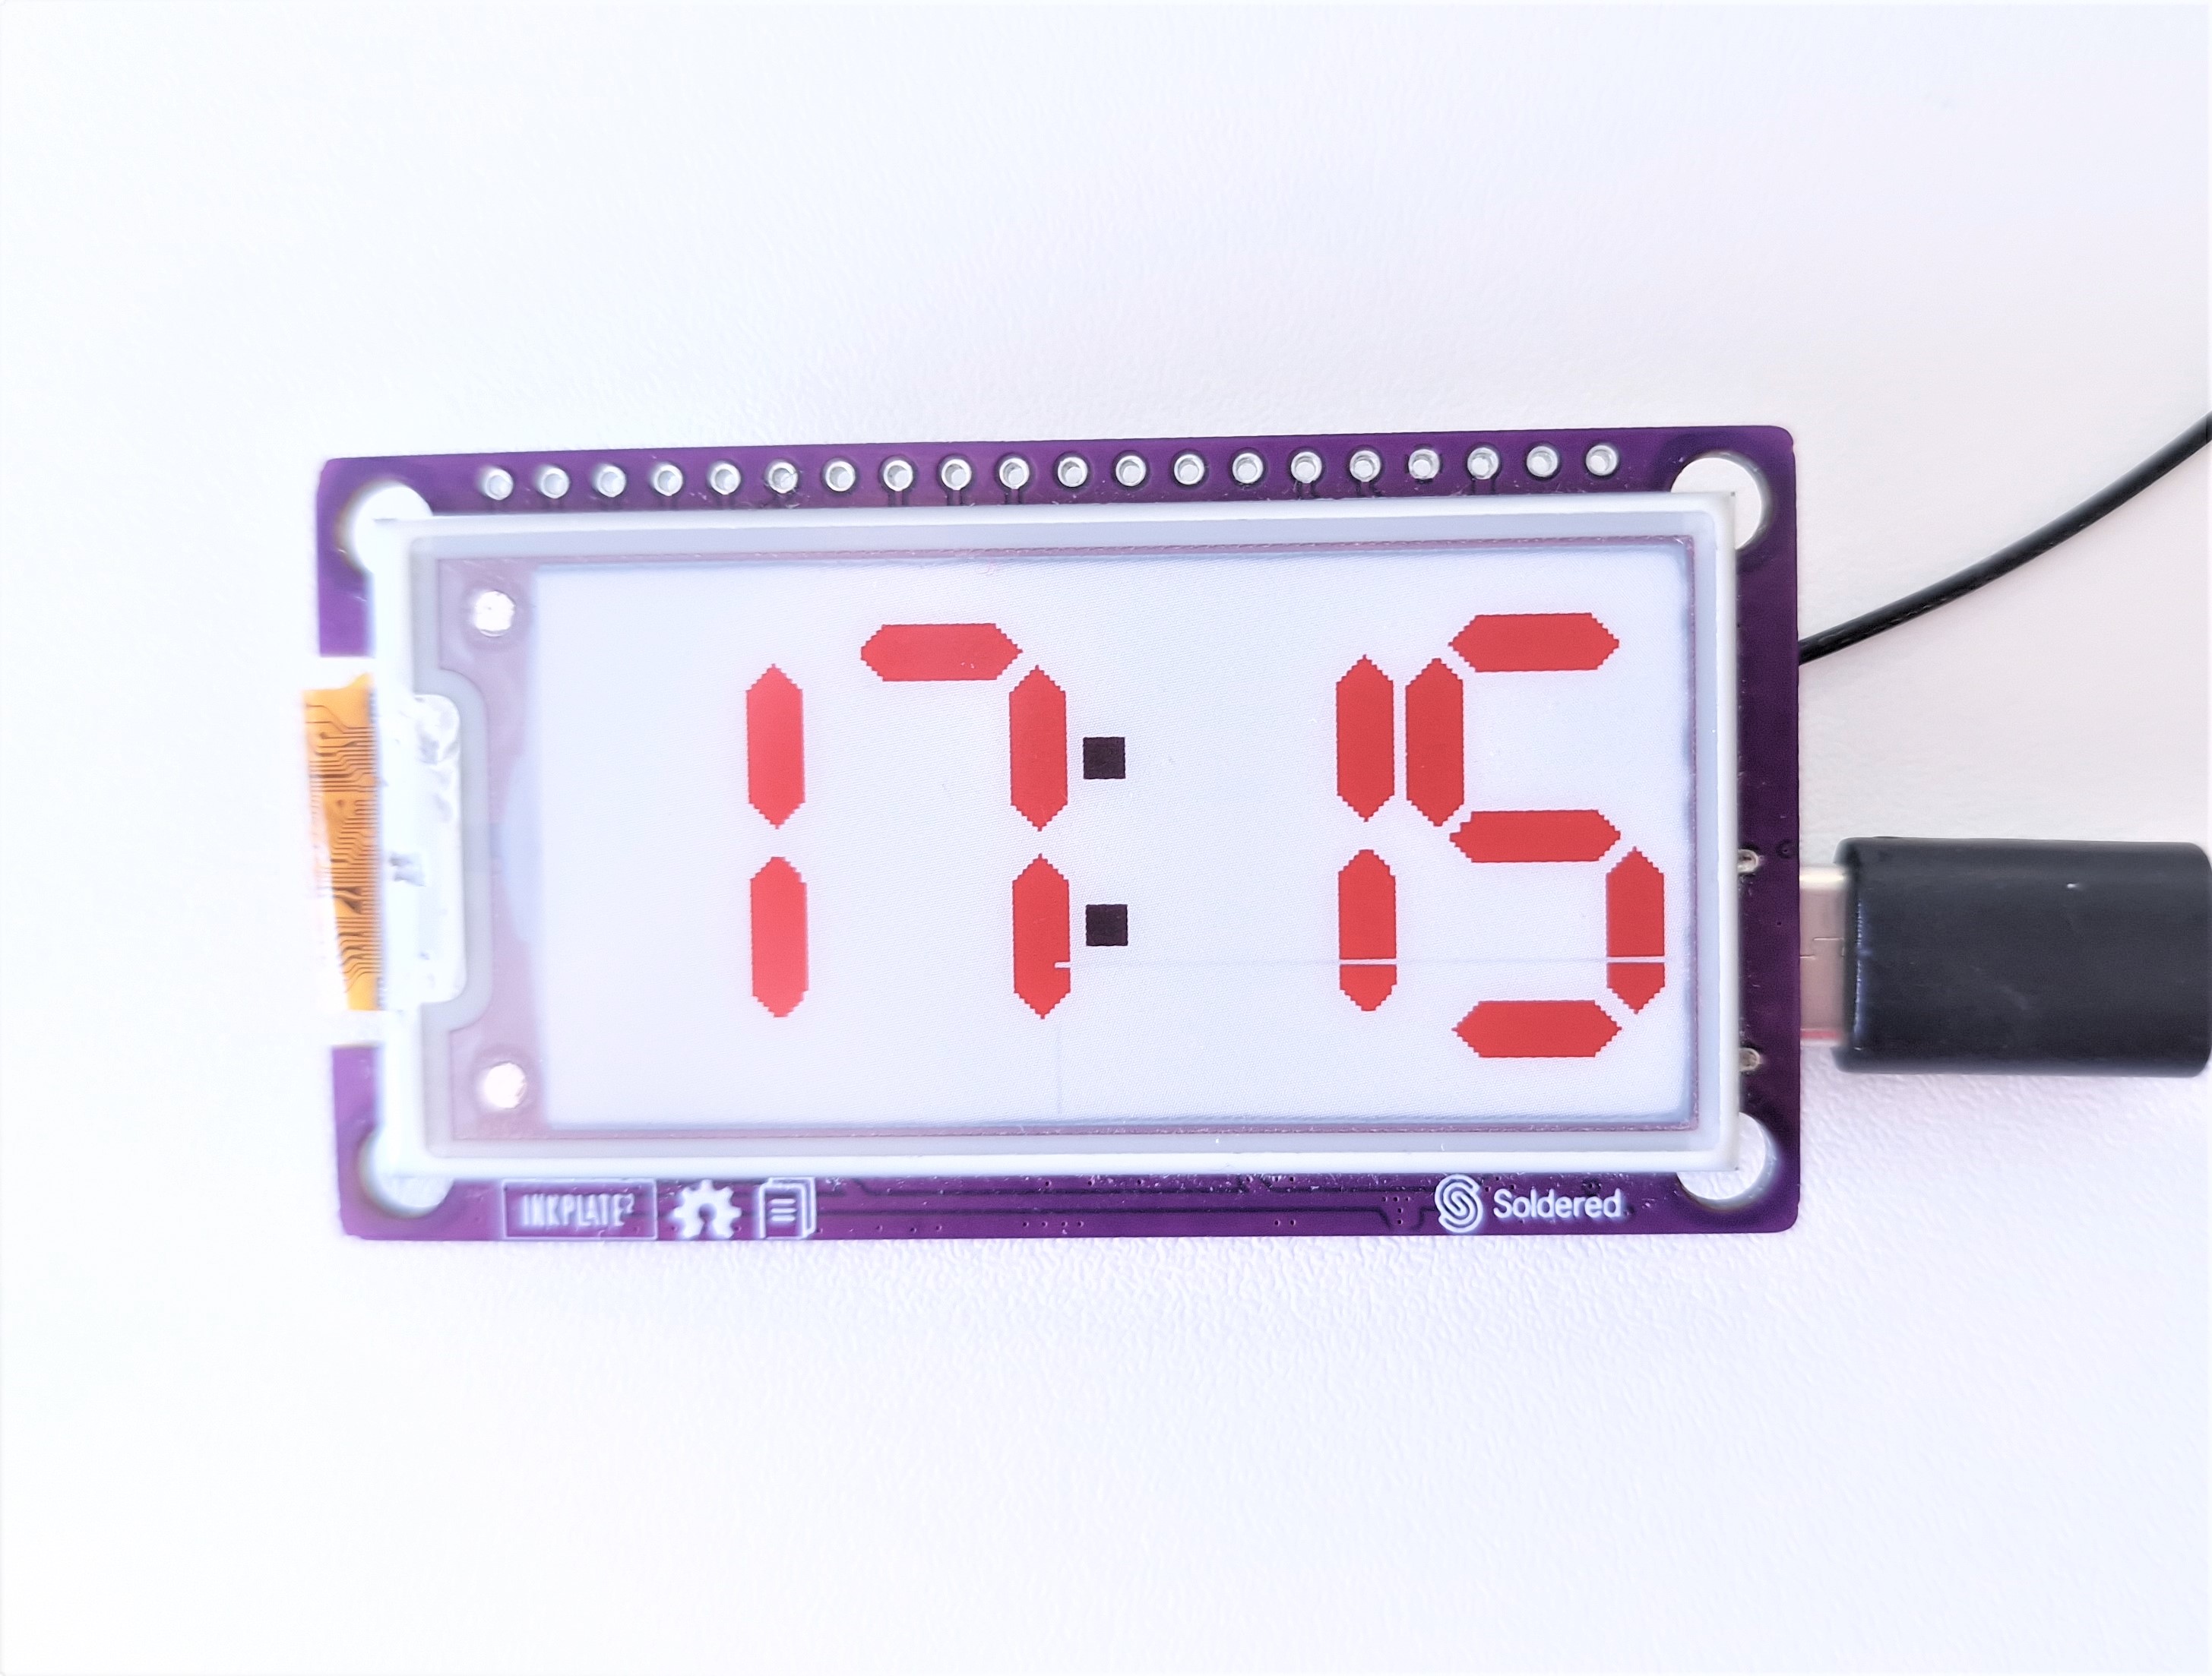
Inkplate2_Clock
This example contains three types of clocks. First type is digital clock with 4 digits which displays hours and minutes. Second type is binary clock, which also have digits but displayed in binary numbers. Third type is analog clock with hands.
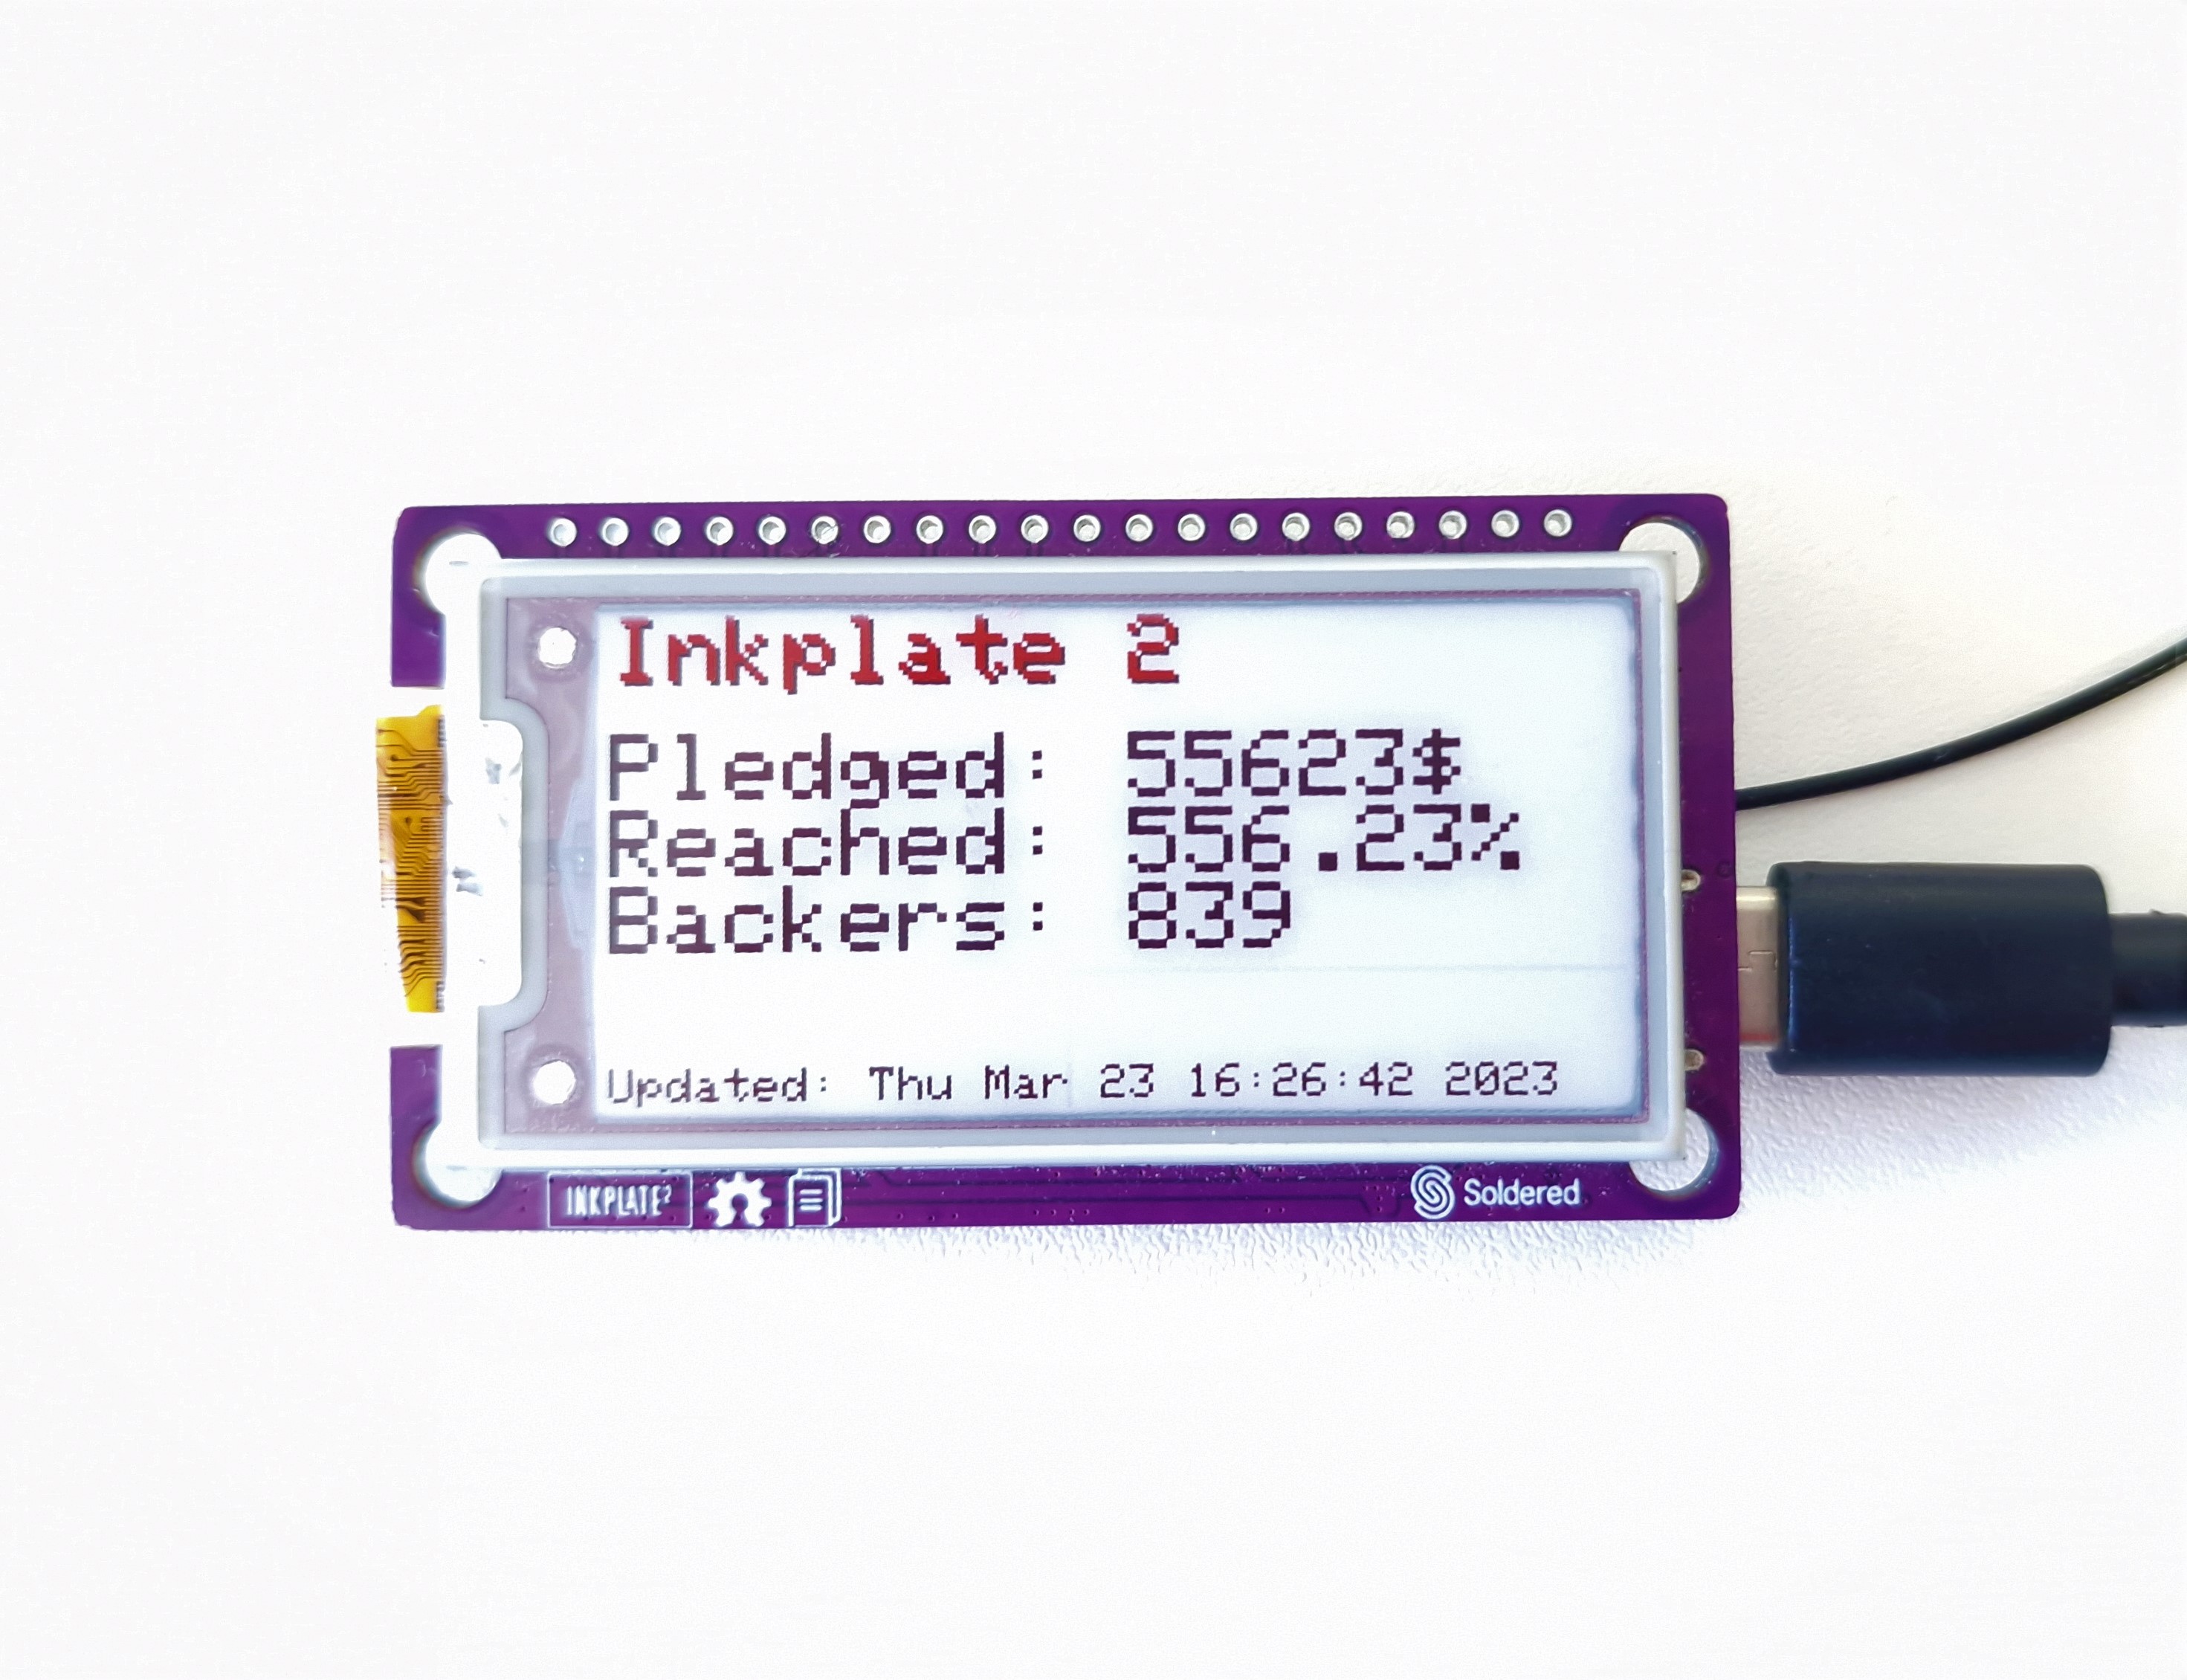
Inkplate2_Kickstarter_Campaign_Tracker
This example will show you how you can use Inkplate 2 to track a campaign on Kickstarter. We find this API for our Kickstarter campaign using Google Chrome and inspecting network data. The page periodically receives stats.json?v=1 file and inside are the data we display.
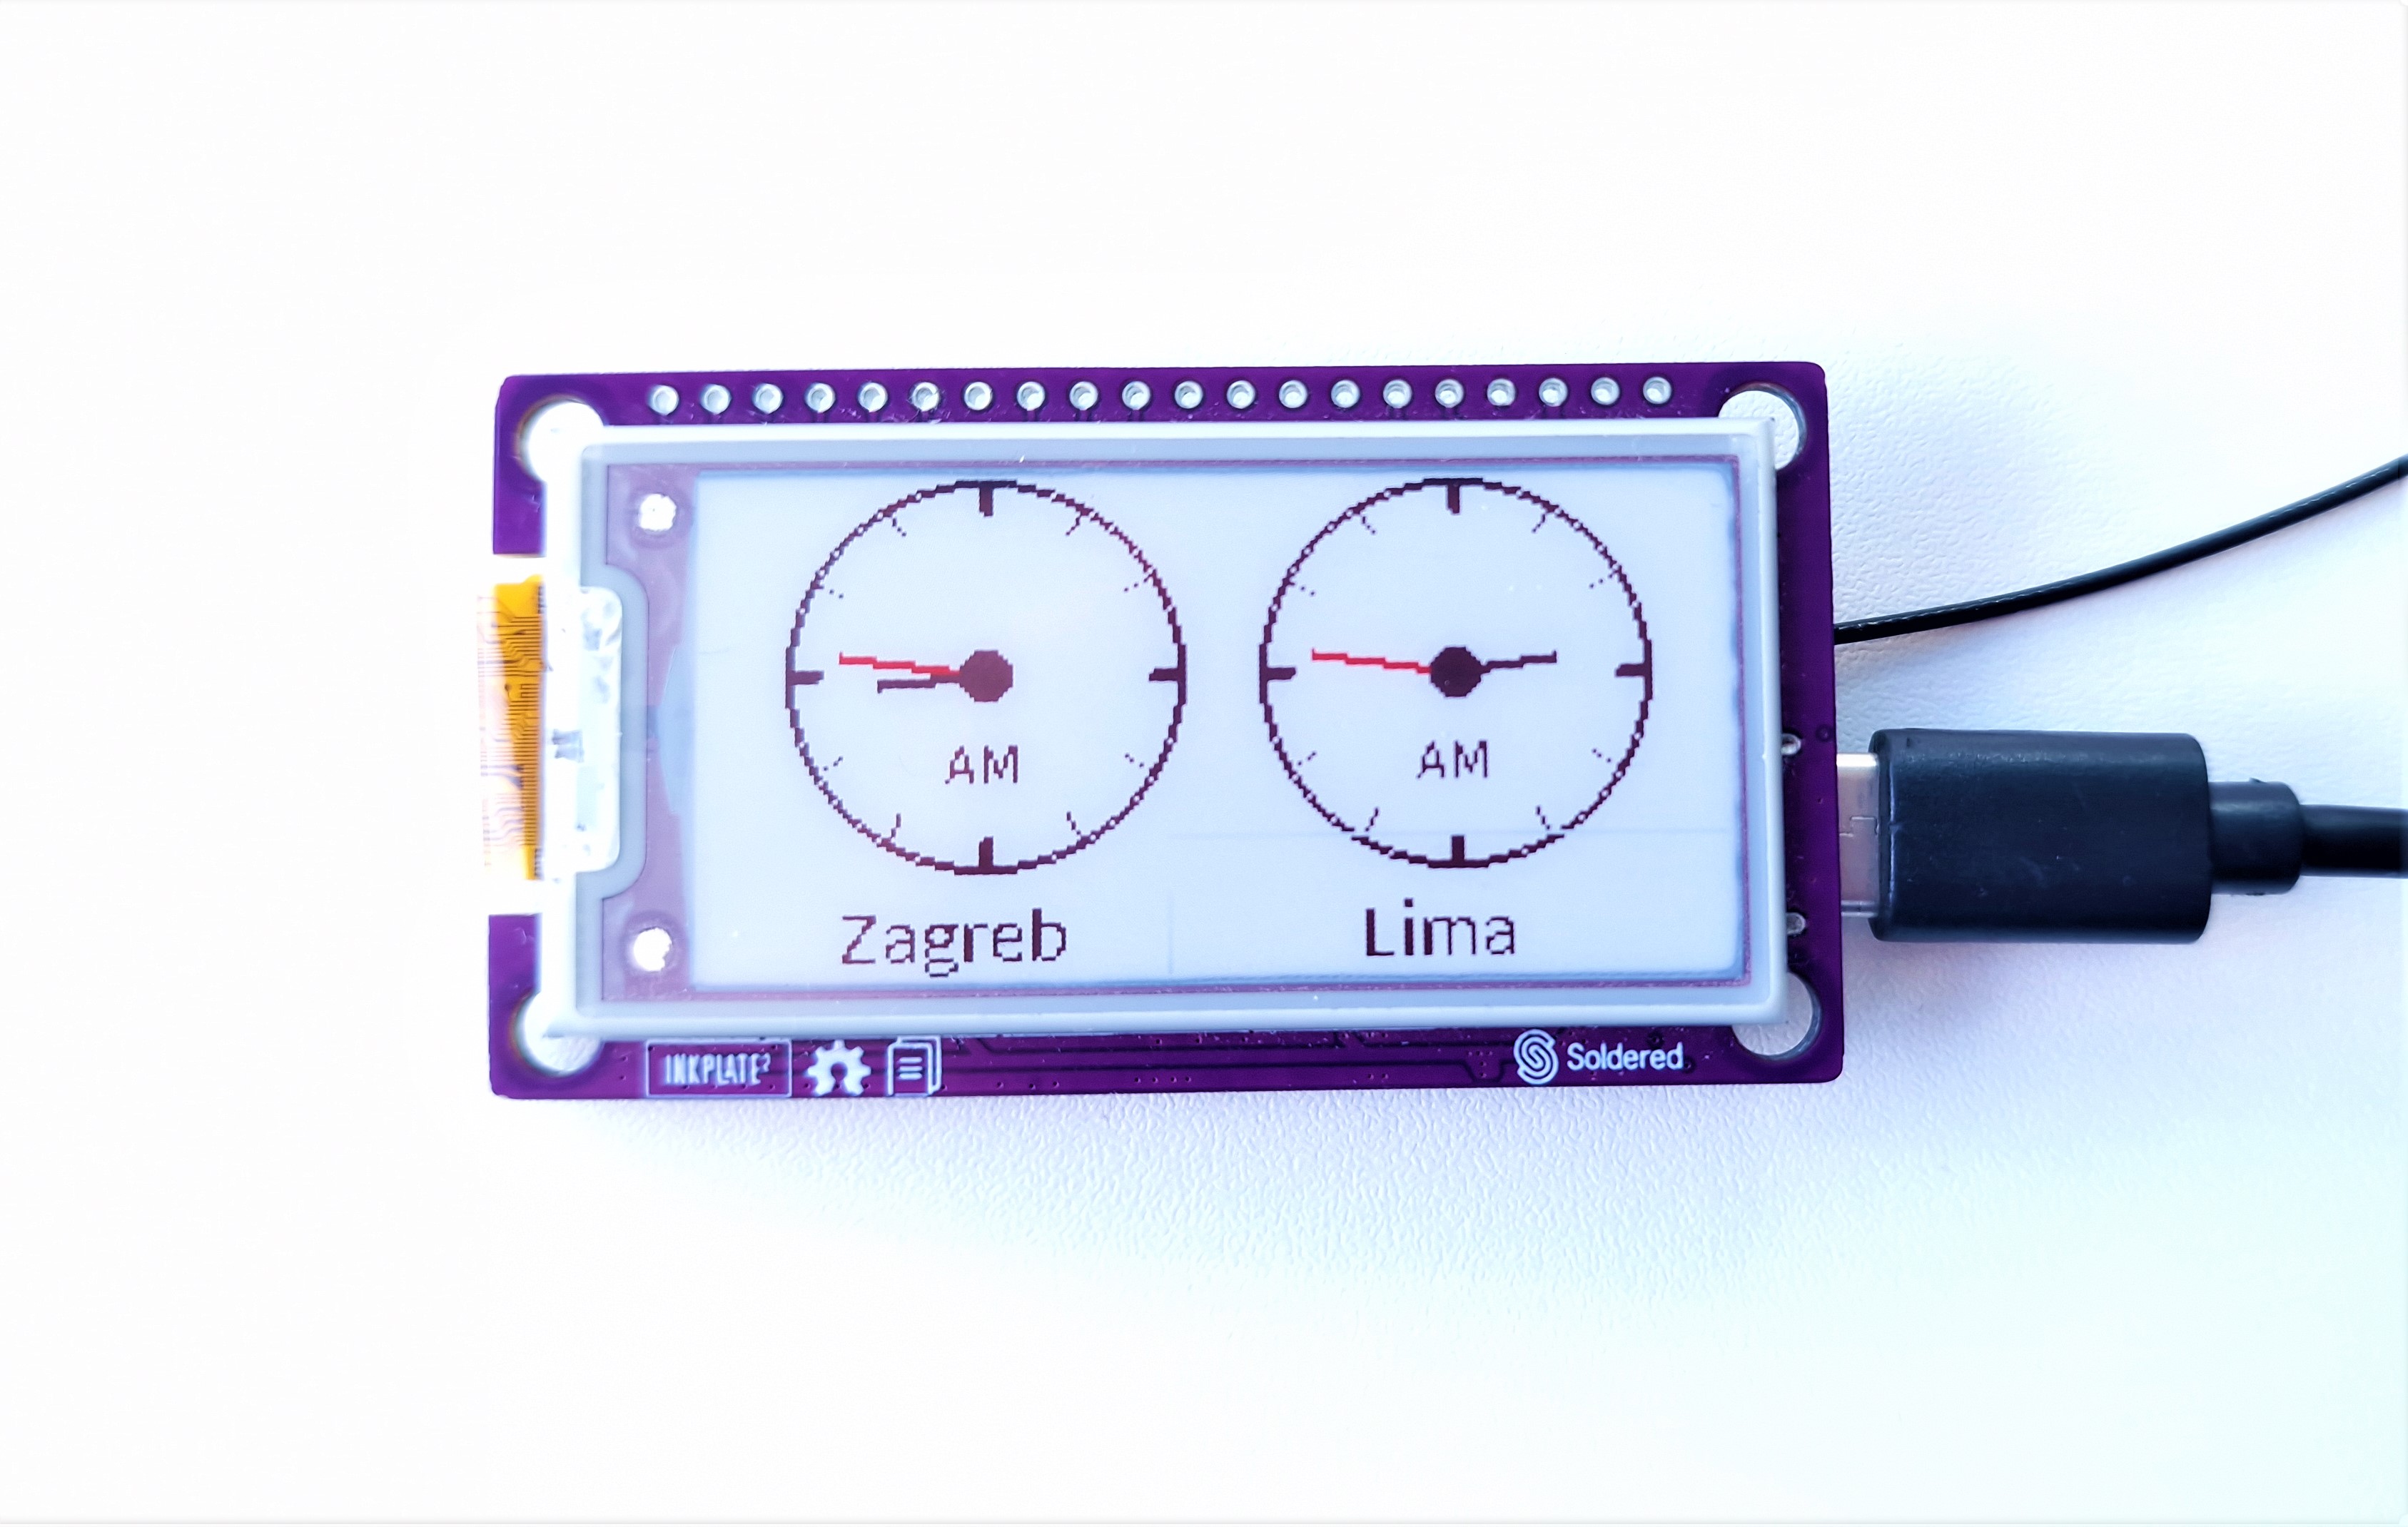
Inkplate2_World_Clock
This example uses API call to get time for wanted city and it’s timezone. Fetched data is in JSON format, and library is used to extract data. To choose the cities just type a part of city’s name and it will be automatically found. The more letters you type, the more accurate it is.
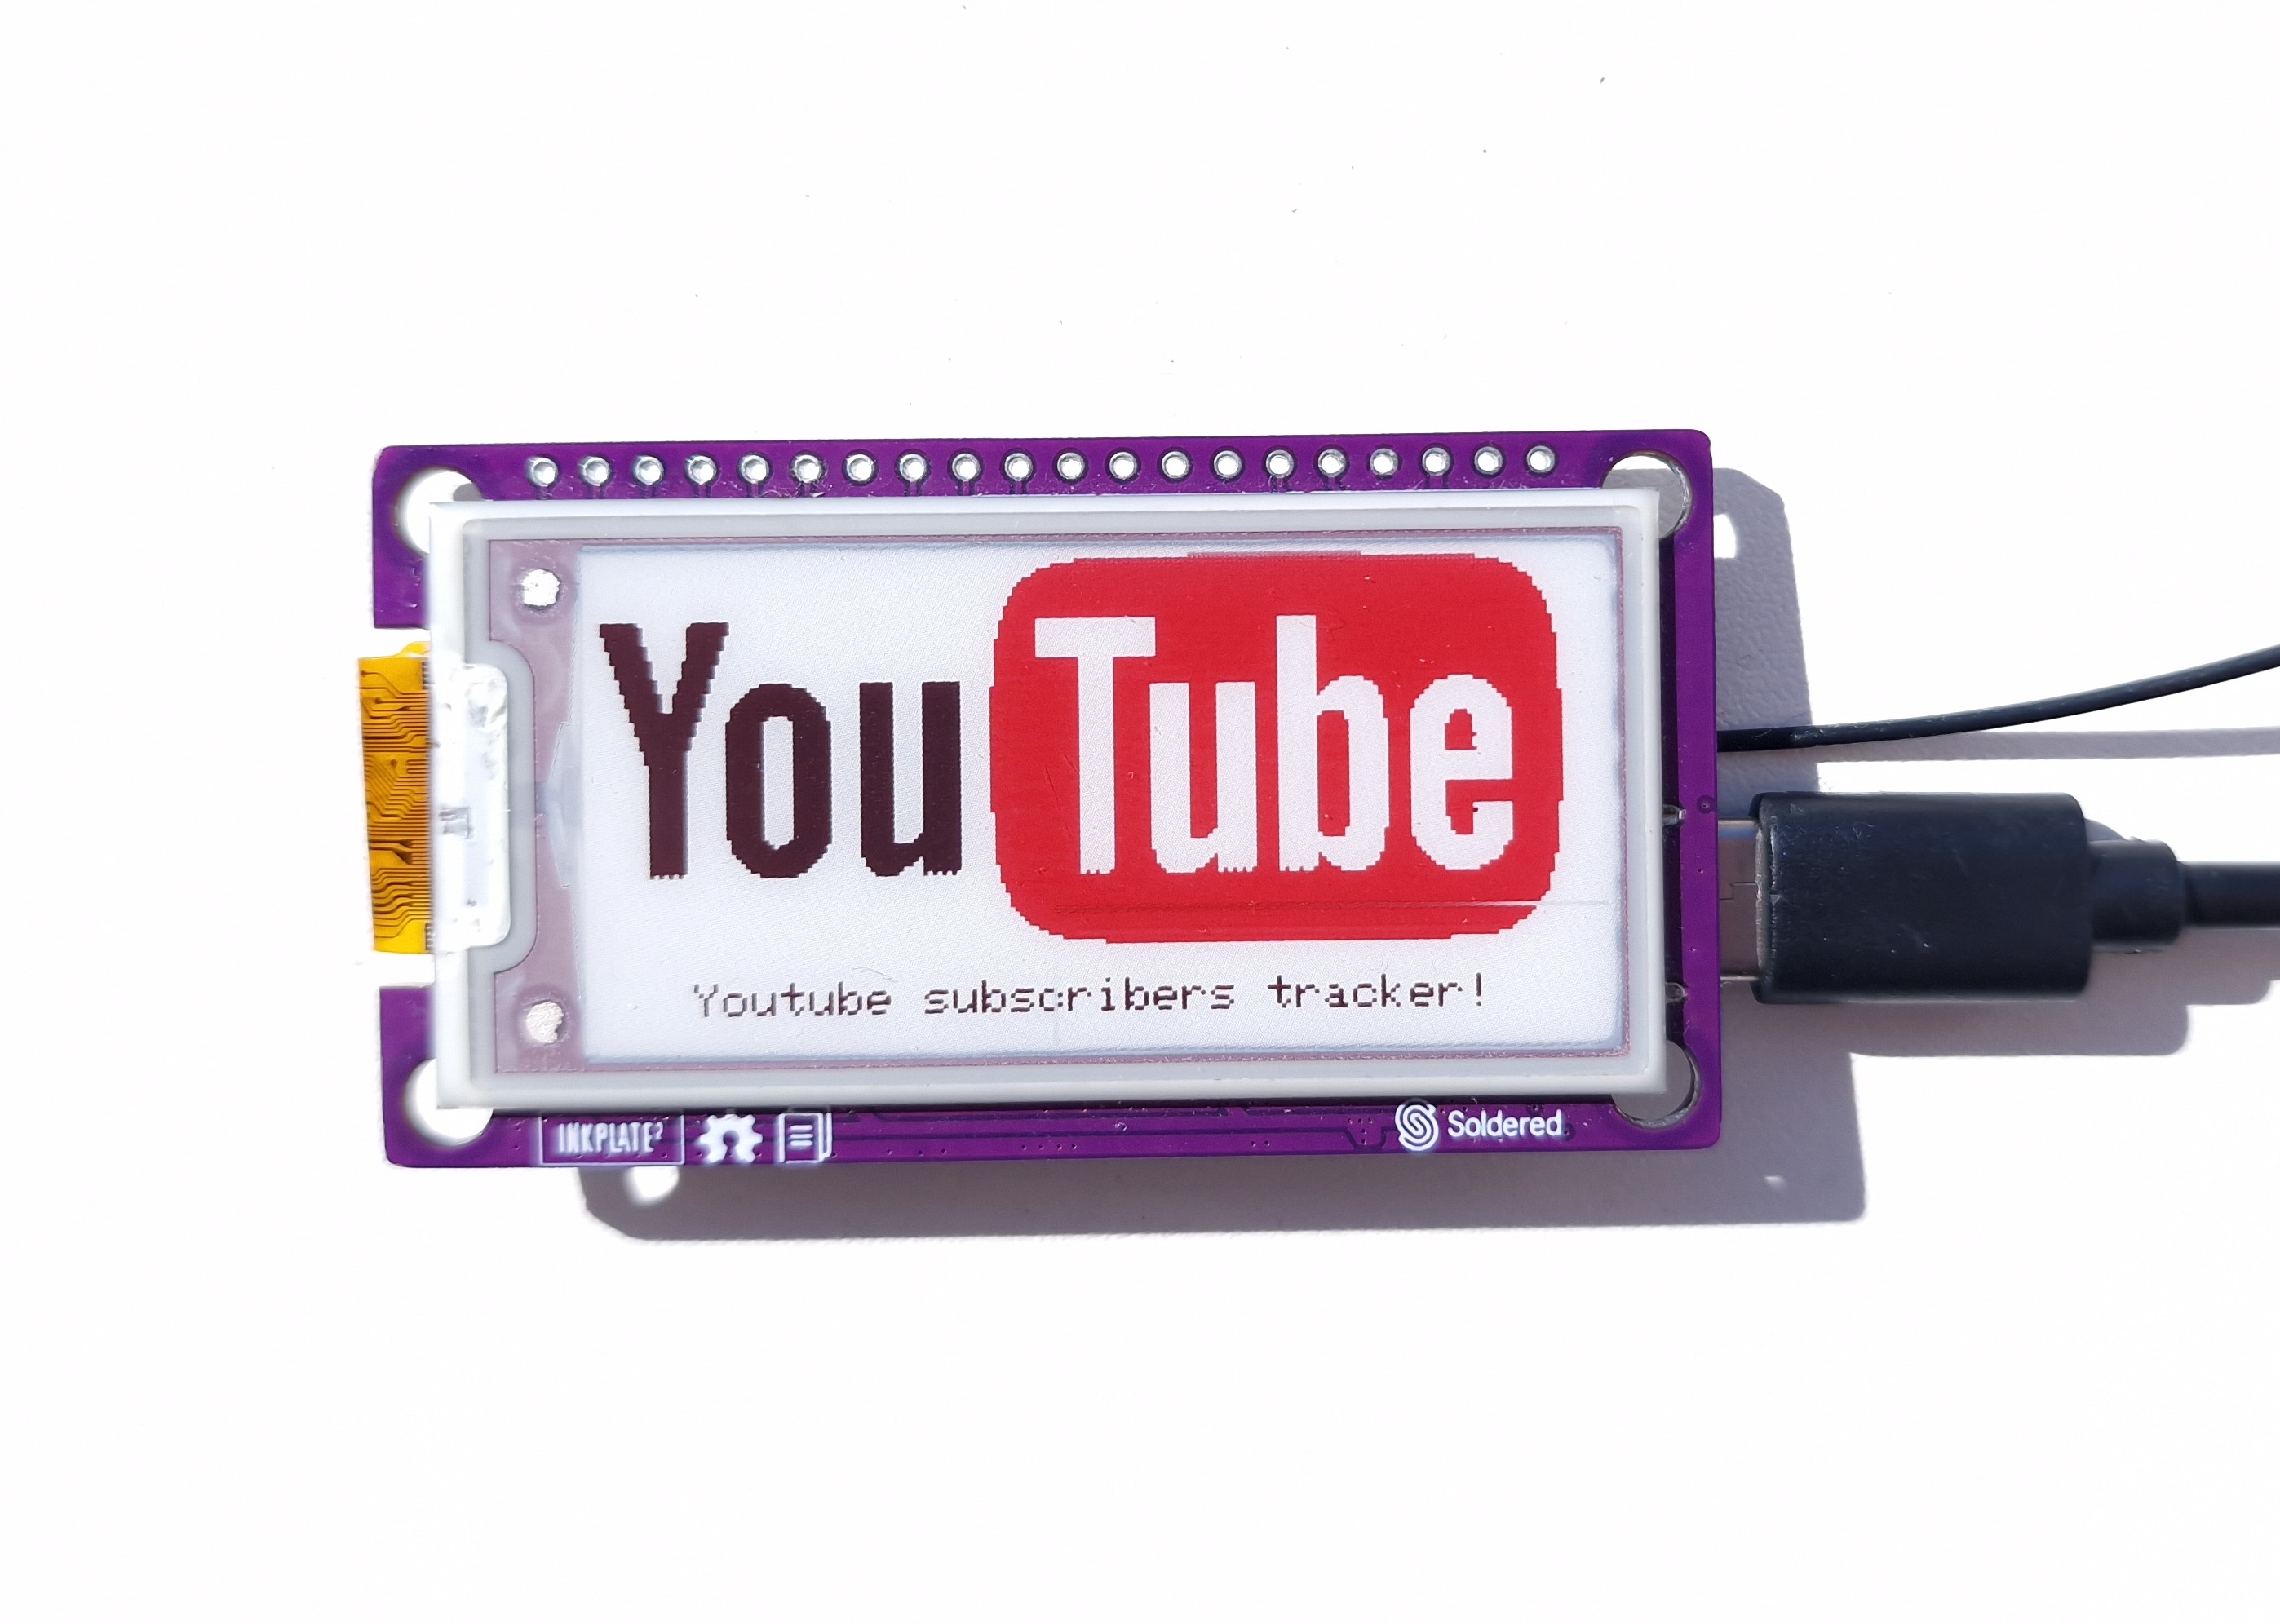
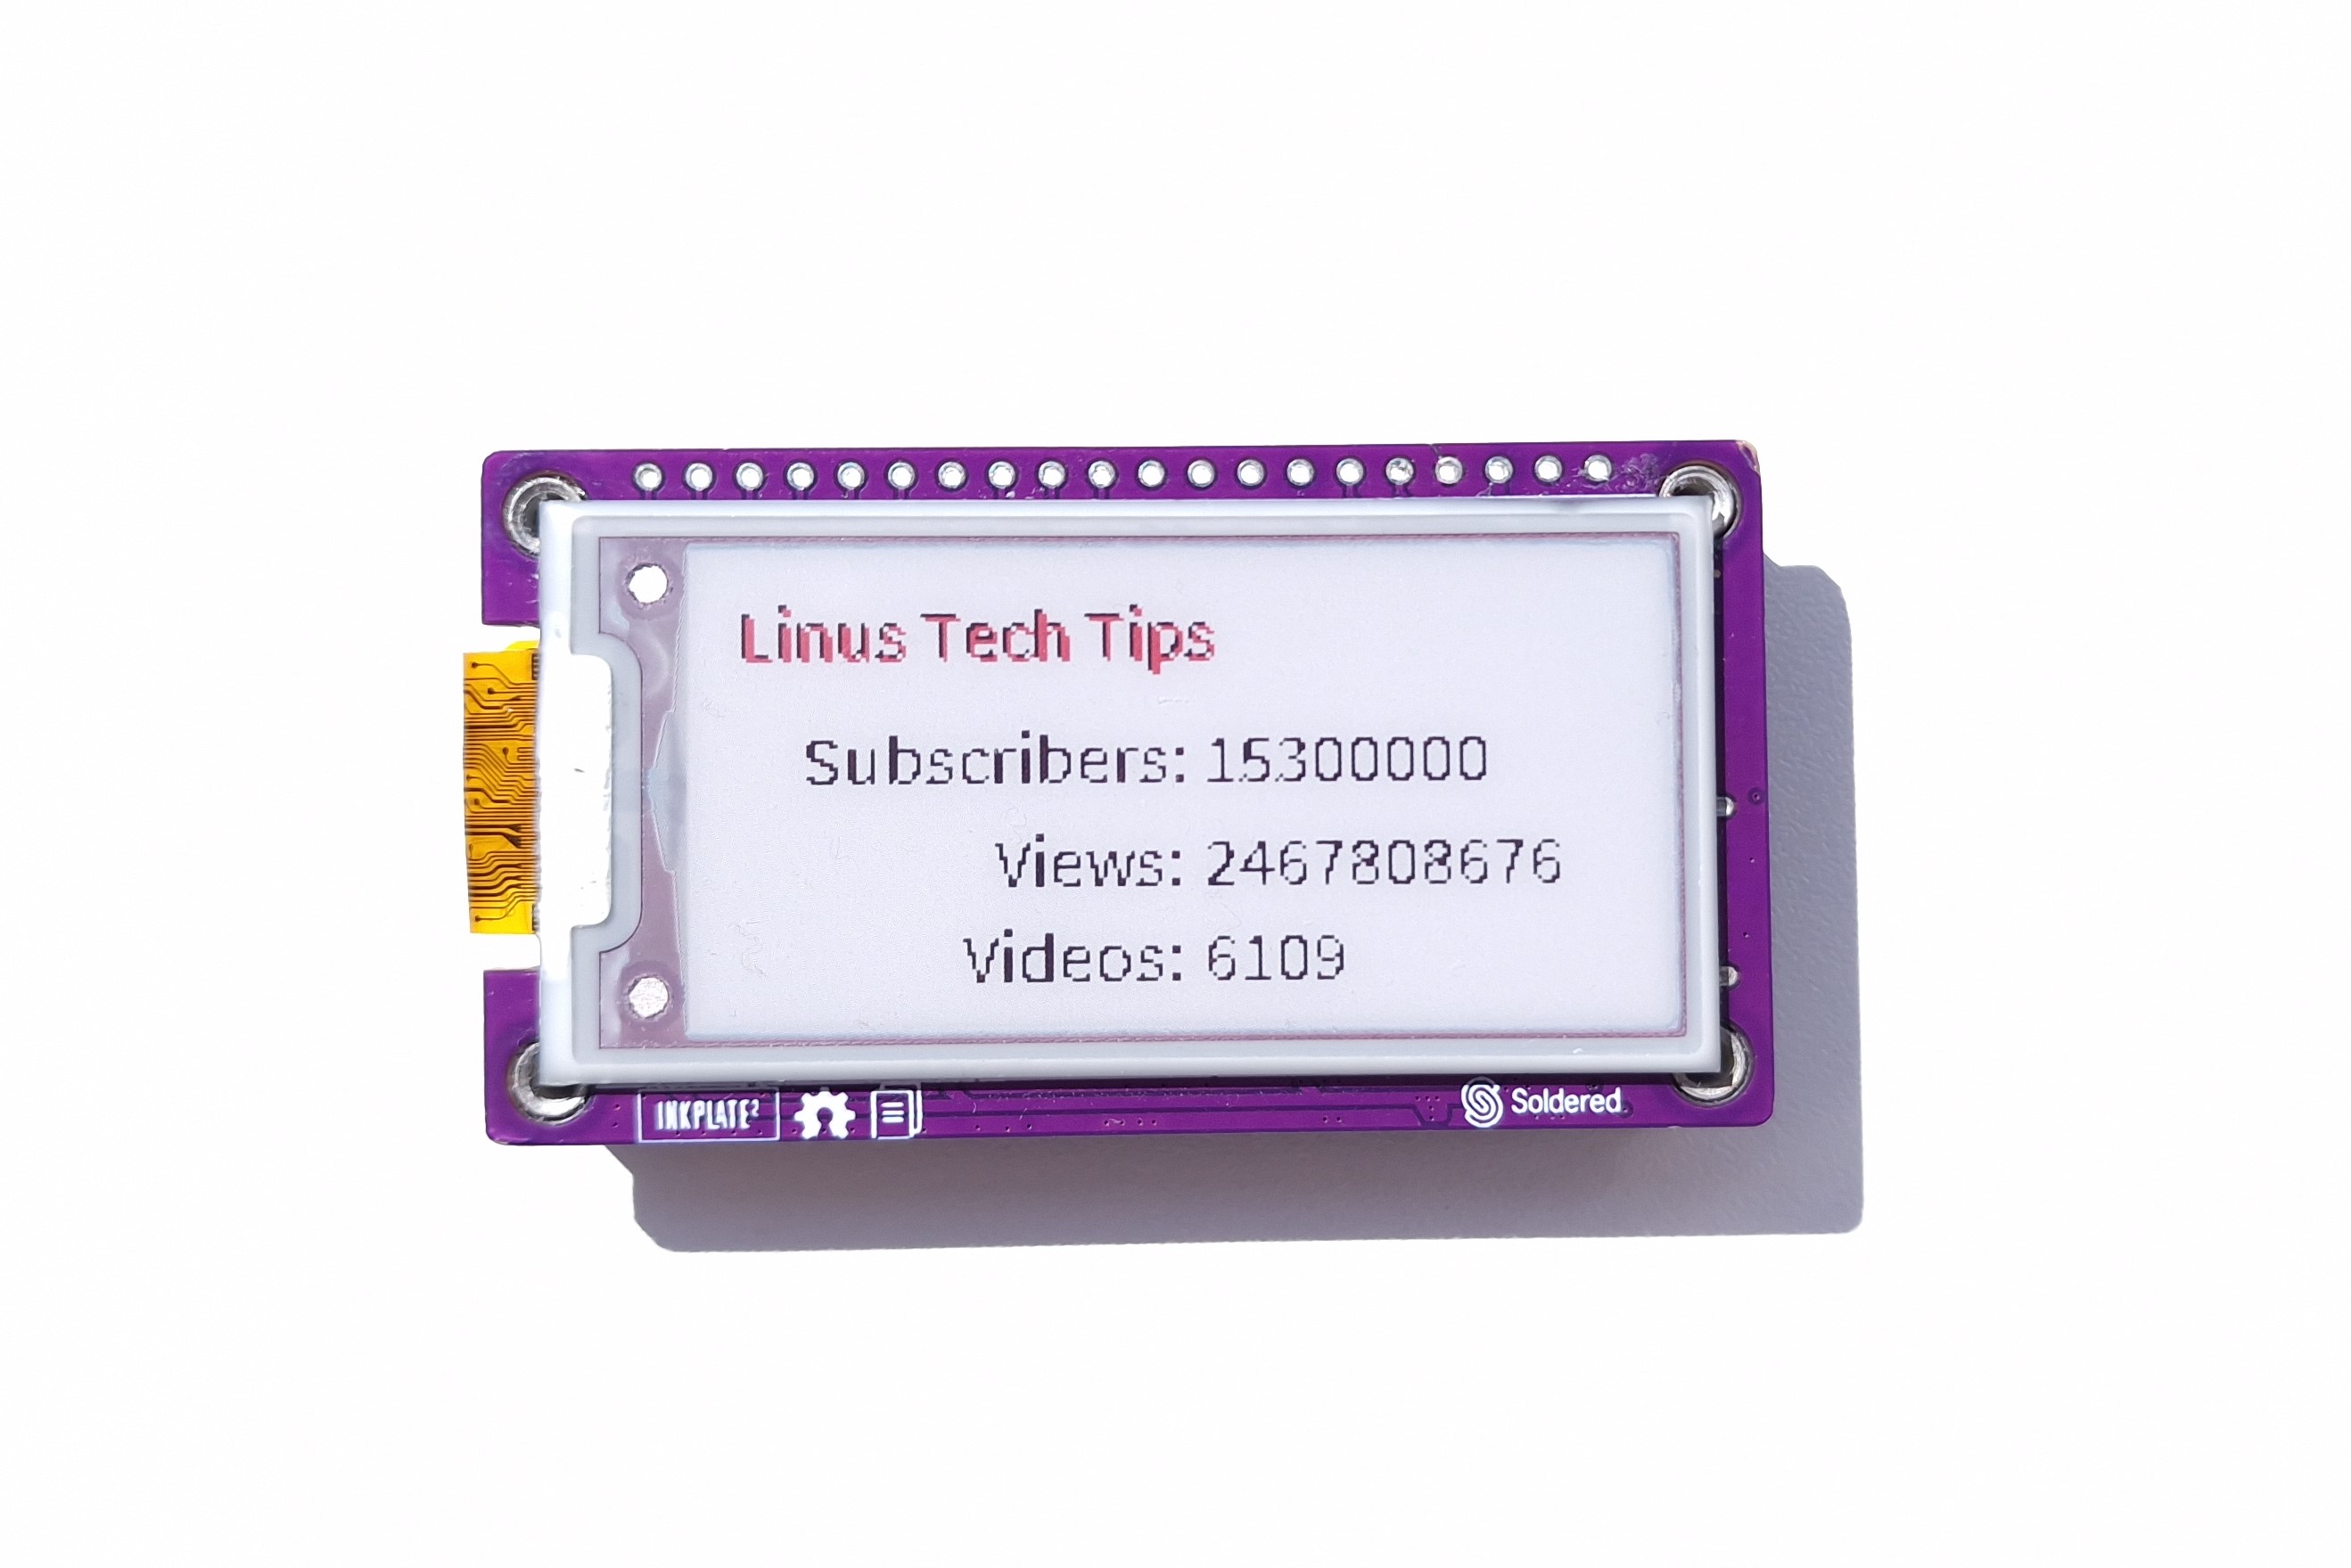
Inkplate2_Youtube_Subscriber_Counter
This example show how to use Google API to show info about some youtube chhannel.