If you are not redirected, click here.
Inkplate Get Started Page
Arduino
In order to get started with Inkplate using Arduino IDE, follow the steps below:
Install the Inkplate board definition to add Inkplate as a board in Arduino IDE
Install the CH340 drivers (if you don’t have them already). NOTE: If you have Mac OSX 10.14 and greater, do not install this driver! Installing it on newer Mac OSX the Inkplate board won’t be detected!
Install the Inkplate Arduino library from our GitHub repository (if you’re not sure how, take a look at our tutorial)
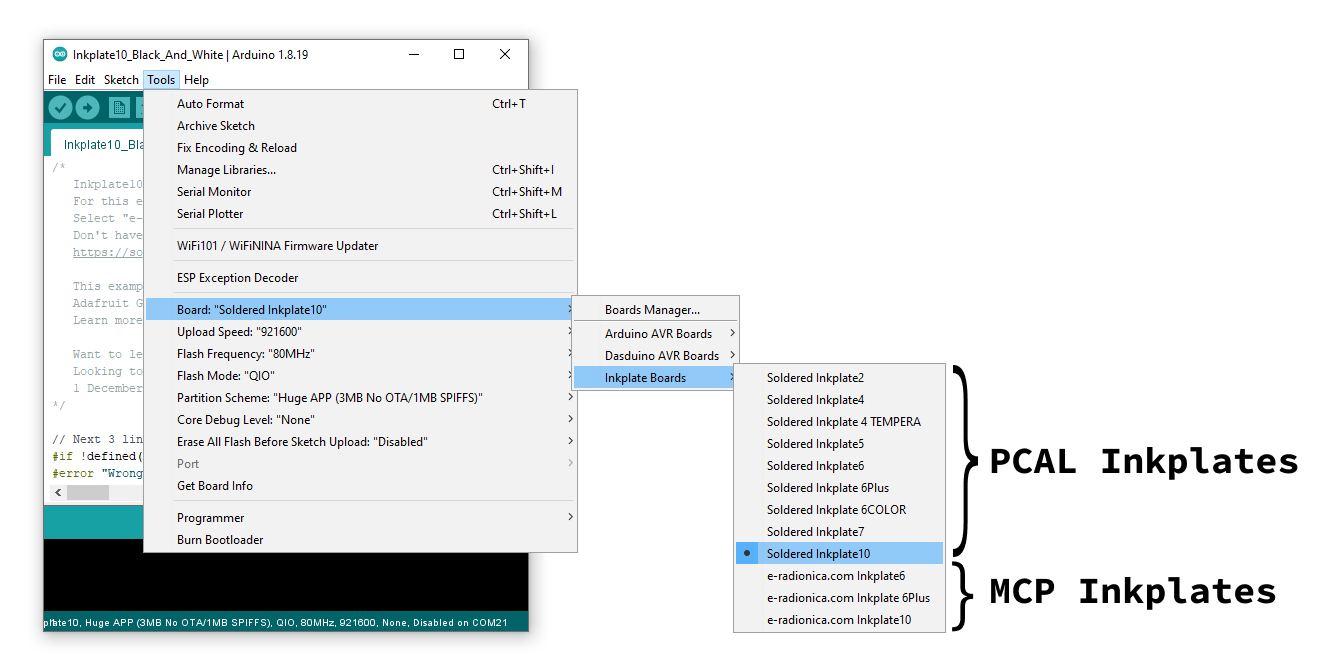
Your Inkplate is now ready to go! Just select Tools -> Board -> Inkplate x, choose the correct COM port, and upload your code! To tweak your upload speed, you can set Upload speed to 115200
NOTE: Make sure you select the correct board definition! Using the wrong board definition will not work, the display won’t update. Your Inkplate is either a “Soldered” Inkplate or an “e-Radionica” Inkplate (if it’s an older model). The difference in board definition functionality is due to use of different GPIO expanders: PCAL6416A and MCP23017. Please refer to this page for more info.
Take a look at our examples in the library and the API reference to see what you can code. To use Peripheral Mode, connect your Inkplate to the “Controller” board or computer with a USB cable or via the ESP32 RX and TX pins. For detailed reference see Peripheral Mode docs.
MicroPython
In order to get started with Inkplate using MicroPython, please follow the guide in the GitHub repository.
ESP-IDF
In order to get started with Inkplate using ESP-IDF, follow the steps below:
Clone repo.
Setup ESP-IDF tools.
Connect Inkplate device and follow instructions.
You can run few examples from examples folder in repository.
Other information
If you want to connect a battery to Inkplate, check the battery’s polarity. See the guide for more info.